PK3
-
Posts
931 -
Joined
-
Last visited
Content Type
Profiles
Forums
Gallery
Events
Store
Everything posted by PK3
-
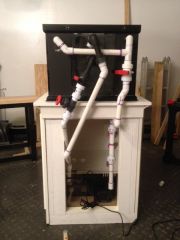
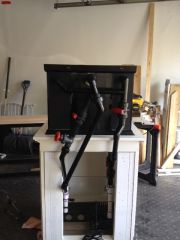
From the album: Plumbing
-
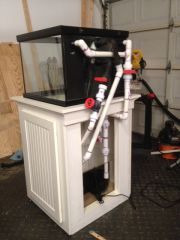
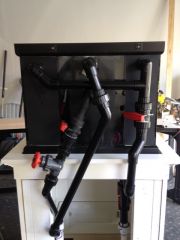
From the album: Plumbing
-
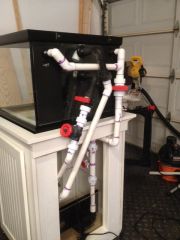
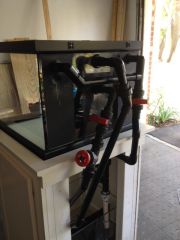
From the album: Plumbing
-
From the album: Plumbing
-
From the album: Plumbing
-
From the album: Plumbing
-
Message to the mods: Is there a way to edit my posts other than the first post? The first four pictures in Post #4 are way too big and it's bothering me. LOL
-
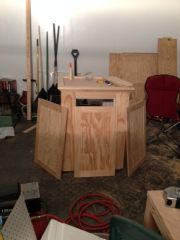
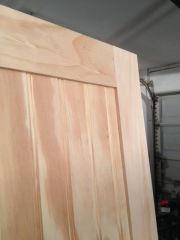
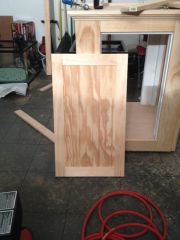
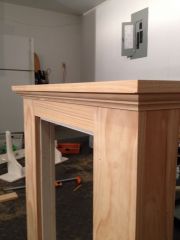
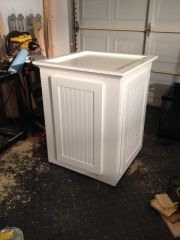
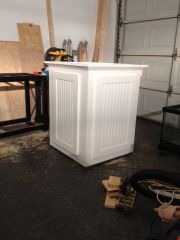
Well, here is a little update. I ended up painting the stand over the course of a week, allowing time to dry between each coat: (1) Two coats of Kilz 2 Latex primer/sealer/stainblocker (2) One coat of Benjamin Moore White Dove (OC-17) Latex paint (3) One coat of Minwax Water-based Polycrylic protective finish. I also bought some soft-close overlay door hinges to attach the doors to the stand. And now I have a somewhat finished product. In the last pic, you can see that I screwed up the placement of the hinges by like 1/16", which made the doors not open properly. So basically, I had to flip the doors around and attach the hinges to the other side. So I have some minor patch work to fill in the hinge holes and pocket holes, but at least the stand is complete enough to move to its final resting spot. Next up.... PLUMBING! Stay tuned.
-
Thanks for the nice words, guys. And thanks for following along. reeferindc, I considered going taller on the sump for the exact reasons you described; however, I plan on keeping ALL equipment under the stand and didn't want to go too tall. I can already envision things getting very cramped under there even with the sump at the height that it is.
-
-
-
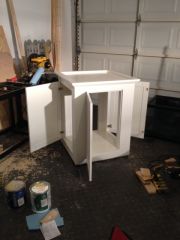
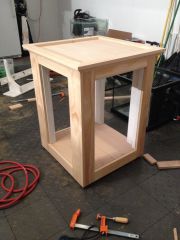
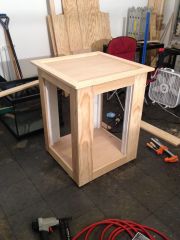
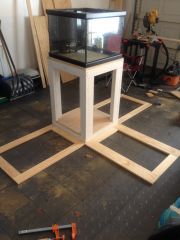
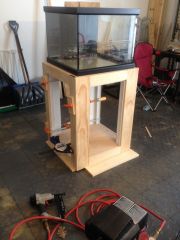
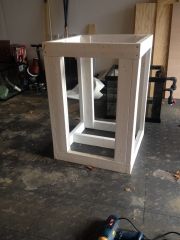
From the album: Stand
-
From the album: Stand
-
From the album: Stand
-
This is hilarious. I think that's the exact same reaction I had when I saw that hidden door.
-
Hey Trisha, As Evan suggested, I would highly recommend up-sizing your return plumbing to at least 1" even if you have to downsize back to 3/4" at the output. It's hard on the pump to push water through that narrow a pipe. Upsizing will significantly reduce friction loss, which will reduce total head pressure and allow you to achieve a higher flow rate. Might as well do it the "optimal" way while the tank is dry and you still have a chance to do it, instead of wishing you had done it later on. Just a suggestion. Nice build.
-
-
Stand, sump, plumbing, T-5 bulb replacements. Then you'll decide you want to upgrade the lighting to LED on the bigger tank. Then you'll want a controller to control everything. The list goes on and on. ** Looks like I was a little late on my post.
-
This! Whatever you think it's going to cost, it's going to be way more.
-
You mean something like this? http://www.homedepot.com/s/acrylic%2520cutter?NCNI-5 So I would just keep cutting/scoring it at the seam until it came off? Your suggestion about keeping the braces for a fuge light is exactly why the sump was designed the way it is. And I think it is a great idea. The ONLY reason why I want to remove them is that the brace on the right greatly limits my skimmer options. I could always get a clamp on fuge light, but that brace is limiting me to nano skimmers.
-
I got this sump through another WAMAS member and was told that the braces are not structural and can be removed. Does anyone have any brilliant ideas on how to remove them cleanly and safely? Thanks.
-
Happy April Fools' Day!
-
HUGE news - what everyone has been waiting for!!
PK3 replied to ExoticReefCreations's topic in Exotic Reef Creations
Woah. This is a phenomenal idea. Could be a real game changer. Congrats to the both of you. -
Nice job. Sometimes you can surprise yourself at what you can accomplish if you just dive in and get yours hands wet. Have you considered mounting the lights in the other direction to get more coverage the long way? Might help get rid of the dark spots in the middle and on the edges.
-
Dang, those things are sah-weet! With your build, I wouldn't expect anything less.
-
Beautiful tank. And those lights are baller. I agree that adding a 3rd would be perfect and get rid of those dark spots. But those things aren't cheap!