PK3
-
Posts
919 -
Joined
-
Last visited
Content Type
Profiles
Forums
Gallery
Events
Store
Everything posted by PK3
-
From the album: Corals
-
This video is pretty funny. I went on YouTube and checked out a couple of his other videos. Check out the one on mantis shrimp. Absolutely hilarious.
-
LOL. It's all about the little details.
-
Haywood, that bonsai-like aquascape is super clean looking and your rock structure looks really nice as well. The only reason why I don't want to tie all my rock together is that I won't be able to rearrange the rock without having to take it all out again. But the picture of that tank you posted is already making me rethink whether I should try to replicate that type of design.
-
Thanks for the analysis. I think I'll keep it this way for now.
-
Thanks for the responses, everyone. I now feel better about putting my LEDs on timers and without dimming them first. I didn't realize that, but that's pretty darn cool.
-
Does anyone know if it's harmful to LED lights to be on a standard on/off timer, whereby the lights are instantly turning on or off at full intensity? I'm assuming not, as it would be no different than the LED lights in my house that are controlled by the flick of a switch? Not sure, but thought I'd ask. Thanks.
-
Your tank looks amazing, Isaac. I can't wait to see all the corals really fill in. That is just an absurd number of posts in one thread. Is the thread going to have to be split soon for performance purposes, like they do on RC? Haha.
-
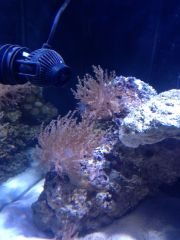
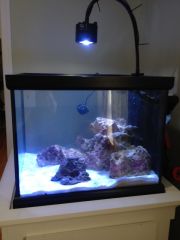
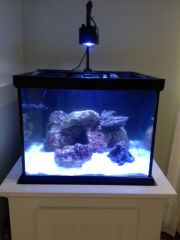
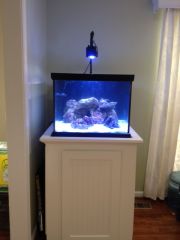
I must confess. I am a chronic aquascape tinker-er. So this aquascape will likely change in a couple months, then change again a month after that, then perhaps revert back to what it was initially, and so on and so forth. But here is a close up of what I've got so far. My wife says she likes it but I'm not 100% satisfied (probably why I keep tinkering). Any suggestions on how it could be improved? Btw, I love the 24" depth as it gives so much room to work with.
-
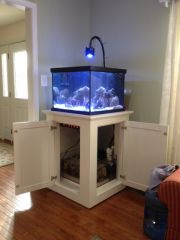
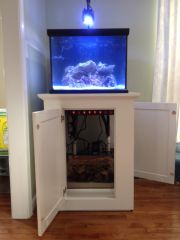
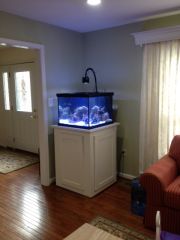
It's alive! I've set up the tank in its final resting spot - right by the entrance of the living room, which is right next to the foyer/front door/entrance of the house. It ended up fitting perfectly into that corner. Installed an 8-switch American DJ Switch at the top of the front cabinet door. I've been considering getting an Apex Jr or Lite, primarily to control temperature and the Kessil A360W light (w/ a VDM module).
-
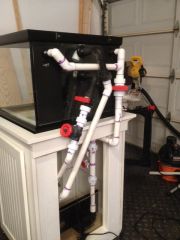
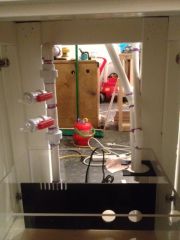
Thanks for tagging along, Haywood. And thanks again for the heater and powerheads. They were pretty crucial in keeping the live rock alive for a couple days while my tank was being set up. Good observation. I had initially thought of this and was going to put valves on both "arms" of the return to control exactly how much is flowing to each side; however, I didn't want to buy another valve and didn't really have a ton of space to work with anyways. Maybe I just got lucky, but as it turns out, there is in fact a bit more flow to the straight arm as opposed to the teed off arm, but it's not that significant of a difference. The bigger issue I have is that I seem to be getting decent flow through the sump, but the velocity of the water coming out of the returns is very low. I think it may be the result of either a) having an under-sized return pump or b) having too many return outlets into the tank. I'm using a RLSS Waveline DC-4000 (rated for 1056 GPH) through 1" pipe up 4-5 feet. I would've thought that this pump would be plenty.
-
-
-
From the album: Initial Setup (April 2014)
-
From the album: Initial Setup (April 2014)
-
From the album: Initial Setup (April 2014)
-
From the album: Initial Setup (April 2014)
-

From the album: Initial Setup (April 2014)
-
From the album: Initial Setup (April 2014)
-
From the album: Initial Setup (April 2014)
-
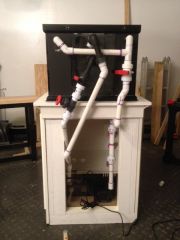
I water tested it and no leaks! So everything will be broken down and moved into its final resting spot in the house. Oh, and for those that have been following along, in the last set of pics you can see that I removed the braces from my sump. After racking my brain on how to do it and posting up for suggestions, I came across the easiest solution possible. After a few failed attempts, I was gripping one of them in frustration and tugging on it when it snapped right off very cleanly. Afterwards, I found out from Adam that because they were just strip braces, they were simply direct welded instead of being pinned, which is why I was able to get such a clean removal.
-
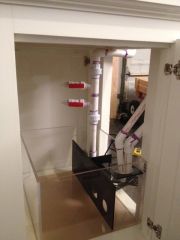
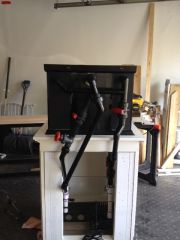
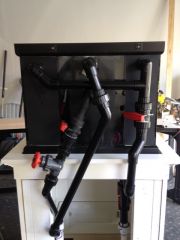
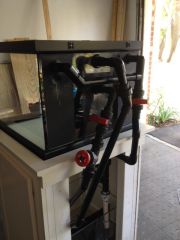
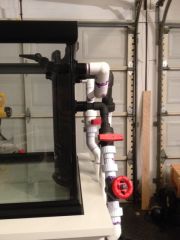
Ok, another update here. I spent the past week working on my plumbing. My time is relegated to a couple hours late at night once my kids are asleep. Then I sneak off into the garage for a couple hours, which my wife doesn't mind because then she gets to control the remote. Anyways, I wanted to install a Herbie drain system on the tank for two primary purposes: 1) Fail-safe against flooding in case of drain blockage and 2) Completely silent overflow. The Marineland 45g RR tank has two holes on the back of the tank: a 3/4" bulkhead a few inches below a 1" bulkhead. Instead of using one as a drain and one as a return as intended, I used the 3/4" hole as the main siphon drain (controlled by a gate valve for fine tuning) and the 1" hole as an emergency drain (run completely open). Using an emergency drain that is larger than the siphon drain provides an additional buffer against flooding. I drilled two holes for 3/4" bulkheads in the top corners of the tank for the return line, which is 1" pipe reduced to 3/4" at the bulkheads. The return runs through a 2-valve manifold, then tees off to each side of the tank. All of the visible plumbing was then painted with Rustoleum Painter's Touch Ultra Cover 2X Semi-Gloss black spray paint. Man, is it hard to spray paint or is it just me? It was a little sloppy but came out good enough for my needs.
-
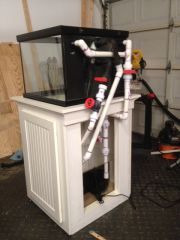
Thanks. Yeah, I saw your stand in your thread and ours definitely match. I went with this white beadboard look to match certain other parts of our house. Thanks. I designed it this way because I know how annoying it can be trying to maneuver in tight quarters under a stand. This way I have maximum access! Thanks guys. I hope to one day get my tank to look as nice as all of yours.
-
-
-
From the album: Plumbing
-
From the album: Plumbing