flooddc
-
Posts
3,927 -
Joined
Content Type
Profiles
Forums
Gallery
Events
Store
Everything posted by flooddc
-
Thanks Ken!I have the triangle and miter saw.
-
Thanks for the suggestion. I planned to add bracing once I figure how to use my saw to cut the 45 degrees. .
-
Thanks Mike! will looking into it.
-
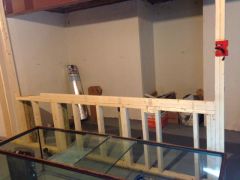
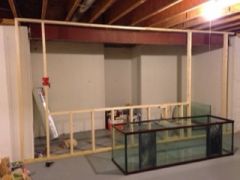
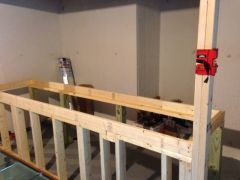
Sacrifice 3-4 inches in height and redo the stand using 2x8's and moved added 2 posts closer together for a 5' span instead of 6.6'. Laminated 3 strips of 8" plywood together and attached to the 2x8's. I think this should be plenty to support the distributed weight of the tanks. Master electrician is suppose to come by today and install 3 lines for the tanks. One line will be connect to the manual backup generator.
-
Load your video on you tube and post the url here!Remove the pump and intake tube. Use a tooth pick and clear out the air hole by the pump. Lots of time, salt deposit clogged in there. Also, the air intake silincer can be take apart and you should see 2 air holes. Make sure they are not clogged.
-
Post some pics or video. Sound like something clogged up. Maybe outlet is not fully opened to allow flow out as fast as flow input or your air intake is clogged. Take it apart and clean it.
-
Costco's plastic nut container. Cut out 3 sides, drilled bunch of holes on bottom. Then use zip ties with 1/4" netting. I used (stong) magnet to hold the container to the tank.
-
Built a small cage and put a small rock it the cage along with the nem. like this: Once it attached itself to the rock, then you can move it to where you like it to stay. Most likely will move away by itself. but at least it attached to a rock.
-
I don't think any shop will drill for you due to liability. here is a great video that show you how to determine whether the tank is tempered or not. And drill it yourself!
-
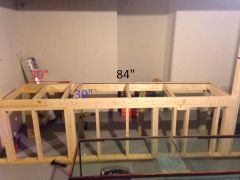
I could replaced with larger joist (2x8's or 2x10's) but i will either lose 3-5 inches under neath or raised my tank up 3-5". Since I am not as tall as average American, I preferred not to raised it too high. For these reasons, I am looking into ways to maintain the tank height. Between 38-40". But looks like I might have to sacrifice a few inches.
-
Yeah! moving is a pain! we still have ton of stuffs at the old place. Now we really need to get everything moved out and put the house in the market for rent. Paying utilities for 2 houses is getting to us big time! As for the build, I am running into a snag. Realized the openings under the tanks are too narrow to fit a larger sumps. So now going to removed the center support and redo it a bit. Got to figure out how to do this safely. Started another thread on the stand and got some ideas, but still undecided. Perhaps incorporate a steel bar in the span area....!!!!
-
yeah! great idea. I am thinking about moving the center post to the side and add another post to form a 5' span instead of the 6.5'. Then cut some 8" strips "plywood" and glue them together to form 2"x8" beam like for added span support. Thanks
-

New to town and back in the hobby
flooddc replied to Octoman's topic in Welcome to WAMAS: FAQ / FYI / Hobby News
Welcome! -
I supposed my family can bunkered there during a huricane
-
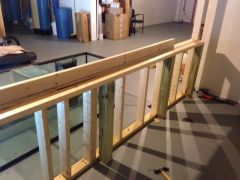
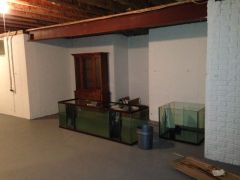
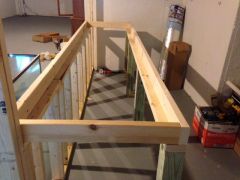
After I built this wood stand, I realized I have a very limited spaces under the stand for my sumps. I like to open up the area underneath the 210 tank (removing center support). Would TWO 2x6 sandwiched together provide enough load support the 210 gallons for a 6'-7' span? Any suggestions/inputs are appreciated. Thank you, Chuck
-
I kept a battery operated air pump for power outage only!
-
All good advises ^^ I personally have upgraded a few tanks and reuse old sand without issues. I usually, clean it well with old tank water using a large fish net to removed most of detritus in it. This way I don't have cycle the tank again. Just my personal experience.
-
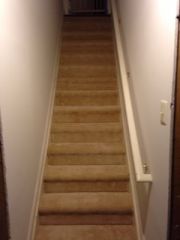
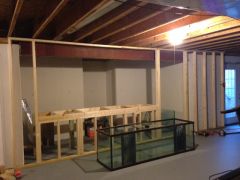
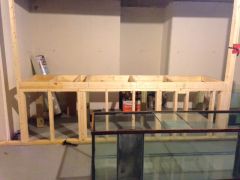
pickup some more lumber today and got a bit more progress. installed carpet on the basement stairs. No more cold feet coming down the basement Tanks stand constructions: I built many tank stands before, but none for this size tanks. Anyone with structural knowledge on here, please advise. Thank you This stand is 120" x 30" constructed with 2x4's and 4 back legs are 4x4"s. Will add 3/4" plywood on top. left side will hold a 93 cube (30"x30") right side will hold 210 long (84"x24")
-
-
-
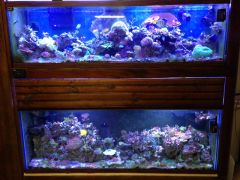
From the album: 210
-

From the album: 210
-
From the album: 210
-
From the album: 210
-
From the album: 210
-
From the album: 210