jimlin July 2, 2013 Share July 2, 2013 really love your stand. Link to comment Share on other sites More sharing options...
londonloco July 6, 2013 Author Share July 6, 2013 After a morning of clean up after the party I had a few hours to gather items for my build, including an appointment at Incredible Corals, picked up: a bottle of revive: and a few jugs of RO water: Continued onto Lowes: Plumbing parts: Mat for the bottom of the tank which is not going to work: Stopped by Tom's on the way home for a 10 lb Marco Rock Aqua Scape Mortar kit: Tom graciously showed me his 240g reef and sump room, which is absolutely beautiful. Thank you Tom, it was a real treat. When I arrived home, two boxes were on my front porch: Magnetic Probe Holder: and a Vertex 1.5 ZEOlite Reactor: Won't have time to work on my electrical board until Sunday. Then this build is on hold until the Phosphate remover and Gate Valve get here late next week. :( Link to comment Share on other sites More sharing options...
londonloco July 6, 2013 Author Share July 6, 2013 really love your stand. Thank you Jim, Adam out did himself on that build. It's rock solid, and to my exact specs. Link to comment Share on other sites More sharing options...
londonloco July 8, 2013 Author Share July 8, 2013 Had a few mins today to work on the stand: Attached the under cabinet LED lighting, it's much brighter than it looks in this pic: also mounted some of the electrical board: I'm not sure the DJ is going to stay put, I guess time will tell. I can always remount it if I have problems with it. I have to hang the elec board, do all the plumbing, figure out a light stand and rock landscaping left to do before I can get this tank wet. Sigh, really nervous about plumbing.... Link to comment Share on other sites More sharing options...
ArtFully Acrylic (Adam B) July 8, 2013 Share July 8, 2013 Loni, for a mat under the tank you can go to http://www.thefoamfactory.com/closedcellfoam/neoprene.html I recommend neoprene under acrylic tanks (though you have that special glass tank from me lol). In this case as your glass bottom is not an inset and is a bottom set pane neoprene will still be a good option for you. I prefer it over styrofoam/polystyrene not only for appearance, but because neoprene will rebound...not just contract like styrofoam. This makes it a better padding material under a tank. For your size tank 3/8" would be a good thickness. If you intend to only line the bottom of the tank then go with the regular half sheet. If you want to line the entire top of the stand (since its longer than the tank to your specs) then I would get the high quality as it looks cosmetically better. Link to comment Share on other sites More sharing options...
londonloco July 8, 2013 Author Share July 8, 2013 Thanks Adam Link to comment Share on other sites More sharing options...
londonloco July 22, 2013 Author Share July 22, 2013 Now that my puppies are back home and recooperating nicely, I can continue with this build. This weekend I did an overnight water test, no leaks were found. No pics either I am waiting for the last of the plumbing parts to show up on my doorstep, so I decided to work on the background today. Many years ago I saw a pic of a reef that had a frosted background, I really liked the look, of course I couldn't fine it when I went looking for it. ADA has also started using frosted backgrounds, but on planted tanks, which are of course beautiful. I decided to give it a try and ordered this (ty Adam for the tip): which is marketed as frosted wallpaper for windows. I purchased a 24"x37" peice of it in privacy frost. I started by making a rough template of the back of my tank: then peiced the details in: cut to fit: followed the written and online video directions: Of course it is not anywhere as easy as the video said it would be. Basically all you use is a water bottle with 2 drops of liquid soap in it, spraying the glass, applying the backing, spraying more water, then working the bubbles out. Working with it was ok, I kept having to trim the top as it kept stretching above the tank's edge. The middle bulkheads came out great, but when I finally got it into place, I had to cut around two return lines which ended up about 1/2" off. Not sure that's a deal breaker, but what is a deal breaker is it's not as "frosted" as the overflow cover Adam made for me. It was hard to get a pic as our garage is filling up quickly with all the projects we have going on (this build and new fences to keep the pups away from the danger zone), we need to move some stuff out: Wednesday I'm going to work on the lighting stand, hopefully get the lighting up, and see 1-how noticable the 1/2" off is, and how different the backing is from the overflow box. I might have to explore other options, or I just might paint the back black and ask Adam to make me a black cover for the overflow box. Link to comment Share on other sites More sharing options...
surf&turf July 23, 2013 Share July 23, 2013 That would look cool with a shadow box behind it. Link to comment Share on other sites More sharing options...
londonloco July 23, 2013 Author Share July 23, 2013 That would look cool with a shadow box behind it. I think it would too, but I am limited as to how far the tank can come off the wall, as it is now, it's a little further than i originally thought. Link to comment Share on other sites More sharing options...
londonloco July 23, 2013 Author Share July 23, 2013 After seeing coralhinds 600g FWWLR tank which I think looks amazing, I decided to stick with the lighter background and paint the background the same color as my stand. First coat today: It's a textured sand paint, I think it's going to need 3 coats. With the weather outside, I'm waiting 24 hours in between coats. Link to comment Share on other sites More sharing options...
YHSublime July 23, 2013 Share July 23, 2013 Looks like it will be nice! Link to comment Share on other sites More sharing options...
londonloco July 23, 2013 Author Share July 23, 2013 Looks like it will be nice! Thanks , it's a little harder to paint the sand paint than just reg old paint or spray paint, the sandy texture sometimes pulls as I'm brushing/rolling and can create bare spots. Which then need to be touched up, several times. I'm waiting 24 hours between coats, hopefully this will alleviate this problem. Link to comment Share on other sites More sharing options...
londonloco July 26, 2013 Author Share July 26, 2013 Had a few hours to work on the lighting tree today: Covered top of tank with a blanket, plywood and pillows: Cut conduit: Sanded: Screwed braces to back of stand: Attached 7' vertical conduit to stand: Assembled horizonal conduit: Hung horizontal to vertical and hung lights to it, side view: Back view: Front view: After much deliberation, decided to uncover top of tank and take a look: To tell you the truth, I really don't like it, but am at a loss how else to hang them. I can't hang them from the 20 foot vaulted ceiling, there is a pocket door behind the tank, hanging from wall I'd have to go up 8 feet. I'm just going to live with this for now. I picked up 3 cans of spray paint, not sure which one to go with. From left to right, gray sand, black hammer or black sand. I'm leaning towards the black sand, which one does everyone here like?: Link to comment Share on other sites More sharing options...
londonloco July 26, 2013 Author Share July 26, 2013 I also cut a peice of neoprene to fit the sump area: Roll of neoprene: Cut and fit to stand. I had to make a long cut, decided to pull the whole thing out, and ripped it from a corner almost all the way thru to the other side: So pissed. Sigh, what fixes everything...ducktape. I even ducktaped the other corners hopefully this won't happen again: Bottom of cabinet with neoprene and sump placed in: Link to comment Share on other sites More sharing options...
londonloco July 26, 2013 Author Share July 26, 2013 Last thing I did was test the water in the bin of dry rock I had soaking in RO water and SeaKlear Phospate Remover for the past few weeks. I have only changed the water weekly, looks like 3rd week was a charm: Tomorrow I might build a cardboard box the same size of my tank, and see what kind of scape I come up with Link to comment Share on other sites More sharing options...
howaboutme July 26, 2013 Share July 26, 2013 I used exactly the same conduit and fittings as you and painted mine black. I like the look. I didn't do the extra turns required for hanging from the back and cantilevering though. My verticals are on the sides (more a product of doing this after the tank was in place than anything else). I like the sleek black paint myself. Link to comment Share on other sites More sharing options...
londonloco July 26, 2013 Author Share July 26, 2013 I used exactly the same conduit and fittings as you and painted mine black. I like the look. I didn't do the extra turns required for hanging from the back and cantilevering though. My verticals are on the sides (more a product of doing this after the tank was in place than anything else). I like the sleek black paint myself. Thanks howaboutme. I like the look of your set up better, it's cleaner, but I can't place my stand like yours as all three of my sides are removable, one will house an electrical board, the other will let my sump slide in and out. The verticals are 7 feet high, I might shorten them to 6.5 feet before I paint them. Not sure if shorter is a better look tho. Link to comment Share on other sites More sharing options...
howaboutme July 26, 2013 Share July 26, 2013 Thank you I agree, shorten them. It looks top heavy and just overall a bit too complicated. You don't need all of those added hanging pieces. Just wrap the "loop" around the conduit and call it a day...Of course, you have to be confident about your fixture height if you do that. Once you paint it black (if), it will look better and everything will blend in. Link to comment Share on other sites More sharing options...
rtsusc83 July 27, 2013 Share July 27, 2013 (edited) Thinking of doing same type of light tree setup using conduit but thinking about using PVC but not sure whether PVC schedule 40 will be strong enough to hold two AI hydras. What do you think? Edited July 27, 2013 by rtsusc83 Link to comment Share on other sites More sharing options...
londonloco July 28, 2013 Author Share July 28, 2013 Thinking of doing same type of light tree setup using conduit but thinking about using PVC but not sure whether PVC schedule 40 will be strong enough to hold two AI hydras. What do you think? I have no experience with a pvc light stand. Using the conduit was not hard at all, except I did have to have my son cut the pieces for me on the rods. If I had continued to cut it, I'd still be cutting 4 days later . If I was hanging more than one light, I'd def go 3/4" conduit. Link to comment Share on other sites More sharing options...
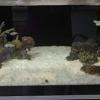
londonloco July 28, 2013 Author Share July 28, 2013 I decided to use the "sand" black paint, which did NOT go on black, it was def grey. Gave the rods a quick coat on both sides, let it dry, then used the hammered black spray paint, which is the WORST spray paint I have ever used. It drips, a lot, and the nozzle keeps getting clogged, which a quick dip in mineral spirits cleans, but what a pita. I have both sides covered, tomorrow I'll inspect when fully dry and see if I need any touchups: Guess it came out kinda "sandy", but I will never use or recommend this paint again. I also made a mock up of my tank using 3 cardboard boxes and a lot of duck tape: I need to get on Sunday dinner with the entire family, tomorrow I'll deal with my rock scape and mortor, maybe drilling and rods. Love this part of a build.... :clap: Link to comment Share on other sites More sharing options...
YHSublime July 28, 2013 Share July 28, 2013 The aquascape is my favorite part as well. I like the sanded black look you ended up getting! Sorry it sucked to use. If you really want a sanded black looks, you could always try the rustoleum bedliner (for trucks and what not.) It goes on really fine, and it is fairly cheap. Used it on my old Jeeps fender flares, and it did a great job! Link to comment Share on other sites More sharing options...
londonloco July 28, 2013 Author Share July 28, 2013 The aquascape is my favorite part as well. I like the sanded black look you ended up getting! Sorry it sucked to use. If you really want a sanded black looks, you could always try the rustoleum bedliner (for trucks and what not.) It goes on really fine, and it is fairly cheap. Used it on my old Jeeps fender flares, and it did a great job! Now you tell me! The sanded spray paint went on fine, but was grey, not black as pictured on it's cap. The black hammer spray paint was the pita to go on. I ran them into the garage before it rained, I have a few touch up places, but other than that, it will do. Not sure it's the permanent stand anyway, I might have found someone to make me one, but will have to wait, he has a few other jobs his wife wants him to finish first. Link to comment Share on other sites More sharing options...
howaboutme July 29, 2013 Share July 29, 2013 I think painting it does look much better, even if it's not "black". I used the Rustoleum black for my conduit and it came up very good. I don't remember exactly but I believe I only did 1 heavy coat. If you don't like the way it looks, you can always go over it w/ the correct paint. Good luck w/ the aquascaping! Link to comment Share on other sites More sharing options...
londonloco July 29, 2013 Author Share July 29, 2013 I think painting it does look much better, even if it's not "black". I used the Rustoleum black for my conduit and it came up very good. I don't remember exactly but I believe I only did 1 heavy coat. If you don't like the way it looks, you can always go over it w/ the correct paint. Good luck w/ the aquascaping! Thanks! I'm sitting here with the family watching a movie and all I can think about is the scape.....meh, tomorrow will come soon enough. Link to comment Share on other sites More sharing options...


Recommended Posts
Create an account or sign in to comment
You need to be a member in order to leave a comment
Create an account
Sign up for a new account in our community. It's easy!
Register a new accountSign in
Already have an account? Sign in here.
Sign In Now