
.jpg.cec6c540fb2da6431942d5ff09ef7a2d.jpg)


Fazio92
-
Posts
830 -
Joined
-
Last visited
Content Type
Profiles
Forums
Gallery
Events
Store
Posts posted by Fazio92
-
-
Very nice!!
Thanks!

that makes your corner tank look tiny....
Lol yeah, that was the goal

Awesome!!!
Thanks!
Tank looks awesome. Very clean. When the SPS fills it in, it's going to be really amazing. What MH bulbs are you using?
Thanks! Yeah i can't wait until the upper portion of the tank is solely SPS branches
I am using the $10 Plusrite 20K 400Ws -
WWWWOOOOOOWWWWW
Congrats man, that tank looks gorgeous.
Looks sweet, Anthony!
Thanks guys!
Very nice. I see one inch of sand in your future.
LoL, maybe, still under internal debate
-Anthony
-
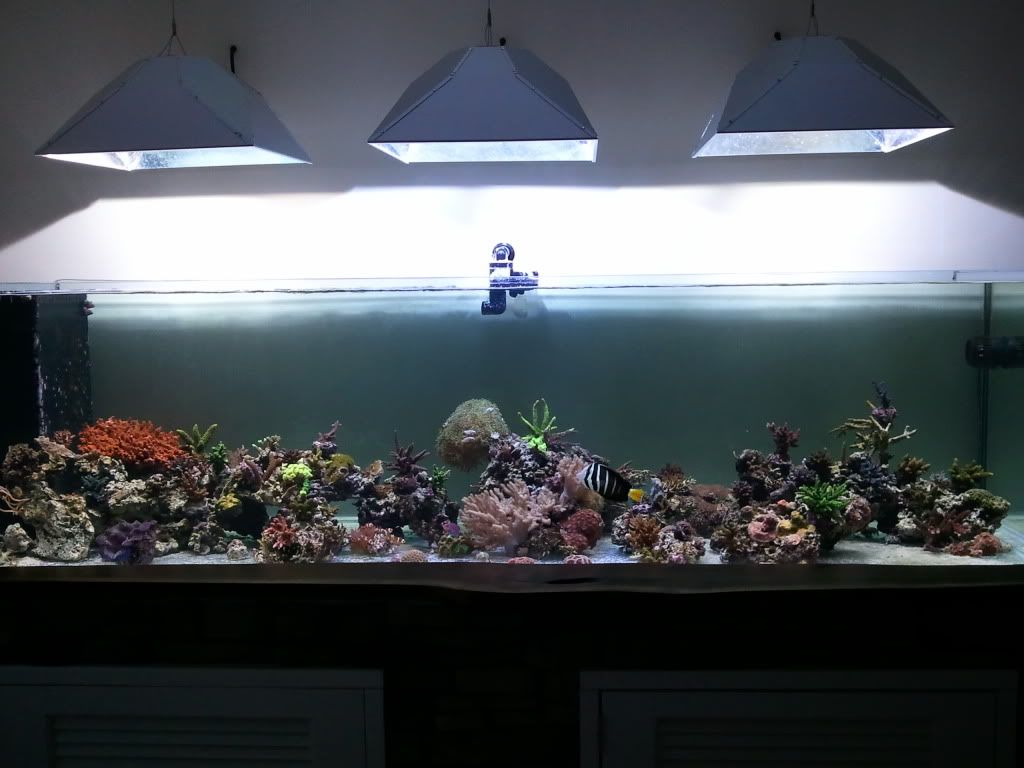
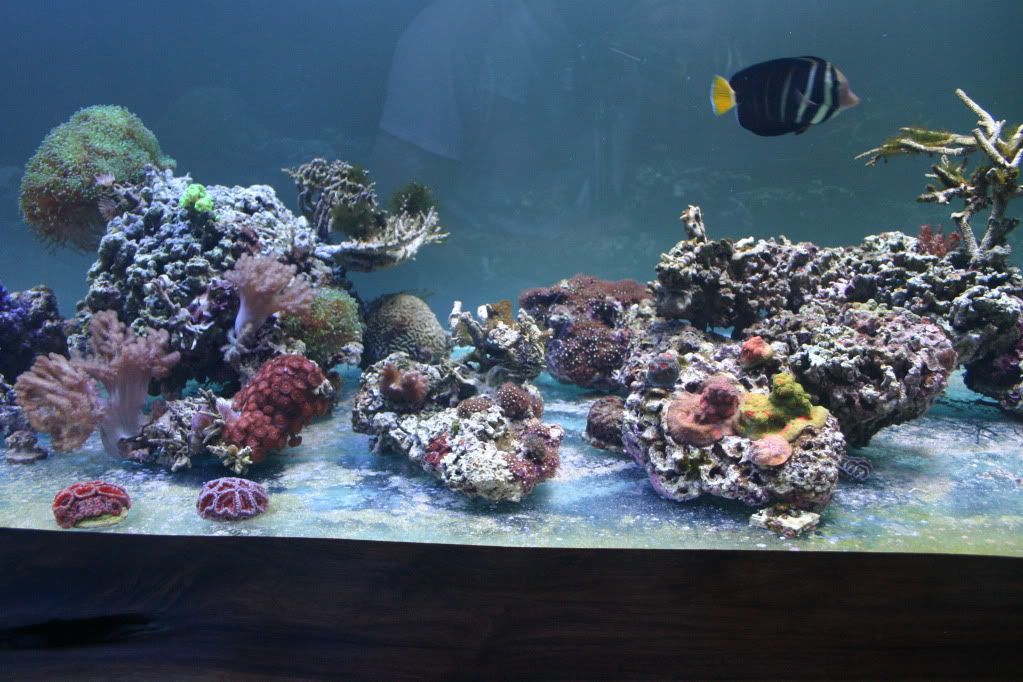
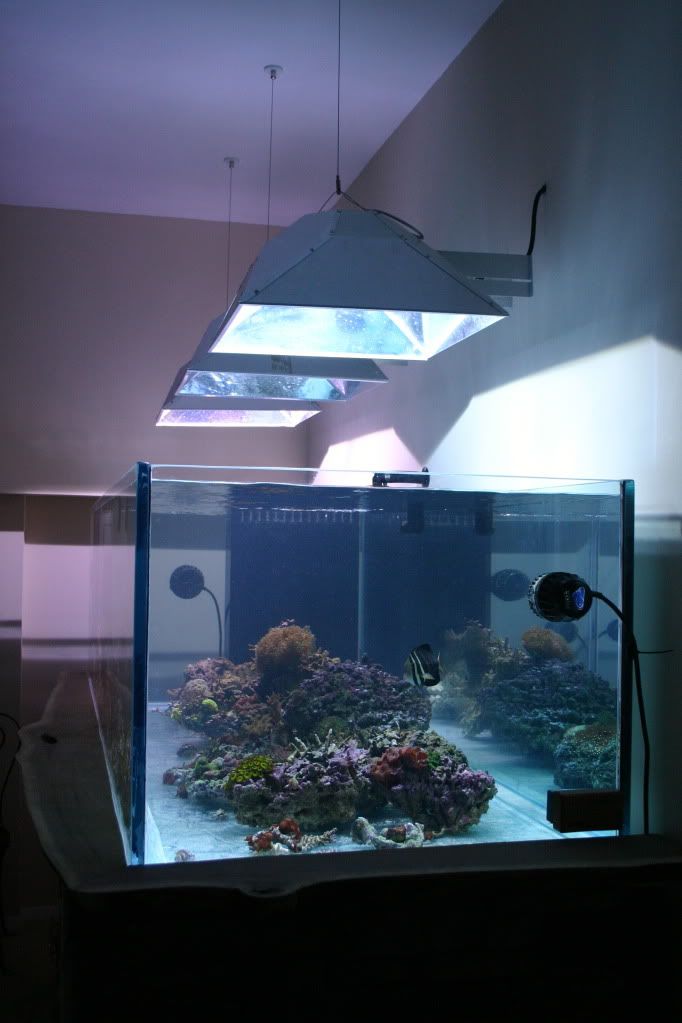
FTS with cell... I'll take a real pic with the Canon tomorrow
-Anthony
-
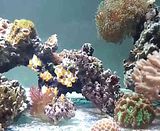
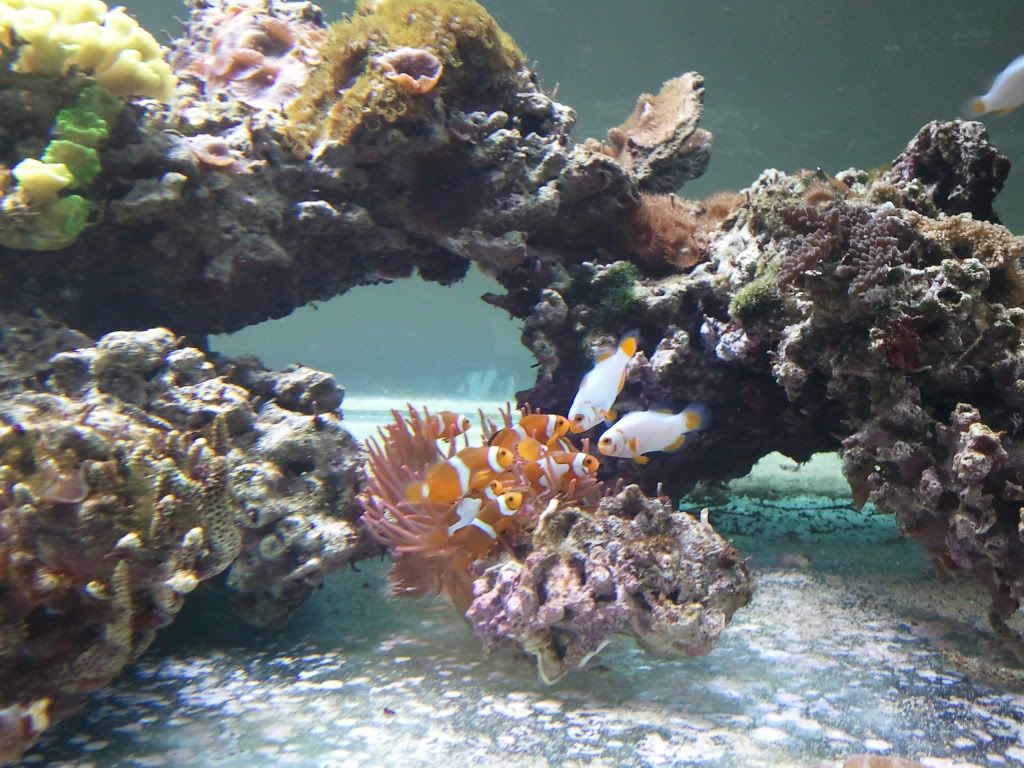
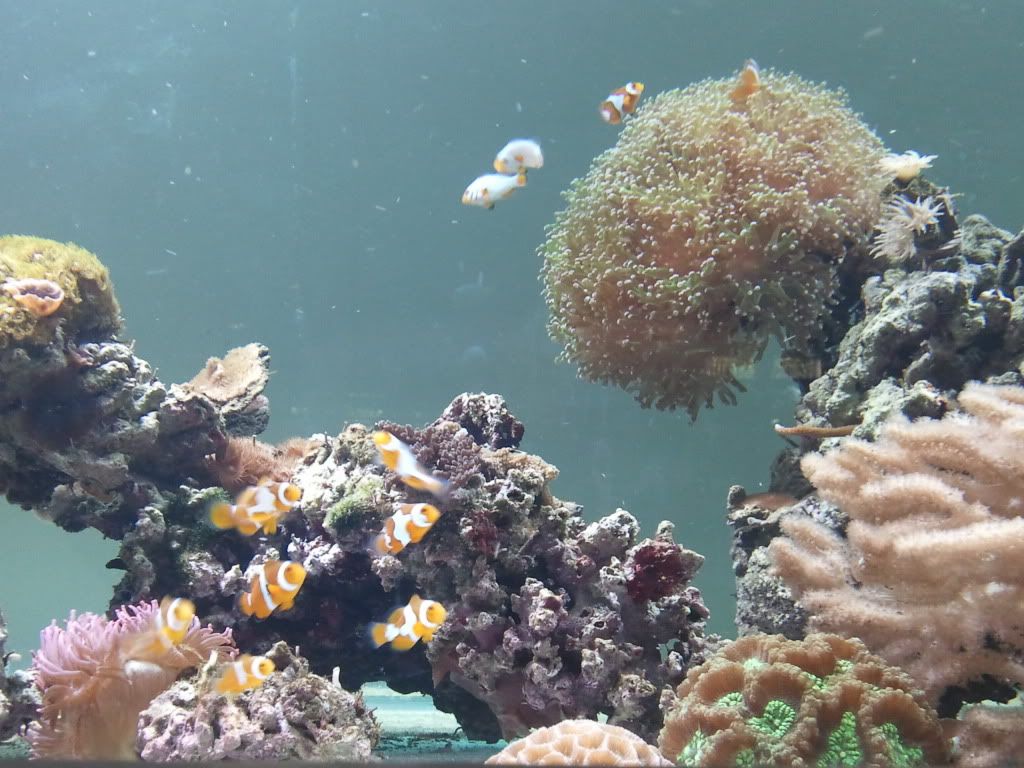
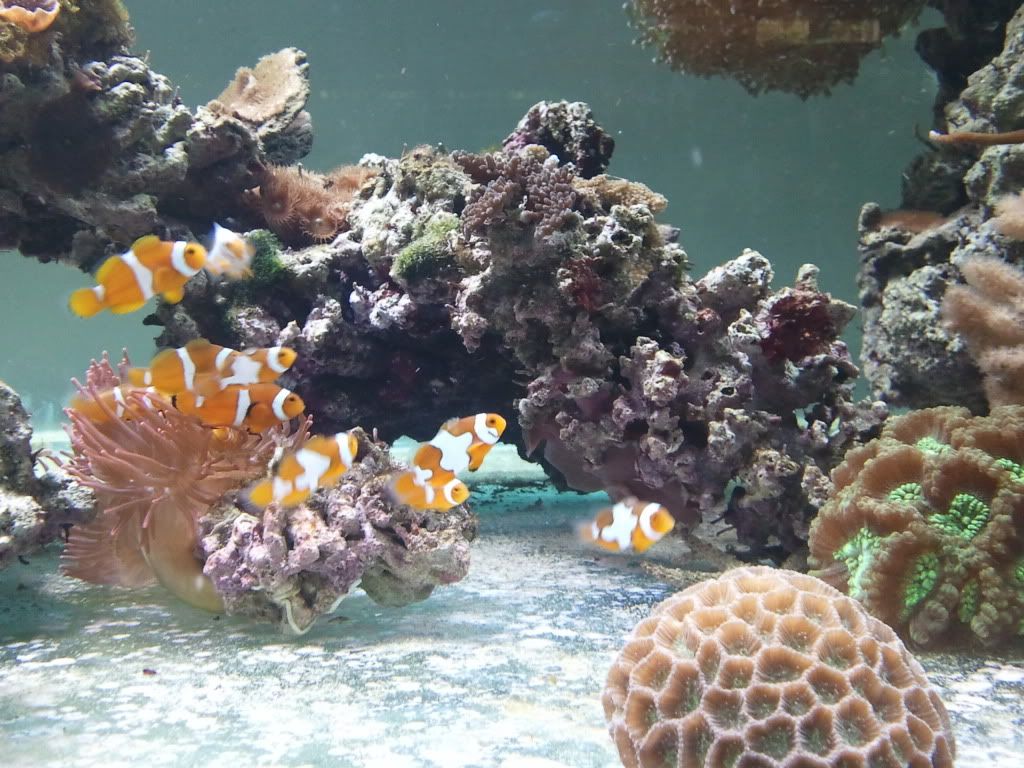
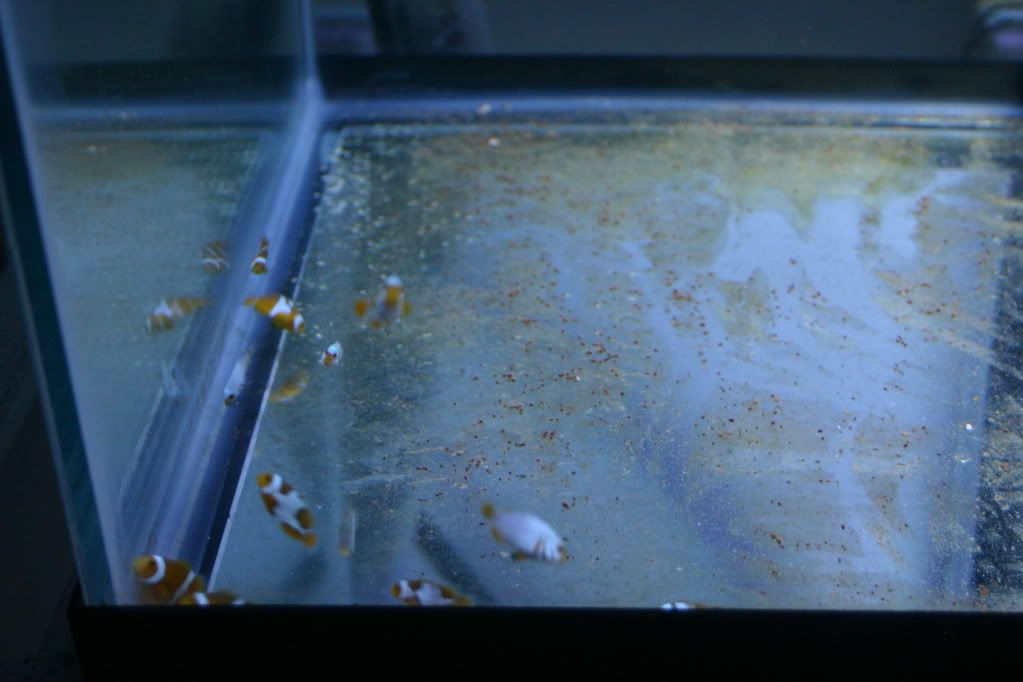
Finally got most of the clowns moved over from the grow-out tanks to the display, still a few more to add
-Anthony
Video:
Pics:
-
Anthony,
Now I am jealous! A floor drain! That is the most single useful thing a reefer can have in a sump room.
I don't know if you ever picked up this Anthony Calfo trick for water changes. You put a bulkhead in your sump exactly at the water level next to the skimmer side of the pump where the dirty water comes back from the tank. You the put a valve on it, and a line that goes to the floor drain.
When you are ready for a water change you just open up the valve and pump the new salt water into the sump right by your return pump inlet. That water goes up into your display. Your sump level will rise and, the dirty water on waste side of your sump flows out the bulkhead and down the drain. It is a simple pleasure, but you can only do it if the water level of your sump is above your drain.
That sounds like a great idea! Unfortunately, my sump isn't divided into chambers like most, but is more like a giant refugium/sump divided by live rock, etc. and everything is fed off the main pump through a manifold. So, I don't think i would be able to do exactly that. However, I do utilize the floor drains for water changes, running a hose directly into the drain, then flip a switch and refill with NSW
I actually just got lucky with the sump placement as that drain is one of 2 that were already installed -
Everything looks happy and healthy. The sump looks kindo of full, that must get scary close to the top when the pumps are off.
Actually, the sump only rises about 2-3" leaving me ~5-6" when full. If it did somehow ever overflow there is a floor drain right in front of it
(though I hope it never gets to that point) -
U gonna stay bare bottom? Or add sand?
On the fence right now... We'll see
-Anthony
-
Been fairly busy with work the past few months, but here are some updated pics of the tank from yesterday. Just need to start repopulating with SPS and throw in the clowns
-Anthony
Dawn FTS:
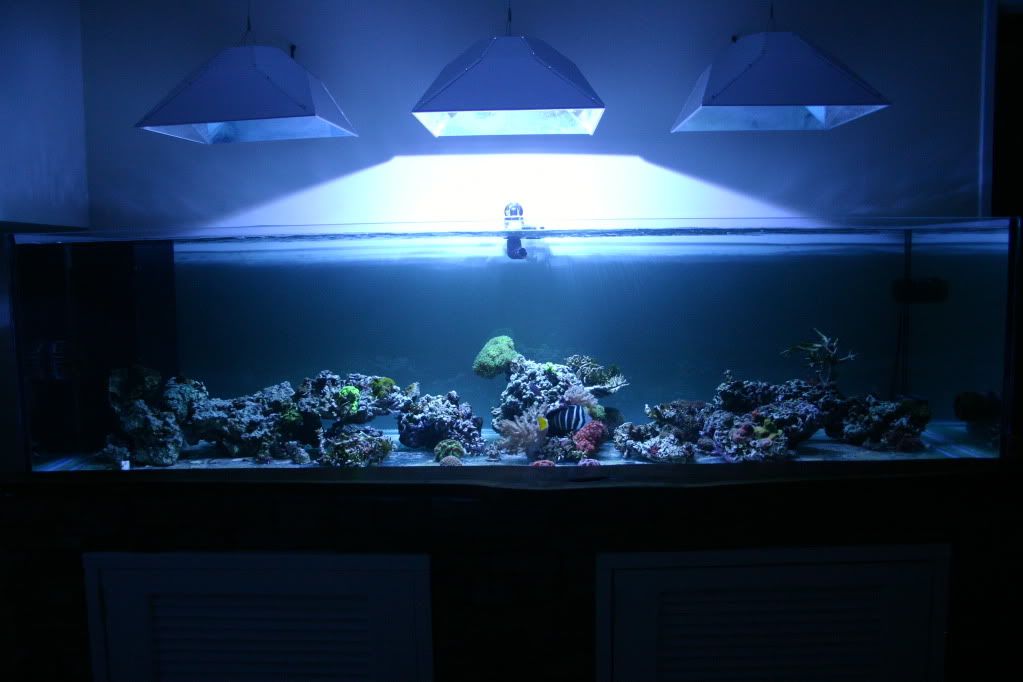
Dawn Angle:
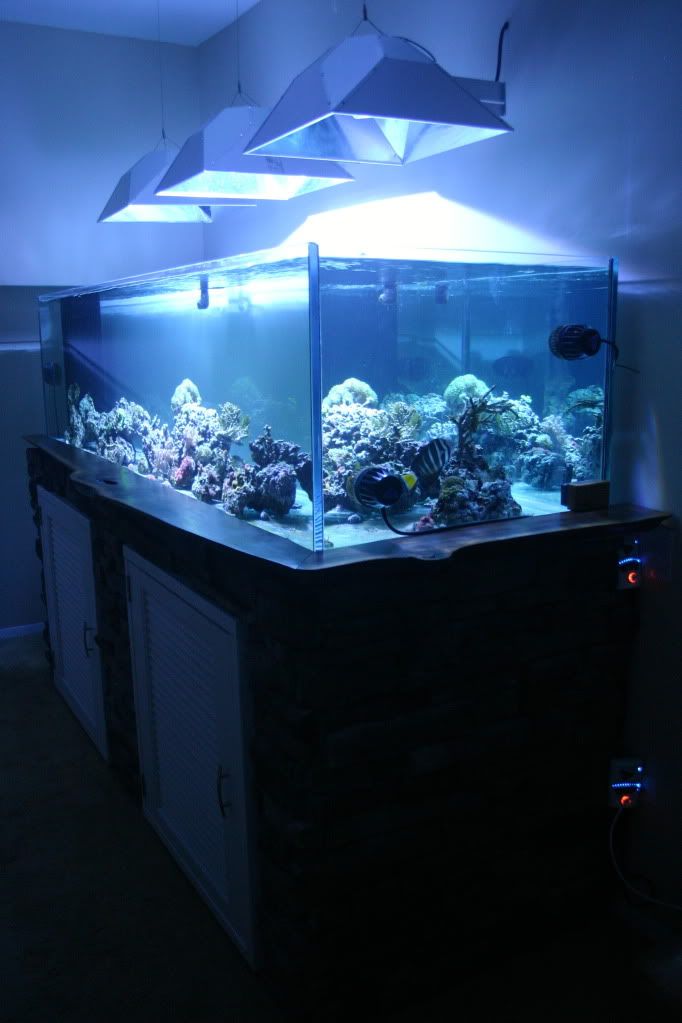
Full Day FTS:
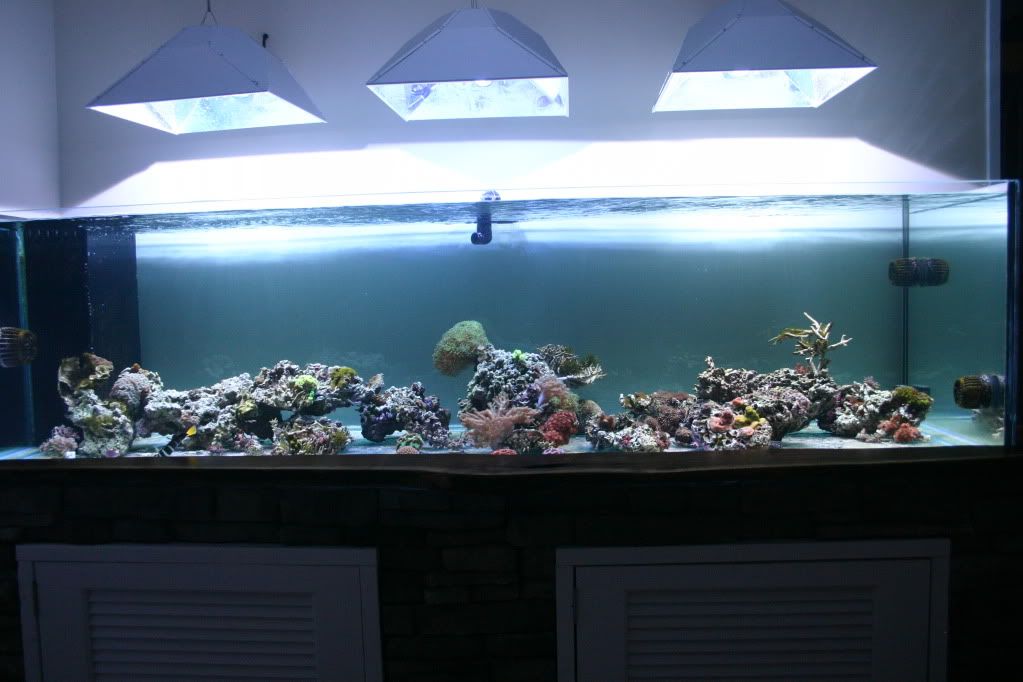
Survival Coral:
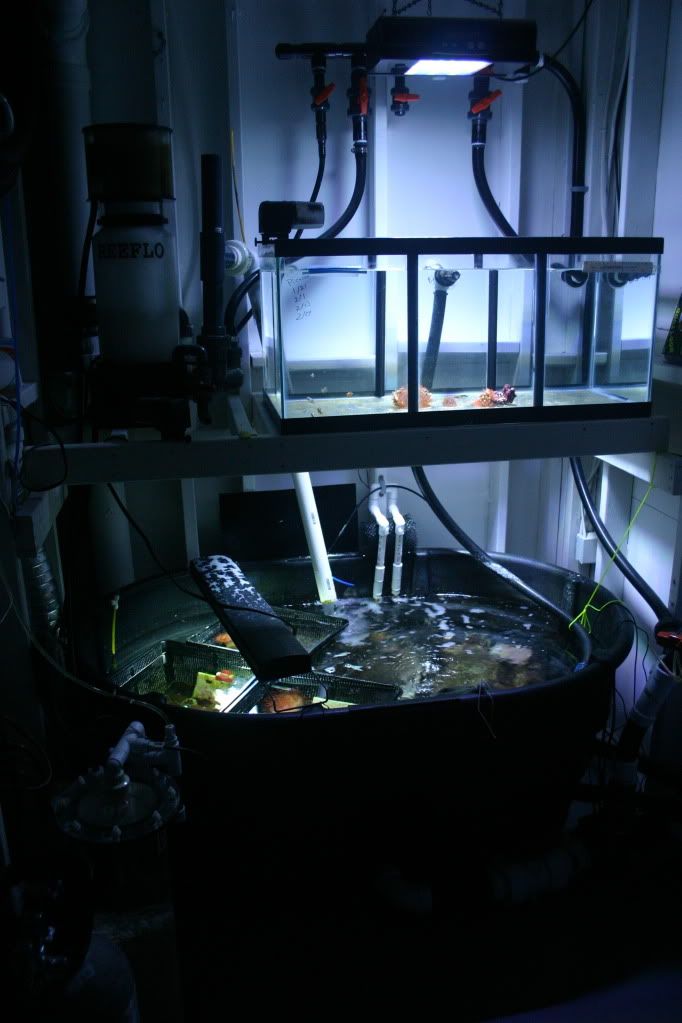
Sump Room:
Future Display Inhabitants:

-
Looks GREAT Eric!!
-
OMG, I am so sorry to hear that, please let us know how we can help!
Best,
-Anthony
-
We want more pics!!!
LOL. Honestly, it looks exactly the same as the last pics. I haven't touched it since I set it up since I took out all the fish to be QT'd, but come July1 all the fish will go back in! I haven't even had time to add sand or even any new coral. Don't worry i'll post some pics soon
-
Wow, Awesome tank.
Question about your heaters. What brand are you using? I am surprised you are running three. Is that for redundancy or because of your natural cooling setup?
They are all Marineland 300w heaters used mainly to offset the natural cooling. Still haven't had the system spike over 81 degrees, so i'de say that's pretty good considering the ambient temp in the room is 75.
Great looking setup!
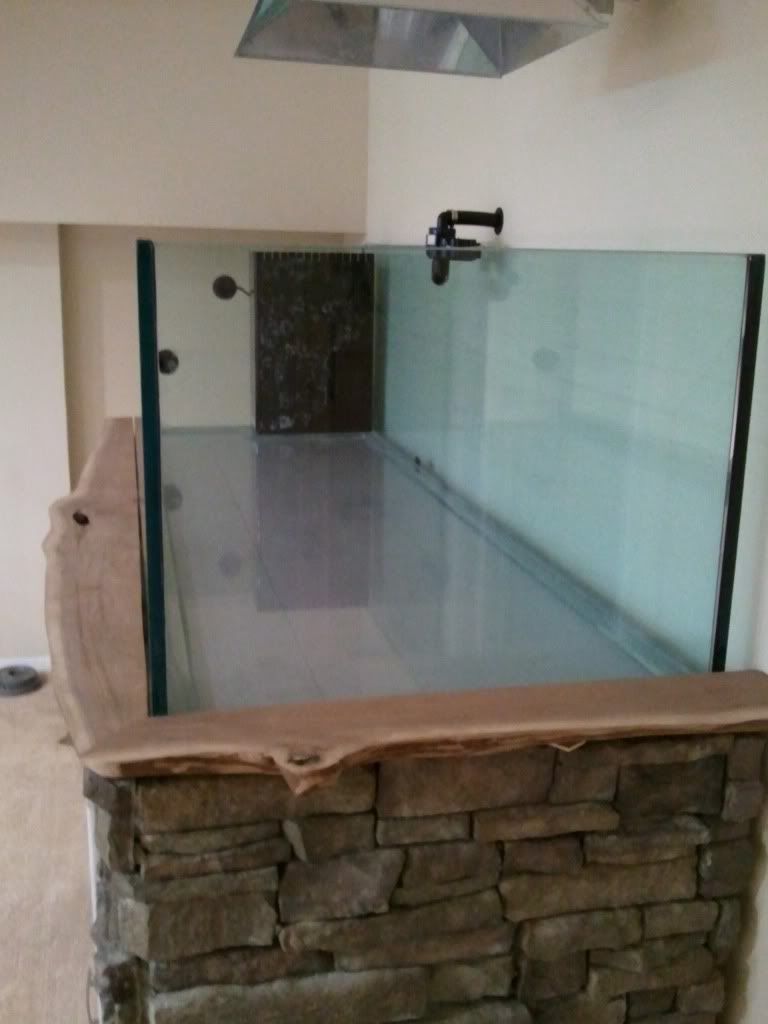
Where did you get the rock veneer for the front? I love that look.
I did a lot of searching and I actually found the exact type I wanted on craigslist, from someone's leftover project. Otherwise, I was going to have to purchase this particular rock through a custom stone/siding company.
Thanks again to everyone for all the complements!
-Anthony
-
Beautiful work, Anthony! Are you planning to keep the back glass clean? Looks great like that.
Thanks! Yeah, that's the plan, but we'll see as it progresses
(want to design a super magnet scraper that I can use through the wall to clean the glass or an extension arm that I can attach to my Hammerhead Magnet to reach at least 4-5ft to reach behind the tank? That would really help!  )
) Anthony - will you be incorporating LED actinics to bring out the color of your corals? or just stick with MH?
MH all the way, Radiums specifically for pop. I thought about LEDs (for supplementation) and played around with a few different types, but for the look I'm after they weren't feasible to just throw-in right now. I may add them later using par38 as recessed lights in the ceiling. Again, my goal was to have a clean setup and adding more fixtures strays away from that goal. Plus, the radiums have never failed me
Just curious but are you going to be able to run the 400's without a chiller on this tank?
Luckily, no
My sump sits directly on the foundation and that seems to keep the tank at a constant temp ~78 through passive cooling. I like to run my tanks around 82-83 and am having a hard time keeping it up (running 3 x 300w heaters). My old tank only had 1 x 400w halide (~200gal system) and I had to run a chiller almost 24/7. Just shows how powerful running a tank in a basement and sump directly on the foundation can have on maintaining a constant temp (like a wine cellar). I do have a chiller just in case, but have yet to hook it up as it's not needed right now.-Anthony
-
Thanks everyone!
Absolutely gorgeous!
Will be following along and watching for your updates. Love the walnut railing and stone work.
May I ask which room in your house it is set up in? And your fish room is directly behind the wall behind the tank? Is that your laundry room?
Great job Anthony!
Maureen
It's in the basement AKA "mancave"
The fish room is directly behind the display tank wall, luckily (yes, laundry/unfinished area). I originally wanted to to an in-wall, but I would have only been able to fit a 5ft tank because of the HVAC and other plumbing that I didn't want to move. Plus, I would have loss the end view panes; which I like as an additional viewing perspective. So, I'm pretty happy with my choice of a longer tank and not sticking it in the wall.-Anthony
-
Thanks everyone for the positive comments!! It was a ton of work and took a very long time just to get it where it's at now! Time to start re-establising my SPS population since I lost all of it during the move back in September!
Looking good, Anthony. Did that guy ever come around to do the final glass polishing?
Thanks Tom, Yeah I got the glass guy to come back out; which was only 2 month delay for the project...
-Anthony
-
Hey Everyone,
So many of you have been asking me to post a build thread for the past 8 months, so I am finally giving in
. Luckily, (planned ahead ) I took pictures throughout the build process; which are displayed below. This new system is an upgrade from my prior 92gal corner and runs roughly 470gal total (330 main, 150gal sump (100gal filled) and 40 holding tank). With my goal of making everything seamless as possible, I routed all electrical and plumbing behind the wall to a sump room; under the stand is just storage space . At the moment I am running the following:Tank
-
Here's a picture of my 330gal that is still in progress, just to give you another local mini (8" depth at max) bar-rail option/view point. Mine's obviously not meant for bar stools, etc... but its a nice drink rail if have a party or something.
-Anthony
-
orbital buffers are cheap- go buy one.
yeah, i was thinking about it, but having a professional do it is also a nice peace of mind. I don't want to end up creating more scratches that i can't fix. That is my last option right now, but not ruling it out.
-
Hey Everyone,
So, I had a glass restoration guy come out and sand/polish out all the coraline etching in my 330gal that I have been trying to setup for the past few months. All the etching was removed and I test filled to ensure it still held water
 , but I have now been waiting for that guy to come back for the final polish now for 1.5months!! It's really not that noticeable, but "I" know its there, even when filled (e.g., swirl marks, scuffs, slight haze), due to his quick polish after the sanding. Just wanted to see if anyone around here does this kind of work so i can get it finished and fill this thing? All it needs is the cerium oxide polish over; which i would do myself, but I don't have a random orbital buffer etc... I did try a windshield kit that Tom lent me before i had the glass guy come out that used a drill and small 2-3" pad, but that took forever (2 panes of glass. 96"x25" & 33"x25"). I think it would be best accomplished with an orbital buffer and 6-7" pad to be effective. If anyone does this for a living please let me know as i can't stare at this tank any longer (without water, corals and fish at least ). Thanks in advance!
-Anthony
-
Looks like bubble algae that isn't getting enough direct light. I had some that looked just like that and grew in the same manner within colonies. If it's hard I'de bet that's what it is.
-
The only reason that I could think of to remove the carpet would be mold/mildew from a spill and the carpet/pad retaining the water.
+1, when i setup my new 320gal i just cut out the carpet where the stand sits incase there were a water problem. I could remove/pull back all the potential wet/molded carpet pieces without worry of moving the stand/tank (which would be impossible). As long as the carpet backs a wall, it will stay taught against the wall side tacking. If you were to look at my stand and carpet, you would never know carpet was missing unless you opened the stand doors. It was a matter of mold/flood pre-thought in-case something ever did happen, i wouldn't have to worry about health concerns (which i had a problem with at my other residence). If it ever did flood, then i would just pull the carpet out (not having to even think about touching the tank) and then just put in tile or something water resistant since there's a sump pump in the room anyhow. Just my 2 cents
-Anthony
-
can i dump cups of green water with rotifers into the 2 gal tank that i have setup for the hatching?
i am thinking to use one gallon of SW from my DT, than the other gallon of green water.
i tried using coffer filter, but in the end, i dont see what ended in the filter, so i dont think that's working so well.
You risk cross contamination by doing that, fry are very sensitive to an array of things. Rinsing the rotifers is a good practice to reduce transfer of other contaminants that may have grown in the rotifer culture.
-
believe me, i tried to look with my naked eye in a clear cup until I realized that my eyes are going out of focus.
the white 'dots' are in the water - just floating in water, and they dont move (unless tha water moves). once in awhile, i do see few that 'swims', but only very few.
and my water seems to be constant 'greenish', not light brown like others mentioned due to rotifers eating.
I am concern that my culture is dead, but my water does not smell.
the fry should be hatching tonight or tomorrow night, and since i dont have time to get a scope, I will give it a try, if this batch doesnt work, i will try again.
The flashlight helps 100fold bc, the rotiers pop out against the green water. Again, if they were dead they would be on the bottom. Sounds like they are alive to me, i wouldn't worry
-
If the "dots" are in the water column, they are alive. Dead ones sink to the bottom. No need for microscope etc... use a flashlight and hold it at an angle to the culture, if you see the specks floating you're good.
-Anthony
Fazio92's 330gal Rimless Reef Display
in Dedicated Tank (Build) Forum
Pics with the Canon
-Anthony