FishWife
-
Posts
768 -
Joined
-
Last visited
Content Type
Profiles
Forums
Gallery
Events
Store
Everything posted by FishWife
-
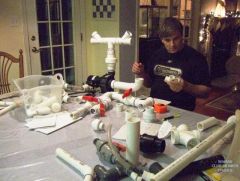
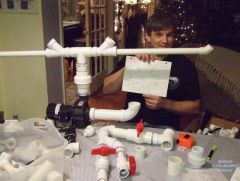
WELCOME to PVC! My husband, Scott, has fallen in love with the stuff. It's cheap, forgiving, and easy to replace, so buy a little extra and feel released to experiment. When he works with PVC, he only uses purple primer and the proper cement (he's never used the cleaner and has fine results, though I think others would say the cleaner is important). Read the labels and be careful: there are two basic kinds of PVC: white PVC and CPVC (which is kind of off-white, when you come to notice it). These two types of pipes have slightly different guages, and are usually stocked side by each in the stores. When you're looking for parts there, or grabbing pipe, it's easy to mismatch, which is why I mention it. Also, the cements are type-specific, so make sure the cement you buy says "PVC" not "CPVC." You don't want CPVC for fish tanks: it's engineered for high temps that you won't use. When you look at joining parts, they are all engineered to work together. The nomenclature is that you use, for instance, a 1" pipe with a 1" joiner... elbow, coupler, female/male threaded or slip (no threads) etc. Eacy joiner has the size embedded somewhere on the part; the pipe has the size in black stamped on it. Scott uses a hacksaw to cut pipes, and then he "dry fits" them to make sure his assembly is right. After cutting, you need to rub the raw edge with something like a small butter knife to get all the nibs off. To join pipes permanently, put primer (purple) on BOTH pieces (inside one and outside on the other). Then, lightly cover BOTH pieces with cement. If working inside, do your wife a favor and put down some newspaper; it's virtually certain that you'll spill. (You must work quickly right after the cement is applied, so keep track of how you want any angles to be BEFORE you apply the cement.) Push the pipe and coupler straight into one another and then make a quarter-turn TWIST. Again, anticipate that twist when odd angles are anticipated. Finally, you don't use cement of any kind on threaded joins. Rather, you use teflon tape. Ask more about that if you need to know. HTH!
-
After thinking it thru some more, I'm still wanting to put it on the rock... right about where the brain coral is in this picture. Problem is (might be) that there are many small, orange button-polyps there now... both behind and under where the clam would be placed. You can just see them if you know where you're looking: These orange polyps are small right now. I *believe* they are juveniles of the ones you see in this shot: on the left, in the crack below the big, hightest, bowl-shaped rock with the Xenia on it. If so, they'll be polyps that are about 1" tall... a veritable jungle of them. And one would think they'll grow upward, towards the light... Think I could control them thru husandry (i.e. peeling them off/fragging) if they grow on the clam's shell or too high nearby?
-
We found that our anem wanted to go to the back, too. I was afraid I'd not be able to feed it, so for a few days, we just rotated the rock to the front. Every night, it moved. Eventually, though, it anchored where 1) there was a crack for it to retreat into and 2) it could expand out into the light. I purposefully put rock around it such that these two requirements were met, and it seemed to be fine with that. HTH
-
OK, that helps. I had read that once you place a clam, don't move it. My concern with the floor of our tank is that it's got quite a bit of motion... so, between light and flow considerations, plus just seeing it well, I thought that rock was perfect, until the issue of the orange polyps came up. I'd rather have both coexist nicely, but the idea of temporarily putting it on the sand appeals, 'cause we can lower flow for awhile then move it up and see what happens with the polyps. Question: how long would it take for the clam to attach, usually?
-
It's an experiment. It evolved out of a desire to use a foam & egg crate idea that I saw on large tank threads on Reef Central. (Search for a thread on this site, and you'll find links to the discussion, if you're interested. I couldn't find the proper reef-safe foam locally, nor could I find a proper epoxy for the project, so we downgraded to the "bare egg crate" look. We ended up liking it very much. It beautifully displays LPSs while keeping them near the pipes that take water out of the system, so that their chemical warfare is kept to a minimum, yet they are wonderfully displayed. We hope that over time coraline algae will cover them, making them look a bit more natural. They also hide all the plumbing pipes behind; you can see more on this on our build thread (linked in our signature below). The construction is: two pannels wide (not attached to each other except by one zip tie at the top). Each pannel, right and left, is actually two pannels deep, offset to make the openings smaller. We then glued them together with acrylic glue, and added the cable ties as places to insert the stalks of LPSs. Used Krylon Fusion spraypaint to make it all black. There are two zip ties for each pannel: one in the middle and one on each side. This is to keep it from floating up. We're a bit concerned that it might become a detritis trap, so we arranged pipes behind it to flush downward and outward from it, and we run those pretty strongly from our sump. Because of the construction, it's easily removed, should the need arise. Hmmm. :( There are small zoos on that rock; or maybe even orang polyps, not sure. They came with the rock. They're small now, but getting more colorful every day... Can we control them (i.e. cut them back somehow) if they grow too close later?
-
I know about/practice/believe in quaranting fish. New to corals: so... 1. How long? 2. Dip... when? Before? After? Both? 3. Dip with what? Products? Fresh water? Both? 4. Have some frogspawn that's been in QT over a week and looks great, but I don't really know what I'm looking for. I have read the pinned post on flatworms, but they seem to apply to just SPSs??? Is that true? TIA for replies!
-
This is encouraging, 'cause crocea is what we want! And thanks for the compliment about the tank. My husband did a great job, and I just love to gaze upon it. Thanks for the link, too! I think we'll wait a few months for that indication of the coraline algae growth, based on the information therein.
-
That's interesting, Bob. So, maybe it's just a luck thing? My Xenia is growing like a weed, and others have trouble keeping them. Hmm. Well, guess we'll just have to see what happens. THANKS for all the great info. I'm storing the link to this one, gentlemen!
-
We want to get a clam or two, either soon (next month) or "eventually." At any rate, I want to plan where to put them in the tank, and I need to know about compatibility. I'm not reading anywhere that any corals bother them. Is that true? Can you put them right near zoas or acros or LPSs and have everyone happy? What about sponge? We got this yellow sponge with our new tank... You can see it in the tank behind the GSP. Can I put a clam right on top/near it? Or, near the SPS's? Also, has anyone put clams on the rocks? In the picture above, there's the large rock on the left that's like a satellite dish. (There has been a brain coral there, but it didn't like so much light and we moved it down some.) Could a clam perch there, if it was secure? Does one apoxy clams? Any comments on these questions would help us sort this out. TIA!
-
Using oolitic play sand for a DSB?
FishWife replied to Highland Reefer's topic in General Discussion
I think we did: DON'T do it! We were told that it was SouthDown under a different name. It was NOT; it had lots of oil and clay in it. Close scrutiny and Internet research revealed that it was TX sand. I'm thinking the oil was TX crude from their atmousphere, but that's just a guess. The other problem was that it was composed partly of clay that totally clogged our pumps. We got this last Sept. at our local Home Depot, in the garden dept. Said it was "pure play sand." I can't quite remember the brand name, but if it's the same stuff, it's a waste of time. -
Welcome, Larry! I live in Derwood, and we have som cheato we could spare. PM me if interested.
-
So... Grabbing the thread back again can we define "mature tank" in terms of anemone? Rocks? System running? (This will be of general interest, I think...) And, maybe, assess my tank for how soon we might buy two of Chip's RBTAs and have it live, as outlined above? (This is for my info, but I really want to know... ) (As I feared, my clownfish has started trying to host my hammer corals... and I hear that it's bad for her and them... ideas?)
-
Thanks SO MUCH. So, from all that I have another question arising from the discussion above my post: my tank is sort of new and sort of not. All my rocks are aged, cycled, and aged some more. We've had them fallow from Christmas day (when our system came down with ich) to today, when we finally reintroduced fish. 1/3 of the rocks came from a mature system in Oct 07; the other 2/3 came from a mature tank that had been let go (and hence to our tub and the fallow routine for a month). These rocks have been in, with corals, and cycling for about two weeks in the 175g display tank. The water is cleansed by one of Dan's Standard 8's which is producing very little green stuff. Today, we introduced three fish (from our month-long hyposalinity/quarentine stint: thanks, Chip, all our fish lived!) . So: is my system "mature" enough for two RBTA? If not (as I suspect you'll say) when would you guestimate "maturity" enough for the 'nem? (And when will you have some ready for me, Chip? I am partial to RBTA, and I think we want two, since I've heard that multiple specimens will do better since the clownfish will wander back and forth and not beat them up as much.) In the meantime, how do I keep my small (2") maroon clown from hosting my LPS's to death (if she does start to do so)? Put her back in QT?
-
My RBTA is also not doing well... but that's to be expected. I had no sooner nursed it back to health using frozen smelts when we did our tank swap. It did pretty well in the holding tanks, but is not looking super right now. I'm going to work with it, but in case it doesn't make it and I look to a replacement, and also in case my clownfish starts hosting (and killing) all my LPS's when she FINALLY comes out of QT tomorrow AM (um... today, I guess, it's late) and goes back into the display, can I ask for some experience-based counsel? Traveller and Chip (and anyone else who had enjoyed success): can you weigh in with a few tips on anemones? For instance: 1. Would you agree that one should wait any amount of time in establishing a tank before introducing an anemone, as Calfo writes in his Invert book? 2. Are clownfish beneficial or deathly to anemone? If the latter, are there any tricks to making things work out? 3. How big of a new anemone should you look for? Is small OK, or is bigger more stable and likely to do well in a new setting? 4. How/what do you feed them? 5. How important is pH (and other chemical factors that I don't know to ask about, like salinity)?
-
I read in Anthony Calfo's book (on Invertebrates and natural fish keeping... can't remember exact title) and his online forums that he strongly recommends NOT using non-marine vegitation, fwiw. His argument is as above: adds that they are the wrong kinds of nutrients for marine animals. I've used regualar Nori from Asian markets. You can't leave it in longer than 24 hours, but that being said, it works. I've had better luck folding it and putting a thick elastic band around it and a rock and tossing it in than with a clip. Seems to last longer before decomposing. BUT, you do need to get it out (if there's any left) in about 24 hours.
-
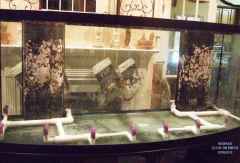
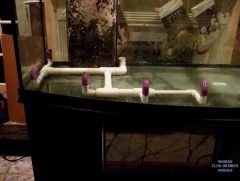
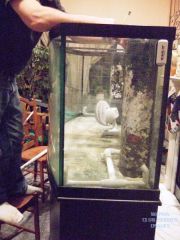
Whew! Between fish who need diaper changes in hyposalinity (read: ammonia really does get high fast when you don't have live rocks!) and building the tank, we've made the jump to hyperspace and have achieved liftoff. WHEW again! THANKS for the encouragement and inquiries. It feels good to know we were missed! But, may I say, "It's ALL worth it!" These pics don't do justice to how GORGEOUS and HUGE a six-foot tank is. The rocks we have are all large ones, so again, the tank is much more stunning in real life. But I'm getting ahead of myself. When we last heard from our heroes, it was "we plan to finish the closed loop tonight." But, due to fish needs, we suddenly realized we needed to concentrate on the "engine room" to get our frags and corals stable and out of the tank they were occupying in our bathroom and into a two-tank system with some live rock. So, about two weeks ago, we switched from trying to get the display up to getting the mud room finished. Scott has worked day and night (around his day job running our small company) to get our system built! First, as I say, it was "back to the mud room." Last you saw, we'd built shelves for our cisterns to be and our frag tank. We now installed frag tank and plumbing: Here's the frag rack I built using acrylic glue and egg crate: And here's the frag tank with happy corals inside. The main dart sequence pump feeds this tank, which overflows to the benthosphere I built in the right compartment of our sump: And here is some of the plumbing, including the skimmer in final position. With our fish set up with a two-tank live rock system (after a week of slowly raising the salinity) we stopped doing 40-60g water changes/day and could breathe. As I say, Scott worked heroically, and this past weekend we took the final steps to WATER!!! First, after the plumbing was all in place (which took several nights and a full Saturday), we did the fresh water test: You can see Scott's neat and ingenious plumbing in the picture above (painted black; back of tank). The two rectangles are the super-sucker returns for the Dart closed loop manifolds. They are a mod out of replacement pieces meant for HOB filters. The right, top manifold has a UV sterilizer inline (40Watt). The two open pipes are two of the four returns from the mudroom sump (they T downward as well). Our four drilled holes in the overflow boxes go to our sump, eventually. One is directly plumbed to feed our Grey Seas skimmer via gravity (one less pump). One feeds our benthosphere. And two join to go into a 50micron bag and then into the left compartment of our sump. Yes, we had a few leaks on the freshwater test, and some air bubbles in the closed loop to troubleshoot. But, by Sunday eve two weeks ago, we knew aquascaping was just around the corner! Of course, it took three days to fill the tank with IO water... .... .... ..... BUT, at last, we put in our new sand, then topped that off with cycled sand from our 80bow, and then added our first rocks. I had prepared a double-layered egg crate screen (two layers slightly juxtaposed to form smaller openings and to block more of the view of our plumbing) as a background. I had wanted to do the foam and rock thing but could never make it work, so we went to a simpler idea. I simply got large plastic conduit brackets and painted them and the egg crate black. We glued it all together, zip tied it to the pipes in two pieces (for easy removal should anything bad happen) and voila! A wonderful place to display my beloved SPS's. Aquascaping took ALL of last Saturday. We had to get to know the new rocks that came with the tank. Some were REALLY big. Here's the final effect, as of tonight: Left side closer: Right side closer: We still need to add the fish. Their quarantine is up on Super Tuesday, so we plan to put them in then. Meantime, we're acclimating corals to the light and the fish are in our bedroom. BUT, check out our bathroom! On a side note, do you remember these two corals from the bow 80g? and Look at them again in this frag tank a week ago: frogspawn left and hammer next to it. Here's the frogspawn in the tank tonight under the halides, fully extended (use the eggcrate to get an idea of size): Remember when I was worried that it was "turning brown" and dying? (See thread here) Somer of you wisely thought that it was the zooxanthellae returning to brown it up. So it was! It's now a spectacular brown with green grape-like nodules all over. And has doubled in size since Halloween when we rescued it from Ryan. (I hope he sees this, to know that his corals are all doing great!) Thanks for all the support. We are excited to start enjoying this tank of our dreams!
-
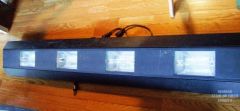
So, we FINALLY got our new 175g tank up!!!! I'm so excited. Pictures soon, but a question for the committee: we've been running T-5s about 5" above the water (and so, about 15" above the corals) in a holding tank for about 10 hours/day or so. Here's the fixture: Our new setup has 4 250 watt 20,000 K bulbs suspended about 6" off the tank and, let's say, 10" above the top-most corals in the tank. We ran it for six hours yesterday with all lights on, and then went to two bulbs in center for 1.5 hours. Does that sound about right? Also, we inherited some green mushrooms (large) on a rock that ended up pretty high in the tank when all the aquascaping was done. I know mushrooms CAN do low light, but does higher intensity bother them? TIA!
-
What I can't figure out is how to cover the foam with epoxy. Otherwise, I'm game. (I also can't find the proper, black Beckett's or Touch 'N Foam (both WalMart and Sears carry the insulating variety but not the reef safe variety in this season). Sigh. We are just going to go for a black background made out of egg crate if we can't find epoxy/foam soon. It's better than bare pipes, and I think it might look kind of neat and different.
-
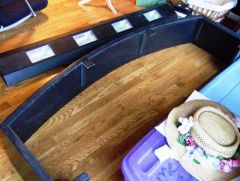
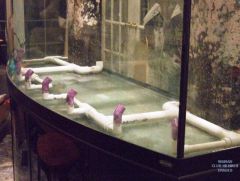
Thanks! Here's progress over the last week: We had electricians come and redo our wiring, giving us three dedicated circuits in the mudroom and one switch to an outlet in the basement, near our RO/DI unit. Scott plans to have his Mag24 down there with two large garbage cans of warm water: one fresh, the other salt. Water can be pumped up from either, using this switch, or he can go down to the basement, switch the Mag from salt to fresh, and throw the switch from down there. We also built shelves: one right above the sump spot for fresh and salt water cisterns, and one higher than that for our frag tank to be. Here are mudroom shots: Next, we have redone our sump. After ripping out all our dividers from the 80g bowfront... (before) ... we started by drilling a 2" hole in our 75g converted tank. We have four drilled holes from two overflow boxes in the new tank. All of these will return water to our mudroom/sump area while powering different parts of our cleansing/nutrifying system behind the wall. Of the four holes, two are 1" and two are 3/4". *One of the 3/4" holes will be directly plumbed to gravity-feed our skimmer (a Grey Seas Standard 8). This will dump into the far left side of the skimmer as you look at it in the mudroom. *The other 3/4" hole will drain into our deep sand bed/benthic zone (a la Shawn Wilson of Reef and Rainforest design's ideas seen Here: second from left, top row: Sump Concept) to provide slow flow to a quiet, natural filtering zone. This flow will be controlled by a ball valve. *The two remaining 1" holes will drain into that first, left-hand compartment where the skimmer does, into 50 micron bags that will catch large detritus. Similar to this design--Model H on Melev's Reef site--all the water will flow from either the left or right chambers to the middle and then back to the Dart doglegged in back of the first chamber, on the left. In our case, like this model, the water is cleansed on the left, goes through a bubble baffle to the center, mixes with water flowing from the sand bed/benthic zone right, and then flows behind the left, cleansing chamber to the Dart, and out. We added one feature of our own: because we HATE microbubbles, and because the sand bed/benthic zone is high up, we decided to create a bubble tower. This way, water comes out (fairly slowly) from the benthic zone, down through a chamber filled with live rock that hopefully bursts most bubbles on the way down, and then out the bottom, thru egg create. You can see this in the pictures below, if you know what you're looking at. Here are some construction pictures: Making the bubble baffle chambers as one piece out of acrylic. The soup cans hold it nice and square, since we don't own clamps. Here it is done, and backwards to my description. You are looking at the sand bed side from the wall that it will eventually sit on, as it were. Our plan is to use two Sequence Dart pumps in all: one to do a closed loop with four manifolds in our display tank, incorporating a large UV sterilizer inline. The second Dart will be in the mudroom, taking the water from the sump to various points: our frag tank, our up-high refugium (that will gravity-feed the display), and eventually, our kitchen display tank. Here's the sump all in place; I added our old sump sand back in last night! Next, Scott tackled our halide light fixture. We got it used for a song, and it had several problems: broken clips, missing screws, etc. He worked for a couple of hours at it: And, voila! Pretty exciting Finally, we have been plumbing the closed loop... And moved the tank into the actual room where it will live (a front office on our ground floor that is now our tank-viewing room, quaintly named "The Grotto" by Scott and painted black by me... yikes!) We hung the halide fixture as we planned from bookshelf brackets: Tonight, we plan to cement the closed loop, and tomorrow, do a fresh water test for flow. It's getting close to SALT water time... maybe by Friday!!!!
-
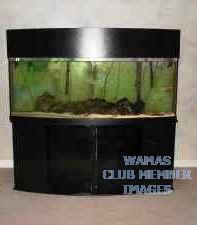
Our new tank
-
-
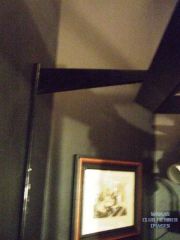
From the album: 175 Bowfront
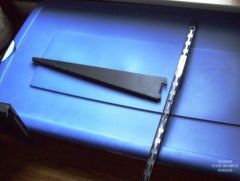
Used brackets intended for shelving. -
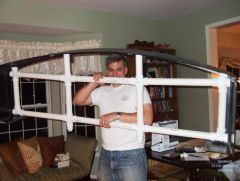
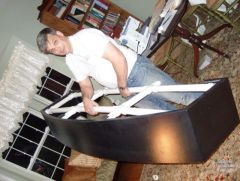
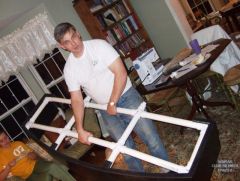
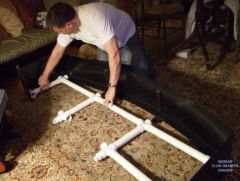
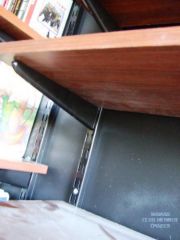
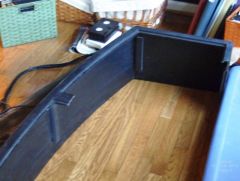
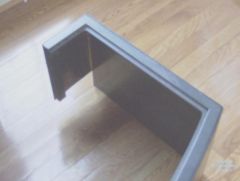
That's interesting. Now, we have a plastic shield, that's not a true canopy. On, it looks like this: Here it is top down view, and you can see our light fixture: And here is how we're planning to mount it to the wall: In our current scheme, we've mounted two shelf brackets on the wall, too, and the halides hang under that PVC superstructure and about 6" to 8" off the surface of the water in the tank. Do you all think we need fans with this canopy arrangement?
-
Have you considered simply putting in an old fashioned dehumidifier near the tank? We're thinking that, in winter, that would solve our mud room problem. In the summer, we'd solve it through the air conditioner. Thoughts?
-
Yes; large (50+) g sump in mud room, along with a frag tank and a separate refugium (same water supply; fuge dumps into display, frag tank dumps into sump) plus a planned (future) 75g in kitchen on OTHER side of mud room. No thermostat in room; it's centrally heated/cooled w/house: one vent. THANKS for answers!
-
Well, that's why we considered installing a window AC unit in our fish room. Don't they take humidity out of the air while cooling?