PotomacBoater July 4, 2012 Share July 4, 2012 This is my "honest" build thread If I do stupid stuff ... its hopefully to teach everyone else what NOT to do. I bought a new condo in March of 2011, The first thing I noticed was the "Computer Nook", it was an alcove between the hallway and the kitchen. I don't know about you guys, but I certainly don't sit at a "desk" when I use my Laptop I used to run Tropical fish in high school (however many years ago that was) So I thought that this space would be GREAT SPOT for a fish tank but not a simple tropical tank, I'm a glutton for punishment, and I figured it was time to try Saltwater. I joined WAMAS in May of 2011, and it took a full year to find the right setup for me. My Requirements were ... Had to fit in a 53" wide alcove Had to be self contained (everything fits in the stand) and I wanted a nice (enclosed) stand and matching canopy, so this would look nice in my living room The goal was to start with a FOWLR tank Further requirements became 75 is too small 150 might be too heavy (I didn't want to risk it since I know I don't have concrete floors) Since I can't get to the side, or the back - tank had to be drilled I wanted a sump with a refugium for nutrient export and additional filtration I wanted the live sand and live rock to come with the tank, WHY? because a $300 tank and stand is a great deal until you remember that 90 lbs of sand & rock at $2/lbs (minimum) plus the skimmer, lights, all the pumps, plumbing, etc really adds up I visited a few members tanks, and checked out a few for sale tanks in the first year I finally found Pat_13's tank on the Wamas Forums http://www.wamas.org/forums/topic/46738-90g-rr-tank-equipment-livestock-and-extras-harpers-ferry-wv/ He had an established 90G tank with everything I needed PLUS he had all the "Controller stuff" (I had no idea what any of that stuff did, but it sounded cool) I did the purchase in two steps, I went to visit the tank first (so I didn't waste my friends time to drive all the way out there and me to hate it) then I picked it up a few weeks later This gave me time to prep. Things I did before the tank arrived a) put acrylic over the hardwood floors of the alcove b) purchased a larger sump from Muddy that was the maximum size for the stand and added baffles c) bought salt and test kits and "borrowed" some RODI d) read as much as a I could about tank moves, cycling an existing tank, and to find as much about the equipment I was getting as I could Things I learned a) I hate home depot for acrylic- Lowes is better - better selection and they will cut it for you. The floor was a thin sheet, at that was fine. Lowes doesn't carry "thick glass" so I went with acrylic baffles in a glass sump. Good idea or bad? (I'll get to that in a minute) I also used the thickest acrylic they had for baffles - OPTIX - these things won't bow, but are twice the price Sump Design ... The design I came up with was Why did I do it this way? 2 reasons ... I wanted to control the flow into the fuge independantly from what goes thru the skimmer/return (which you can't do with the fuge in the middle) Also, the stand is already plumbed for a left sided fuge. What's going to be in my sump? In the fuge ... Live rock, cheato, pods (not sure if there will be sand or not) Coralife SuperSkimmer 220 skimmer in the middle Mag 12 return pump (with a 4 ft of head pressure, I figure we would get 10x turnover) The method I used to hold the baffles was the "removable baffle design" with EPDM weatherstripping on each side of the acrylic (it needed water to lube it up enough to fit in) I got the measurements for the old sump (which had no refugium) 12.5 high each, with 12" wide for the skimmer and 7" wide for the return I made the bubble trap baffles 13" each with 1" raise for the 2nd trap and a 16" baffle for the fuge to run over I turned out nice looking ... Did the baffles hold the water? NO! They didn't bow but the weatherstripping wasn't tight enough to keep the whole sheet from sliding around when there was water on one side I fixed it by adding spacers (This almost negates the "removable baffle" aspect) There is a problem with the skimmer height But I'll address that in my next post I added the ato sensor A was in the return sensor B was in the plastic bin of rodi water Using mode A I made it work, but then it stopped Still diagnosing why! Next post will cover the move, and the tank itself Link to comment Share on other sites More sharing options...
PotomacBoater July 21, 2012 Author Share July 21, 2012 The day of the move did have a few hiccups Hopefully others can avoid them ... It took almost 3 hours to pack a pick up with 90 Gallons of Water, Tank, Stand, Etc (even longer to put it back together since I tried a vinegar bath for most of the submerged components) I kept the existing livestock alive in the 55 G drum if you have more valuable fish, make sure you have a plan to aerate the water With 2 55 gallon drums in the truck, and all the live rock in there We had to put the drums in the truck and then add the water 5 gallon bucket at a time If we didn't have an inverter in the truck (or an outlet in the garage at the destination) then we wouldn't have been able to get the water OUT of the drums with a pump (siphon would still work) A drilled tank can't sit in the bed of a truck We used 2 x 6's under the tank to raise up the tank and not crack the bulkhead keeping the same water reduced the cycle time to about 4 days (It would have been a good idea to test all the water parameters BEFORE the move to know what was normal ... amonia will go up with agitation, but ph and salinity shouldn't change) having pre-mixed saltwater at my house to top off the tank was useful and necessary putting the sump in before the tank went on the stand was also necessary (and had to be pre planned) the stand I have (with center braces) can fit a 28G sump, but couldn't put it in without coming thru the top Remember to keep all your probes wet (paper towels and a little water in a plastic bag worked for me for over a week) I moved the sand in the tank with about an inch of water (be careful of weight on the bottom glass, but again it did work for me) Take a picture of the aquascaping before the move but CHANGE IT 100 times after you get it moved I did NOT clean any of the algae off the rocks (but again, I didn't have coral or fish that it could harm) I considered it natural filtration and great fish food for herbivours By the end of the first day, I did have the return pump going no skimmer no heaters no ato no controller no waver makers (that was day 2) Just a filter sock (changed after a day or two) Link to comment Share on other sites More sharing options...
PotomacBoater July 31, 2012 Author Share July 31, 2012 RODI water in my system Everyone tells me that using RODI water in my system makes for a healthy tank. My goal is minimum maintenance (or atleast minimum emergency maintenance) so I borrow the first 55+ gallons from a friend with an RODI system for the inital setup (most people only store 55 gallons, so it took two days for him to make enough and lots of containers to hold them mix them with salt and leave a pump to keep everything mixed. After having the tank for a week or two, it was time to start looking for an RODI unit Almost every used RODI unit costs $100. I didn't think it was worth it, since you can buy a new one for $180 with brand new filters The one I wanted was ... http://www.thefilterguys.biz/ro_di_systems.htm The requirements (atleast for DC) is a Chlorimine filter and a 75 GPD capacity (100 GPD units aren't very efficient, and 150 GPD is way more then I would need) I wanted a Pressure Gauge but they are cheap and easy to find $10 on google AND I'm not sure if the initial pressure is good, how it would go ever good down (clogged filter I guess) TDS meter is a must (mine is built in, and measures before and after, but the handheld works too) Bypass is a must to keep your media alive longer (it gets the old water out of the system before new water is "processed") I ended up buying a used unit from a member. Ofcourse, I made a few mistakes ... I didn't have him show me it in operation before I bought it I didn't take a picture of how it was set up. The kind of unit I bought was ... http://www.purelyh2o.com/index.php/h2o-test-meters.html?page=shop.product_details&flypage=flypage.tpl&product_id=67&category_id=80 PurelyH2O Optima Chlorimide Advanced Nice system 6 stages (which might be overkill) Stage 1: is a T-33 Taste and Odor removal filter Stage 2: 1 micron poly spun sediment filter Stage 3: 1 micron solid carbon block Stage 4: (GAC) Catalytic carbon Stage 5: 75 GPD Dow Membrane Stage 6 : Refillable MBD-20 Nuclear Grade Deionization chamber The first and second stage seem to be redundant (which I only found out after I bought a new T33 filter) I may remove it and see if it changes my readings the Catalytic Carbon (GAC) is where all the Chlorimine filtering is done (I didn't know that, so hopefully someone will learn something from this) My plan was to install this under the bathroom sink. (while leaving the sink functional) The picture shows my first attempt to connect it, I got one of these ... http://www.amazon.com/Brass-Supply-Stop-Extender-Tees/dp/B0078S1Y0M Two problems with this design I LIKE the valve that I added, just to turn the on the rodi (that way the sink is always on) BUT it should have been on the rodi end of the hose, instead of the side closer to the outlet) And, if you look at the picture, this is on the hot water (oops) Should have been on the Cold water I've already replace the pressure valve the T33 filter and extended the output line to run into the other room for storage The plan is to drill the pvc drain from my sink (on the top) and insert the waste line and use silicon to seal it (hopefully that will hold since there is no "pressure" on a drain) The rate I'm seeing is 1 gallon of good water every 15 minutes = 96 GPD (which is over the 75gpd capacity - I'm not sure how I screwed up using a stopwatch) Update: Ofcourse, I broke the thing I moved the tds meter enough times that one of the wires broke from the wiring harness (too close to the bracket to sodder) One of the sensors died (the "before" sensor) but the other sensor is fine I found the part ... SP-2: Dual TDS Sensor Probes for the DM-1 http://www.tdsmeter.com/products/sensors.html A brand new meter is $35 but the part is only $12 http://www.freshwatersystems.com/p-1390-hm-digital-sp-2-dual-tds-sensor-probe-for-dm-1-dual-inline-tds-monitor.aspx I did consider buying a new meter and keeping the half one I had that would give me 3 sensors. Maybe later in life I will add two, right now, I'm just using one on the output of the DI resin. screw the input reading! TDS is still reading 2, that means I need new DI Resin I don't want to deal with storing di resin and keeping it out of the air, so I don't want to get a bag of resin instead I'll get the full filter, and replace it but only once it goes to 3 or 4 (getting every last day out of this old setup) Link to comment Share on other sites More sharing options...
DaveS July 31, 2012 Share July 31, 2012 I would get that thing off the hot water line if you haven't already. There are lots of metals, rust, and other contaminants from the hot water heater will reduce the longevity of your filters. Link to comment Share on other sites More sharing options...
PotomacBoater July 31, 2012 Author Share July 31, 2012 I figured that out very quickly and re-did it on the cold water line I didn't keep any of that rodi water, just hope I didn't ruin any of the filters Link to comment Share on other sites More sharing options...
smallreef July 31, 2012 Share July 31, 2012 There is also a waste water clamp to put it on the drain line so you dont have to silicone it in place... Link to comment Share on other sites More sharing options...
Coral Hind July 31, 2012 Share July 31, 2012 Here is the drain saddle smallreef is talking about. http://www.airwaterice.com/product/WE-CU114B-Q/Drain-Saddle.html Link to comment Share on other sites More sharing options...
PotomacBoater July 31, 2012 Author Share July 31, 2012 exactly what I need, thanks! Link to comment Share on other sites More sharing options...
smallreef July 31, 2012 Share July 31, 2012 Though I have to say I set up my RO/DI yesterday and I actually have my waste water going into a container (way different than my RO container) so I can use the water to water my plants and grass (my patch of grass in the front yard is like 3x6, lol) I just HATE throwing that much water away.... Link to comment Share on other sites More sharing options...
PotomacBoater July 31, 2012 Author Share July 31, 2012 I've read about lots of uses for waste water (washing machine, etc) but I live in a condo - No lawn, No plants, and no family around that I need to do a load of laundry every time I need to fill my RODI Reservoir Link to comment Share on other sites More sharing options...
smallreef July 31, 2012 Share July 31, 2012 LOL but but but.. just think of the waste!!!! I see what your are saying... that makes sense for your situation... Link to comment Share on other sites More sharing options...
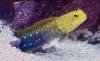
PotomacBoater August 14, 2012 Author Share August 14, 2012 (edited) Current Lifestock at Cycle + 30 Days So far I've only added the cleanup crew The tank came with a lot of algae on the rocks and they have been dining nicely I currently have ... 2 Astraea snails 6 Zebra Turbo Snail 20 Assorted Hermits 10 cerith snails 8 bumblebee snails 4 Nassarius snails 1 Large Banded Coral Shrimp 2 (down to 1) emerald snails 1 sand sifting sea star 1 bristle sea star I hope to add 2 Cleaner Shrimp, 2 more emerald, and 2 Sally Lightfoot crabs I'm barely feeding them. Just a few pellets from time to time they seem to be doing well I like the variety, they seem to be working well together Next ... FISH Edited August 14, 2012 by PotomacBoater Link to comment Share on other sites More sharing options...
PotomacBoater August 14, 2012 Author Share August 14, 2012 (edited) Not sure why all the pics are getting dropped (they are in the gallery and they've linked before ...) Edited August 14, 2012 by PotomacBoater Link to comment Share on other sites More sharing options...
smallreef August 14, 2012 Share August 14, 2012 LOL...I couldnt tell ya,,, i use photobucket... but you are going to hate all those hermits once they start growing and killing the snails for the shells... I started with 6 and now am down to 3 in my 50g... thats a good number... the snails move faster now, lol now for some pictures that actually work???? Link to comment Share on other sites More sharing options...
jimlin August 15, 2012 Share August 15, 2012 i am also not a fan of the hermit crab. i prefer worms. they do a pretty good job of eating the left over food. Link to comment Share on other sites More sharing options...
jaddc August 15, 2012 Share August 15, 2012 (edited) Looking like a nice start! The hermits are always jonesing for a new shell. If you get a bag of empty Astrea and Turbo shells that will prevent snail decimation. IME they rather fight each other for empty shells than tackle a snail. Edited August 15, 2012 by jaddc Link to comment Share on other sites More sharing options...
PotomacBoater August 15, 2012 Author Share August 15, 2012 One hermit is already wearing an astrea shell, but other then that, they just seem to be attacking each other there are a few very large empty shells in there, I figure when the big guy moves up, his shell will become available and work its way down the line If the hermits kill all the snails, then we will get more snails or I'll get a fish that likes to eat hermits ;-) Link to comment Share on other sites More sharing options...
jaddc August 15, 2012 Share August 15, 2012 Yup -- they'll be fine. And the hermits are always amusing to watch IMO. Link to comment Share on other sites More sharing options...


Recommended Posts
Create an account or sign in to comment
You need to be a member in order to leave a comment
Create an account
Sign up for a new account in our community. It's easy!
Register a new accountSign in
Already have an account? Sign in here.
Sign In Now