brobak
-
Posts
220 -
Joined
-
Last visited
-
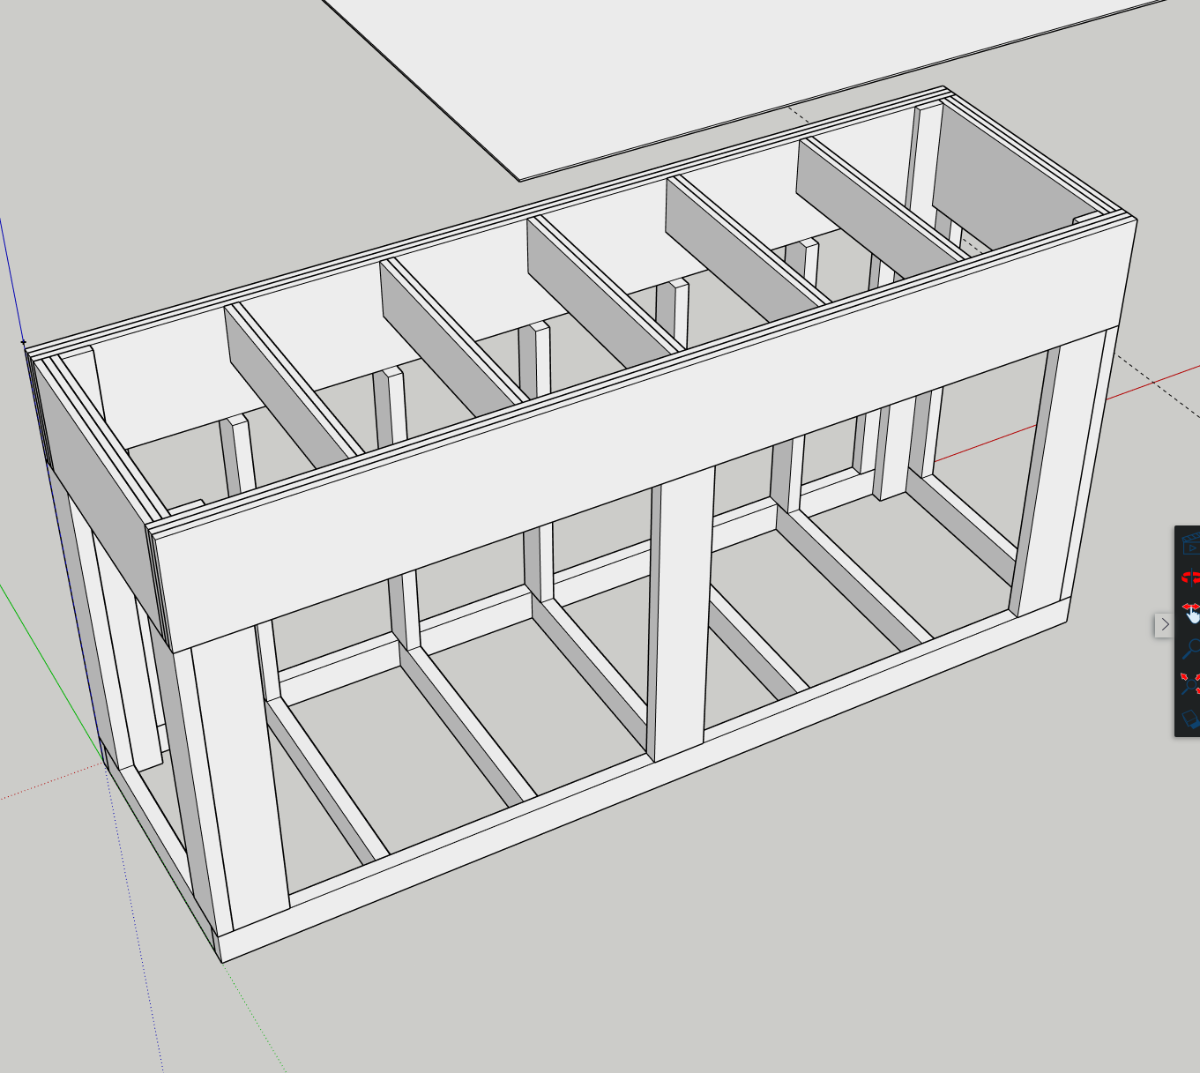
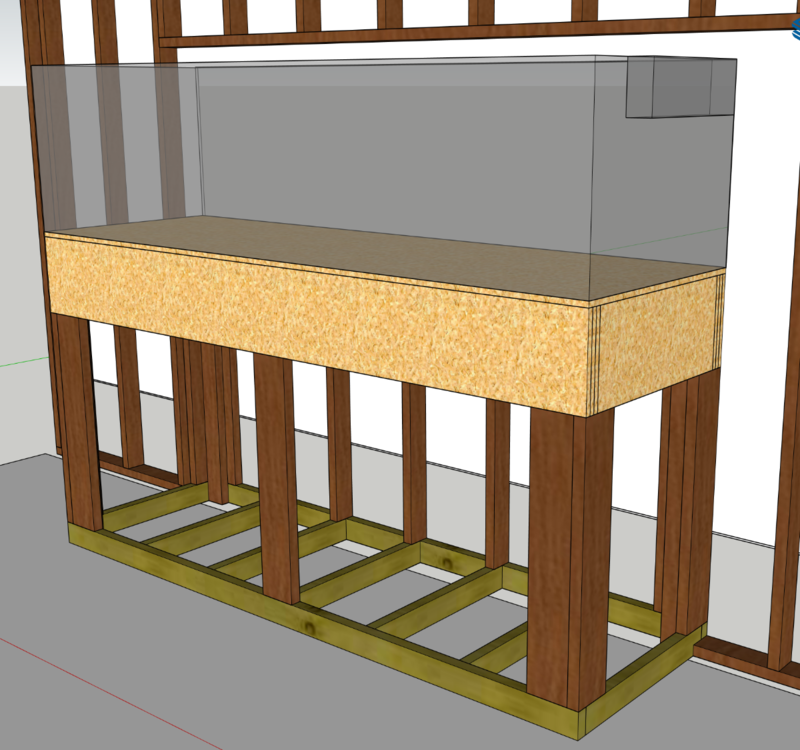
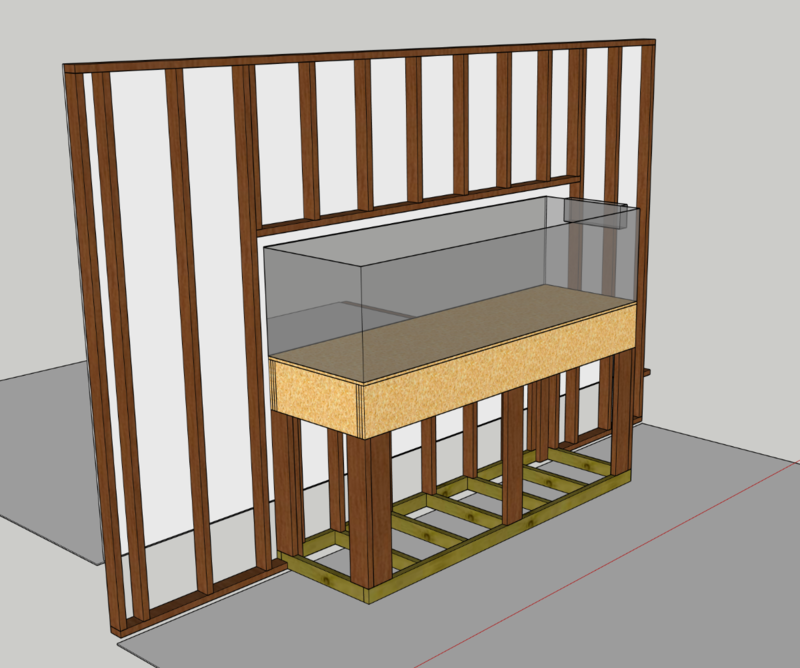
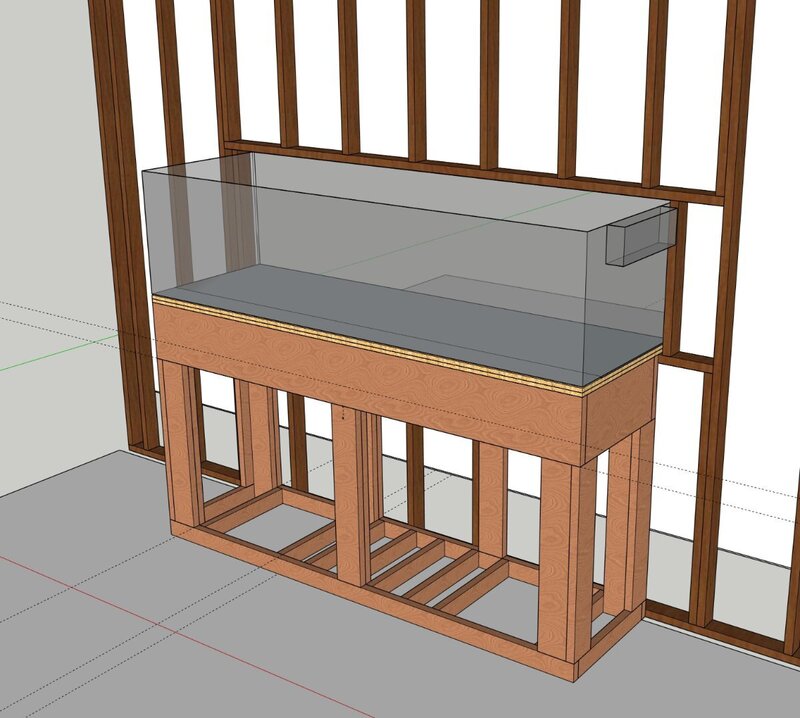
Some more updates and moving towards final forms of the stand. I've decided to use laminated plywood members for the top of the stand, along with pressure treated lumber for the bits that will touch the concrete. Spent a few hours today in sketchup to get the new stand laid out. I've also removed the cabinets from the previous picture, and I expect the plumber this week to get the sink in place. Electrical is still pending more quotes.
-
I appreciate the nod towards the plywood, but I don't really have the tools that I would need to work with larger sheets like that. I do plan to tie the stand into the wall, and to put some 45 degree diagonal braces in to prevent racking and such on the back side where I don't need access.
-
@Oragami Yep, I see what you have going on there, and I can accommodate that easily in my plans. Would you mind sharing the load calculator spreadsheet you have? No big deal if you dont want to, but I'd love to be able to run some different configs/calculations.
-
@Origami this is fantastic! Not too late at all, as I'm still several months away from water in the tank and finalizing the whole project. Just to be clear, are you plans calculated with no middle brace at all and just the open span? I'm actually surprised that it'd work with 'just' 2x8's. Without the benefit of this calculator, I had just upped my plans to use 2x12's around the top, 2x6's on the legs, with one center brace in the front and two in the back, with a 2x4 base. I can trivially upgrade those plans to a 2x6 base, and I really like the idea that you have there where they are laying flat and are secured to the concrete floor vs vertically oriented, which will save me a few more inches in height. Attached is what I had come up with without the benefit of this calculator.
-
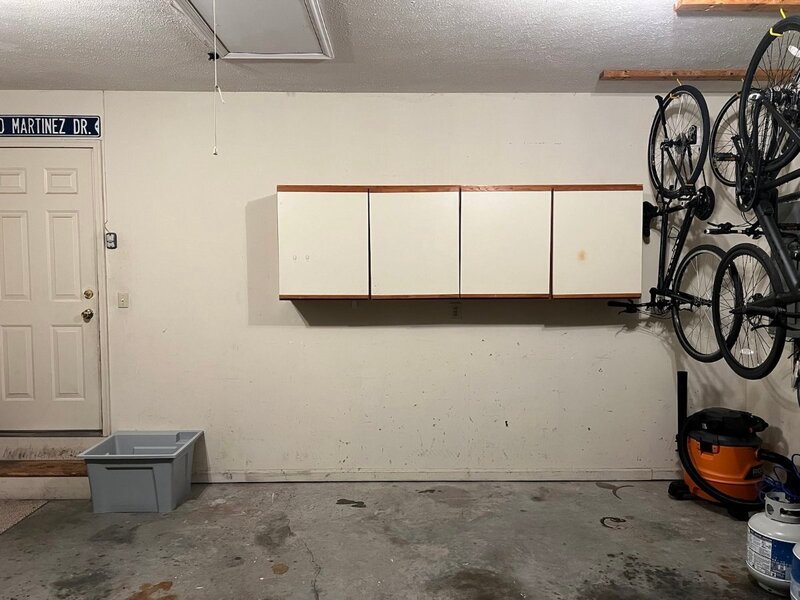
Cleaned out the garage over the holiday. Still need to remove the cabinets, but they are ALMOST the right placement and size that the final tank will be. Also, have the plumber coming in the first week of January to install the water and drain where that gray sink is sitting on the floor.
-
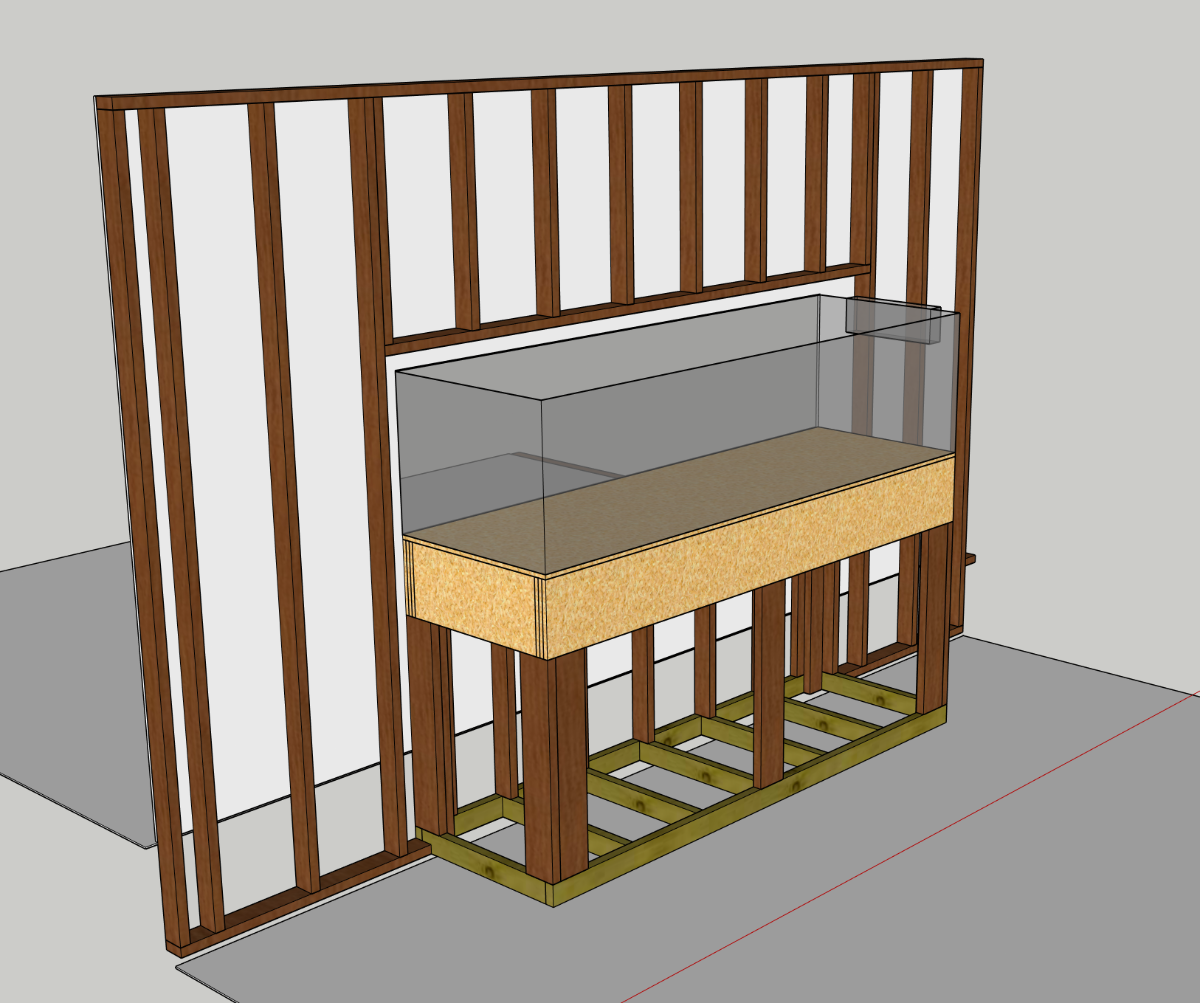
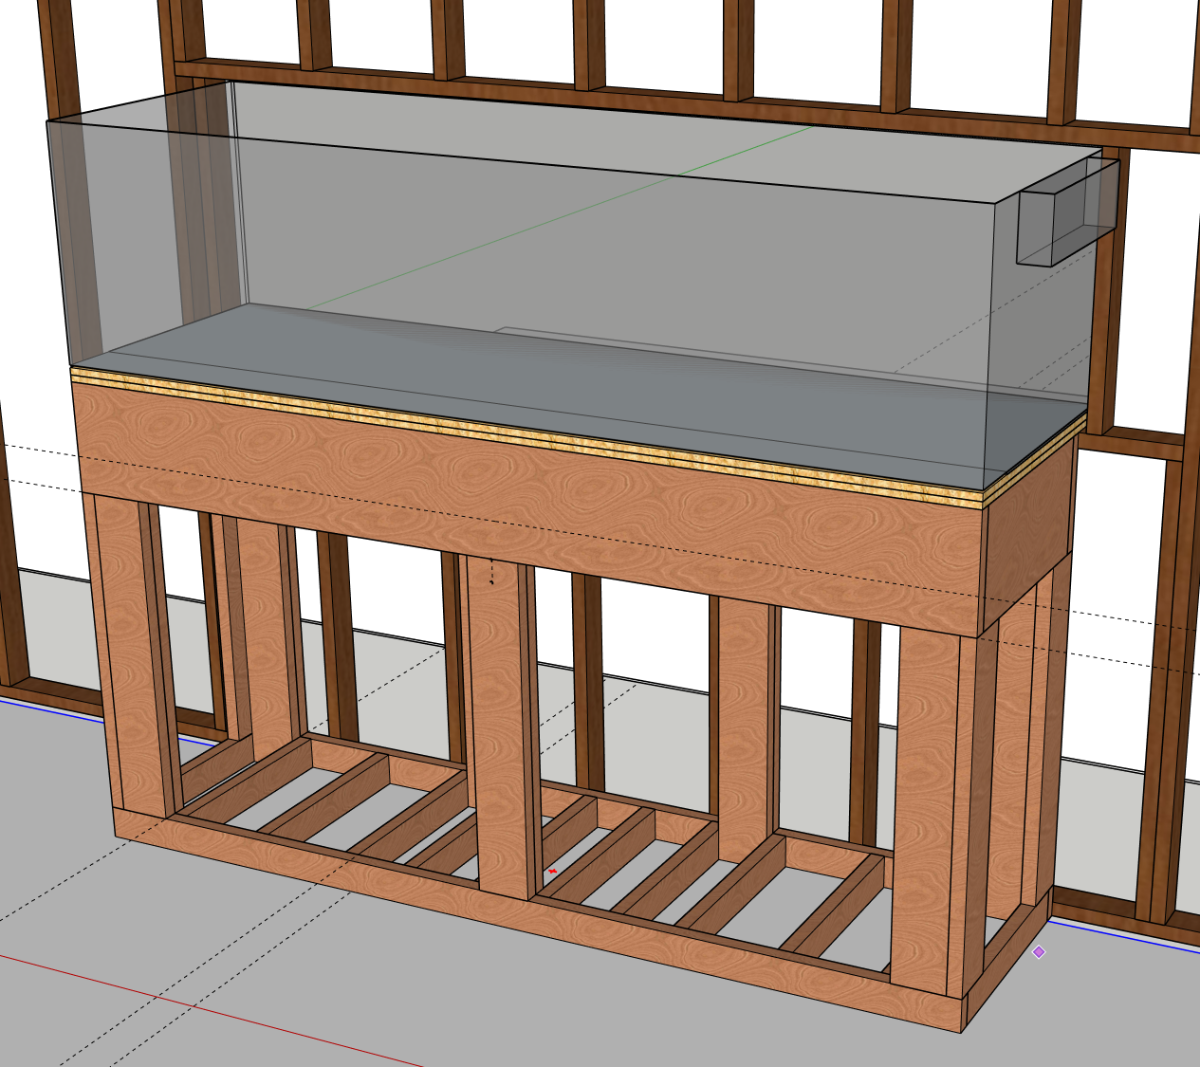
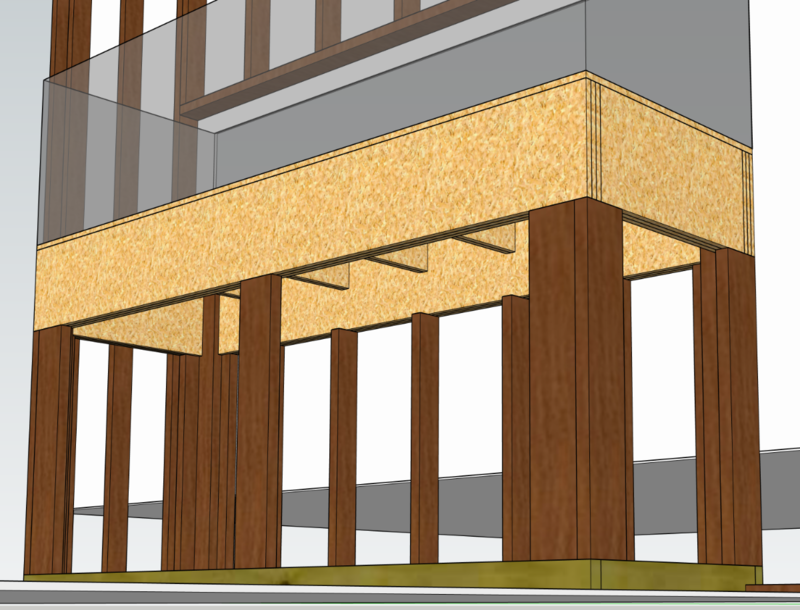
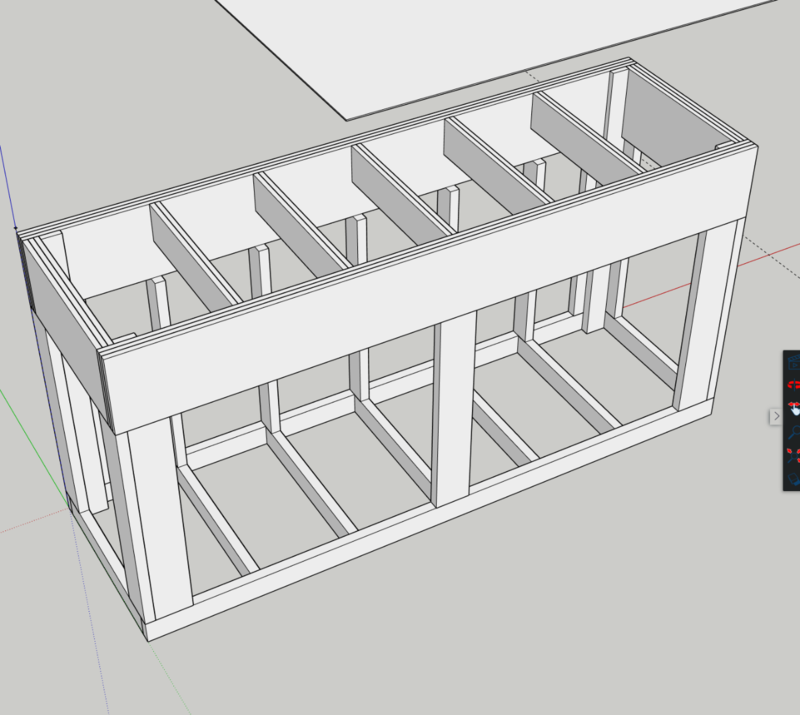
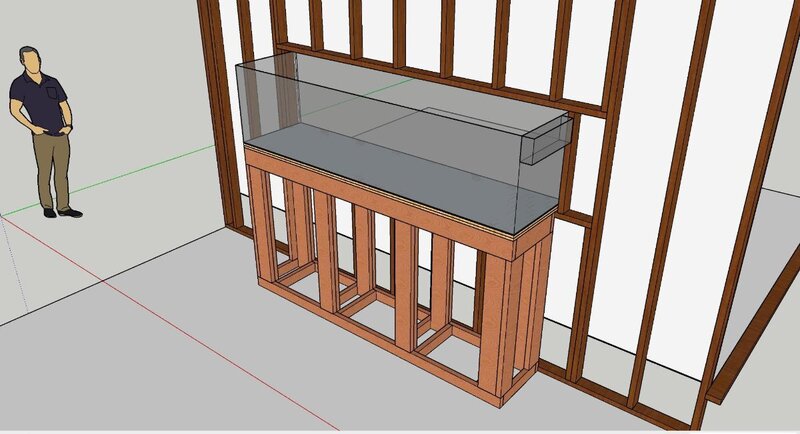
Just posting a quick update. The tank size and stand plans have changed a bit. I measured the old plan, and found that I wouldn't be able to fit a sump tank wider than 14", which is very limiting. So...I've upgraded the tank to now 96Lx30Wx24H to get the extra under stand space for a reasonably wide sump @ 18". I also changed the top of the stand to 2x12s so that I could delete one of the two front stand braces and get down to one, for better access to the sump. Quotes are coming in for the plumbing and electrical, but since it's the holidays, I don't expect to have them all in until after the new year.

-
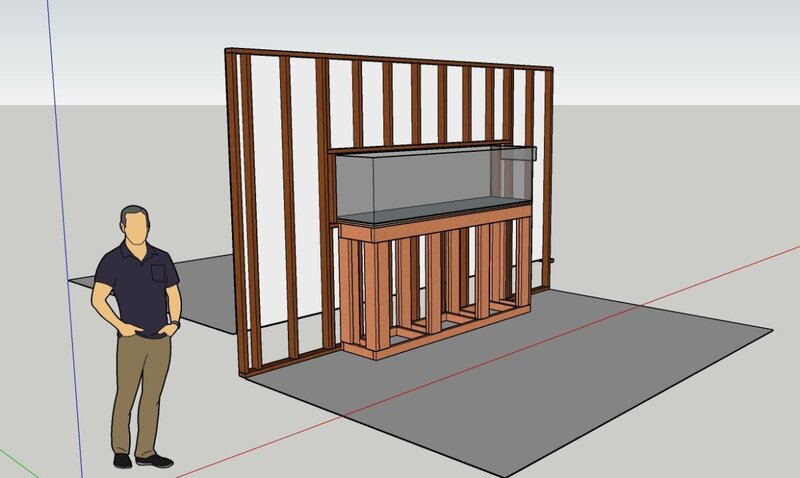
I'm planning out an unusually tall stand for an in-wall tank build from my garage through to my den. Given there is a 14" step up from the garage floor to the den, the stand will be over 50" tall, vs the more typical 36" stands. I'm planning to go by the bog standard plans for DIY wooden stands you see in use all over the internet. But given that I have a little more height than usual to work with, sI wouldn't mind losing a bit of it to the top frame if it meant I could have only one middle support leg vs the more traditional two required when you use 2x6's, if that is even safely possible. I was wondering if anyone knew the right size lumber to use to make sure it wouldn't bow too much with just the one middle support. 2x8? 2x10? 2x12? More? Double up on any of those? Would appreciate any insights. Thanks!
-
@BowieReefer84: I have an avast on my 60g anemone tank now and it's been great. My only mistake was to put it on the main tank vs feeding into the return pump, since it tends to grow algae in the tube that needs to be cleaned decently frequently. Love it though, and will def use it on this tank. Appreciate the thoughts on the painting of the sides. I can always take a look at it, and see if it does the mirror thing, and then if not, I can paint it afterwards easily enough after the first test-fill. I have some space limitations that mean I won't be able to put the sump anywhere except under the stand. My current sump on another tank is on its own, in a separate fish room behind the display, and its been nice having it there. I'm hoping that the taller-than-usual height of this stand (over 52") will leave me a decent space to deal with the sump vs more normal 36" stands. @YHSublime Scott is actually a good friend of mine. Been over to his place a bunch and played around with that tank. That thing is nuts being up so high heh. He's been consulting for me outside of the forums as much as I can bother him. @howaboutme Long term, an insulated garage door is in the plans. The walls and ceiling are already insulated, and I'll eventually put a mini-split into the garage to condition it. I plan to caulk the gaps around the tank, and caulk the trim to the front of the tank to help with air loss to the garage. I can also use some weather stripping under the trim framing to stop air leakage from the den into the garage. We'll see how that works. As I mentioned, I also plan to build a 'temporary' insulated room, effectively a cooler made out of 2" pink rigid insulation board that will go around the tank, flush on all sides, with the wall along the back of the tank removable via some magnets and 3d printed handles. I know it won't be air tight, but it should help somewhat while I work on affording the garage upgrades to conditioned space.
-
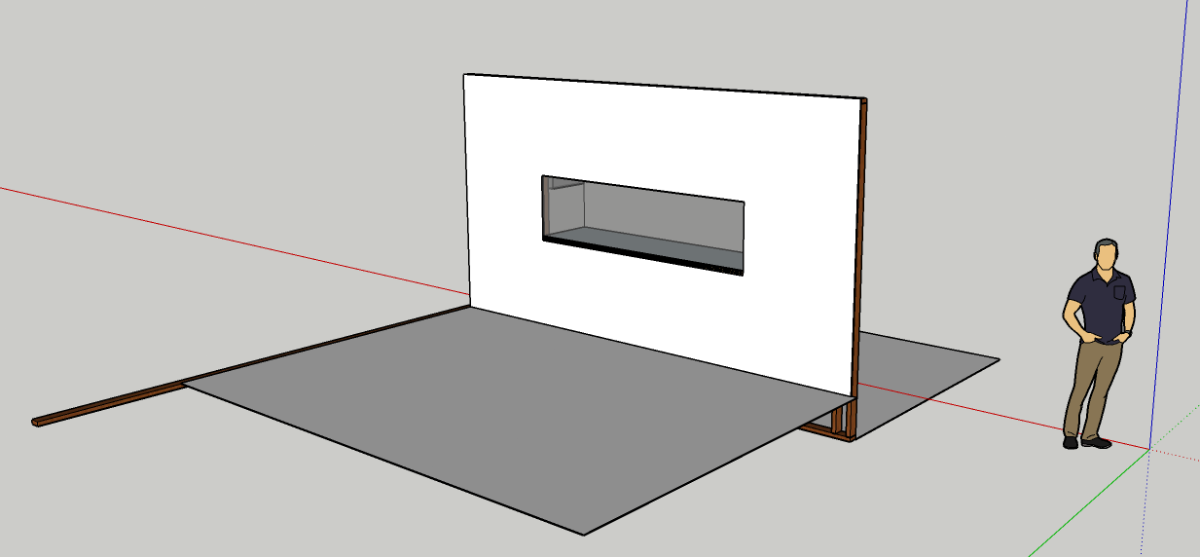
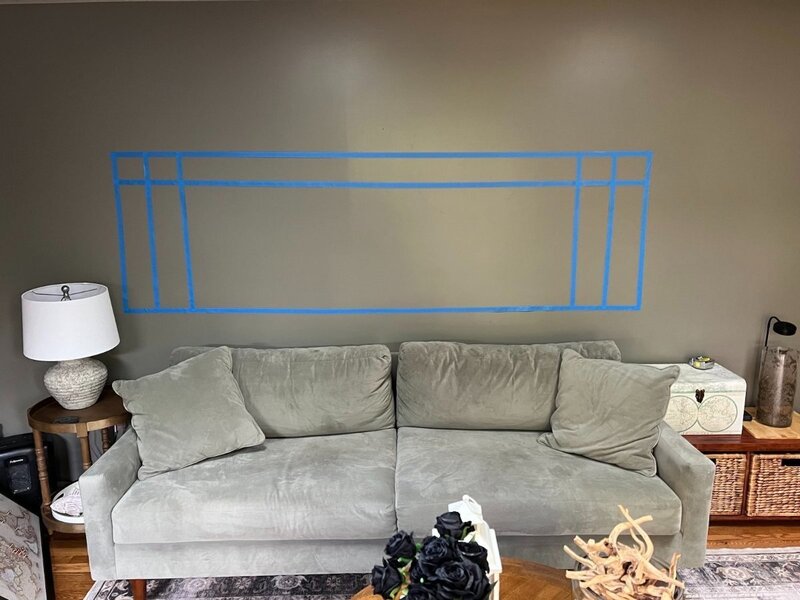
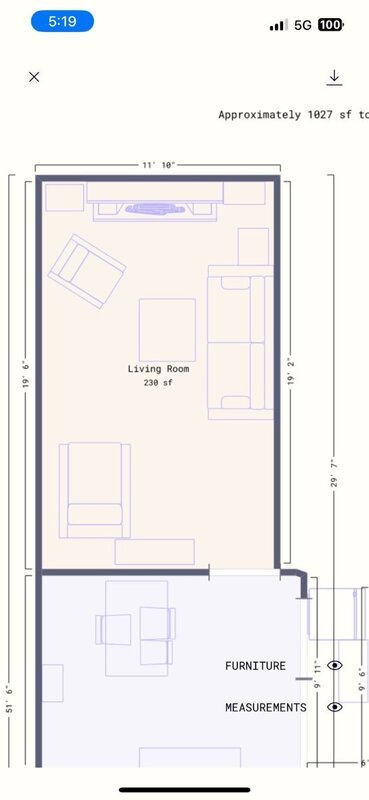
Having secured permission from my wife, based primarily on the promise that that 'all my crap will now be in the garage from now on', I've begun taking steps in earnest to get this project rolling. The Tank: I'm looking at a 96Lx30Wx24H tank that will be located in my garage, and displayed flush on the other side of my wall facing the den. The glass will sit just shy of the drywall (due to the trim), and will be framed like a picture. In the attached pictures, you can see where I've taped off approximately where the tank will come through the wall (the tape lines are for 6 foot, 7 foot and 8 foot tank lengths [settled on the full 96 inches] and 24" and 30" heights), along with the floor plan of the den and furniture lay out, as well as some initial sketchup plans for the stand and tank. I'm considering a 'notched' external overflow from glasscages.com, set back a bit towards the back of the tank so that it can clear the wall joists (as you can see in the sketchup), but I may still just simplify the whole thing and do a more standard shadow box style low profile internal overflow to save a ton of money. I want to keep the back length of the tank free of any permanent, hard-line plumbing so that I can use a small painters step ladder for maintenance in the tank more easily. Front glass is planned to be low iron, with the other three sides being painted black. Sump: I'm looking at using a 100 long (72x18x20) for the sump. The only thing I've totally got nailed down about the sump at this point is the use of a roller mat filter vs socks (or nothing), and dual return pumps that will primarily come up along the left hand, short side of the tank. Automation: I have accumulated a significant amount of Apex controller gear over the years from various other tanks, and since this will be my end-stage tank, I'll be shutting down the 60g anemone cube I have the apex stuff running now, and pulling all the gear up to this tank to run the automation. Infrastructure: To the left of the tank, I'm having a drain and water supply put in, along with a 36" stainless steel utility sink, and there will be two, 20 amp 240v circuits put in on either side of the tank for electrical (the garage needs more outlets anyways, so while this may seem overkill, I'm actually having 6 more outlets put in around the garage for other purposes anyway, so whats one more circuit run). The wall is non-load bearing, though early plans had me quite worried about having to put in a serious beam to carry the roof load across 8+ feet. Luckily, I have a flying-truss roof structure (who knew), and now it's just a framing/drywall job. Odds and Ends: The garage is non-conditioned space, and there isn't sufficient length to the garage to allow me to build out a fully enclosed and insulated fish room, and another firm requirement for this tank is that it doesn't prevent my wife from parking her car in the garage upon completion. With that in mind, I'm considering fitting removable insulating panels around the tank, fixed to the stand, floor and ceiling with a combination of magnets and 3d printed angle brackets to secure them. The two side panels will be mostly permanent, but the back panel will be removable for maintenance. I'll be running lids on the tank to help hold heat and prevent humidity problems, but I'll still probably vent that room using either a few small computer fans through the insulating panels, or else using a ceiling mounted bathroom style fan, venting outside via dryer vent style outlet. I will overspec both heating and cooling, and monitor how things go for a season, with eventual plans to condition the garage with a mini-split and an insulated garage door to further alleviate any issues. Next Steps: I have more contractors coming this month to quote me out on the plumbing and electrical work, and expect to have walls open in January of this year to get started on the work. Next steps for me are to get the contractor quotes, and keep updating the sketchup as the plan refines.


-
PM me for a link.
-
No thats not hard. Most of the plastics don't shrink very much on cooling. You just need a cheap set of calipers to measure what you want, then add a teeny bit for wiggle room. For instance, when I made those frag plugs, and assumed a 1.25 inch hole, when I made my design, I made it 1.3 inches, or .05 inches larger than specifically required.
-
If you are feeling froggy the 'right' answer for design is usually Fusion360, just have to find their hobbiest version on their site. They hide it pretty well. If you want more lego-style stuff, you can go to tinkercad.com and check things out there. Thats what I learned first. It's much easier than Fusion, but I wish I had learned fusion. There is definitely a steep learning curve, but there's a guy on youtube that does fusion tutorials that is a good place to start.
-
I posted a thread here on DIY a few months ago about printing things for the community just because I enjoy printing and trying to give back. My printing come in waves. I'll get an idea and start to work on something and make a ton of prints all at once, and then I'll let it sit for a few months. Tell you one thing, if you are planning on getting one, don't get a Chinese knockoff printer for cheap. They often are very unsafe in terms of thermal protection, and the wiring and power supplies tend to be sub standard. If I was going to get started, I'd go for the Prusa Mini. The only issue there is that there is an enormous wait at this time due to #1 the popularity and #2 the corona virus causing supply issues. A close second on the cheaper end to get your feet wet might be something like an Ender 3 Pro. Look to make sure any printer you get has a heated bed and if at ALL possible, automatic bed leveling (also sometimes called bed leveling assist). If I was looking on the higher end of printers, I'd go with the one that I have, which is the Prusa MK3S. I got it as a kit and built it so that I would know how it works when things invariably have a hiccup. Took me about 8 hours to build, and I could probably do it a second time in maybe 4-5 (FOLLOW THE **ONLINE** guide, it has really good comments vs the paper guide). Anything more expensive than the MK3S and you're really just paying for commercial support at that point, and the quality doesn't really go up meaningfully given that the next steps up triple the price (or more). If you have any questions, just let me know.