Search the Community
Showing results for tags 'Write-up'.
Found 1 result
-
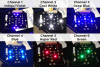
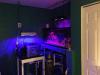
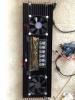
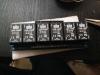
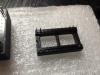
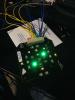
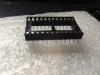
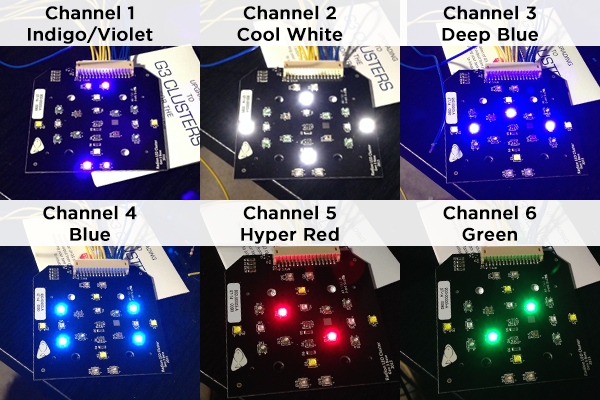
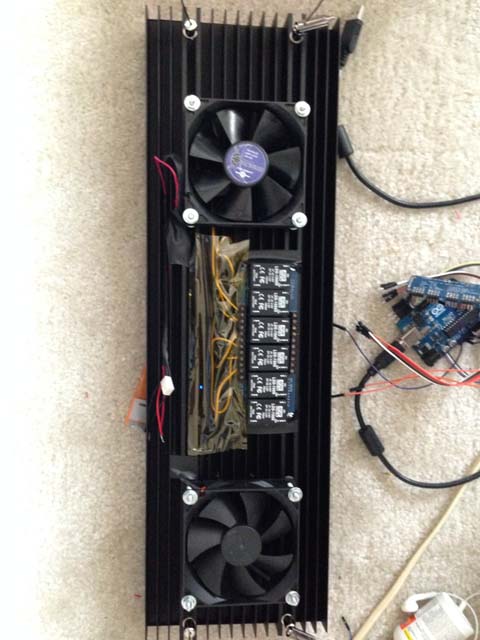
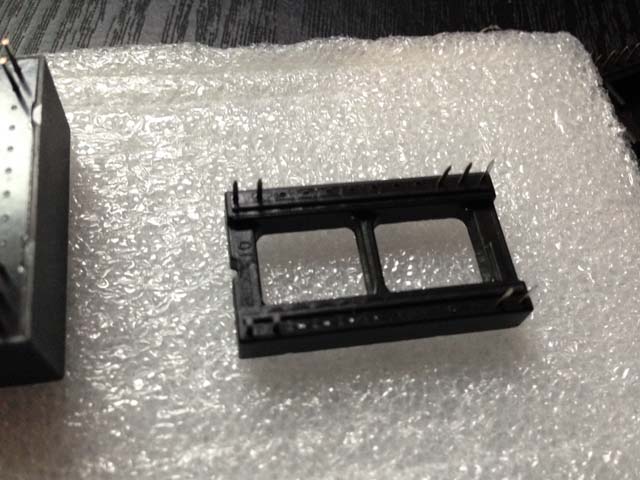
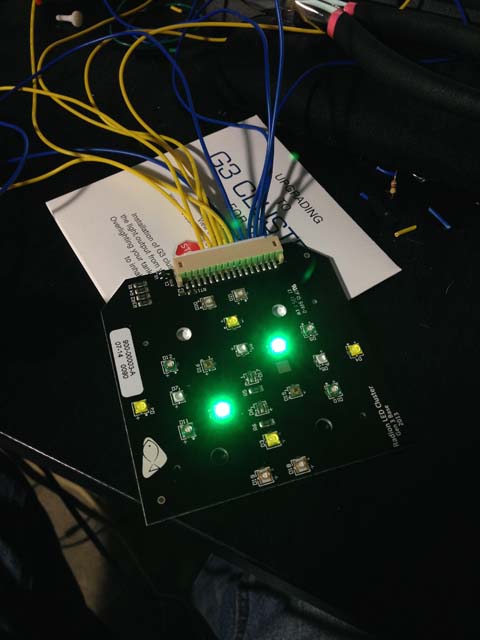
Intro: Some time ago I stumbled across a tread on RC that someone started when he upgraded his radion fixture from G1>G2, and he attempted to re-use the old pucks in a DIY fixture. I decided I was going to try to do the same thing as a prototype for my 265 gallon build, so far I've tested out and tried out both Lumias (5.1+5.2), they are both nice, but finer control was needed in my opinion. cost wise a Lumias fixture would probably run round 300-400 if you put two pucks on one fixture. So to the write up... The pucks and Wiring: As far as I understand the G2 and G3 pinouts are exactly the same, I will write about my experience with the G3 (not pro). The puck has a harness connector on it with 16 pins, pins 1-12 are used to power the leds, it's unknown for me what pins 13-16 are used for, some guess that it could be used as a temp sensor circuit, version identifier circuit, or just status circuit... the puck is fully operational without plugging anything in those pins Color and drive info, Pin Numbers + - Channel 1: Cool White, CREE XT-E 5W each max current 1500mA, 2(+), 9(-) Channel 2: Deep Blue, Osram Oslon Square, 4W each, max current 1500mA, 3(+), 8(-) Channel 3: Blue, CREE XP-E, 3.5W each, max current 1000mA, 4(+), 7(-) Channel 4: Green, CREE XP-E, 3.5W each, max current 1000mA, 6(+), 11(-) Channel 5, Hyper Red, Osram Oslon SSL, 3W each, max current 1000mA, 5(+), 12(-) Channel 6, Indigo and Violets, Semileds C35, 2.5W each, max current 700mA. 1(+), 10(-) The pucks needs to be wired in series, meaning the the negative (-) pin on puck one goes to the positive (+) pin on puck 2, so for example, channel one will be connected as follow: Driver (+) > Puck 1: Pin 2 Puck 1: Pin 9 > Puck 2: Pin 2 Puck 2 pin 9 > Driver (-) This part of the build is the most frustrating one since it will take forever to crimp and connect those pins, I've tried using automated crimber, but had mixed results, so I've ended up starting the crimp with a needlenose pliers, make the crimp with the tool, re-strighten the connection with the pliers again, It must have taken me at least 45 minutes to get all the wiring done on the pucks end. PCB Prepping: When buying the PCB for the drivers from Coralux it still requires some soldering done to connect the terminals and the drivers. I decided to use the DIP sockets so i don't have to hand solder each driver, so incase that I would like to upgrade in the future i would just need to swap out the old/bad driver and plug in another one in it's place. When buying those sockets, they come with 24 pins.... we only need 9 pins for each driver. Using a needlenose pliers you can push the unused pins out, so it looks something like that: After you are done making all 6, solder them first, and only then solder the wire terminals. Attaching the Pucks / Drivers / Fans I didn't take as many pictures as I wanted, since I had to go back and fourth to home depot to look for bolts and such. I have used #6 bolts for connecting the PCBS (pucks and driver board) for the drivers board i used #8 washers so they will fit in the groove in the back of the heat sink. in order to connect the puck to the heat sink, I drilled a hole big enough to barley fit in a #6 nut, then forced the nut with some glue into that hole. after that, I applied the heatsink compound (comes with the pucks) and screwed in the puck in place. For the fans, I used 1.5" #8 bolt, with #8 washer and #8 self locking washer (could probably be used without) Connecting to the arduino controller (could probably use storm x too) Since I am using the arduino mega as my controller I will only address that one, I think you can connect up to 16 channels on the storm x too. To improve the pwm resolution, i've ordered the PWM servo extender from Adafruit, that gives me 16 pwm channels, at 4096 steps vs only 256 steps that the pwm channels on the arduino provides. Arduino Code used: #include <Wire.h> #include <Adafruit_PWMServoDriver.h> // called this way, it uses the default address 0x40 Adafruit_PWMServoDriver pwm = Adafruit_PWMServoDriver(0x41); String status = "day"; void setup(){ // PWM stuff from the adafruit library pwm.begin(); pwm.setPWMFreq(1600); // This is the maximum PWM frequency // save I2C bitrate uint8_t twbrbackup = TWBR; TWBR = 12; // upgrade to 400KHz! // Setting the relays for the fans, turning them on. pinMode(22, OUTPUT); pinMode(23, OUTPUT); digitalWrite(22, LOW); digitalWrite(23, LOW); // Since i am not using a real controller yet, just to turn the lights on // and off, I added a variable for day and night. so i just need to // switch the variable form day to night to switch the lights. if(status != "day"){ // Lumia 5.2 (FRAG TANK) pwm.setPWM(0, 0, 3 ); // white pwm.setPWM(1, 0, 4 ); // royal blue / violet pwm.setPWM(2, 0, 4 ); // royal blue / violet pwm.setPWM(3, 0, 5 ); // tourquese pwm.setPWM(4, 0, 25); // Royal Blue); // Radions G3 (FUGE TANK) pwm.setPWM(5, 0, 1 ); // Cool White pwm.setPWM(6, 0, 1 ); // deep blue pwm.setPWM(7, 0, 1 ); // blue pwm.setPWM(8, 0, 1 ); // green pwm.setPWM(9, 0, 20); // red pwm.setPWM(10, 0, 25 ); // Viloet // Indigo } else { // Lumia 5.2 (FRAG TANK) pwm.setPWM(0, 0, 2500 ); // white pwm.setPWM(1, 0, 3500 ); // royal blue / violet pwm.setPWM(2, 0, 3500 ); // royal blue / violet pwm.setPWM(3, 0, 2000 ); // tourquese pwm.setPWM(4, 0, 4095); // Royal Blue); // Radions G3 (FUGE TANK) pwm.setPWM(5, 0, 2500 ); // Cool White pwm.setPWM(6, 0, 3200 ); // deep blue pwm.setPWM(7, 0, 3200 ); // blue pwm.setPWM(8, 0, 1500 ); // green pwm.setPWM(9, 0, 2000); // red pwm.setPWM(10, 0, 4000 ); // Viloet // Indigo } } void loop(){ // nothing in the loop --- YET! } I've used Cat 5e cable to connect the pwm single lines and the fans. and I used 18/3 cable to connect them to the power supply. Buying List: 16 Pin Connector (Digi-Key) $.40 each Header Crimp (I think that what it's called, Digi-Key) $.02-$.05 each 20" Heat Sink, splash guard and hanging kit $42 92mm computer fan (used 2) (Amazon) $9.99 each 6 LDD-H up board (CoralLux) $13.99 24 wide DIP Socket (not a must, but will make replacement of drivers / upgrades easier) $.41 each LDD-H Driver (CoralLux) (I used 2 1000's and 4 700's) $6.99 each Pucks -- price includes 2 of them (almost forgot ) $150 for regular version, $250 for pro. if you go with pro you might need to look up the LEDs used there and switch up some of the LDD drivers. TIR Lenses.. those are the new lenses used on the new Radions, regular lenses are $30, wide angle are $35