VA Reefdog
BB Participant-
Posts
141 -
Joined
-
Last visited
Content Type
Profiles
Forums
Gallery
Events
Store
Everything posted by VA Reefdog
-
Greg's 120 Gallon Mixed Reef
VA Reefdog replied to VA Reefdog's topic in Dedicated Tank (Build) Forum
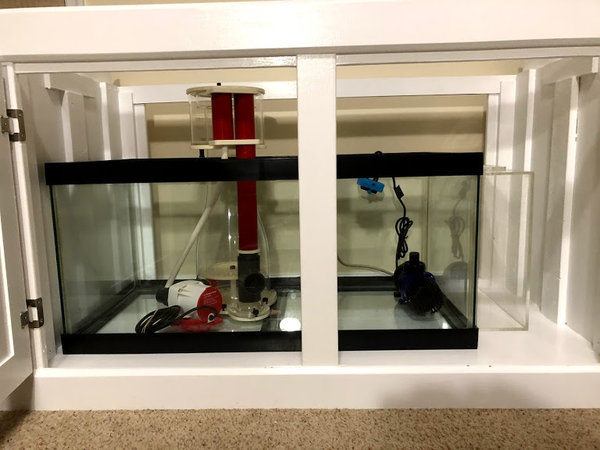
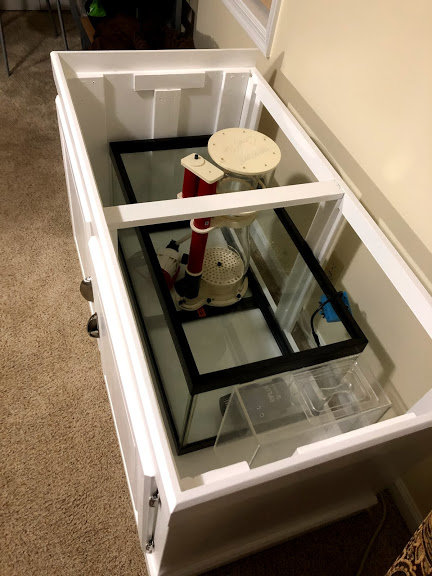
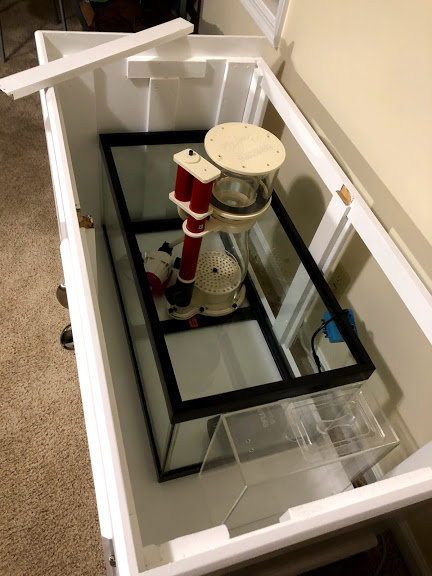
Figured out solution-- Thanks Kyle for the suggestion of notching stand. Sanded and notched out small spot on stand cross bar and can now rotate skimmer into and out of sump. It is as tight as can be but it will work. And now the work can continue.... -
So I can get cup off and out. I can easily get the pump out. What about cleaning? I used to take out the old one to clean the neck of the it and use vinegar water as needed. Does the body/bubble plate ever go bad/need to be changed? What is the likelihood of ever needing to change it out. It is a solid/well made beast of acrylic/plastic. It seems incredibly durable. I just don't want to start putting my tank together until I have this figured out. epleeds-- how long have you you run the tank above that you mentioned? Thanks.
-
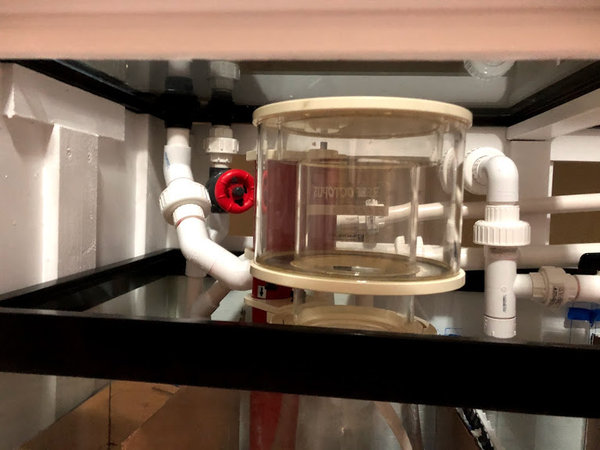
See my tank build for further details-- this is sort of duplicate post-- need some suggestions on what to do next. 120 gallon tank/40 gallon breeder sump. Looking at mixed reef-- medium stocking. Got used skimmer-- Reef Octopus Elite 200-INT 8" Super Cone Skimmer. Footprint - 15" x 11.2"/Height - 23.2". Recommended Water Height: 7.5" - 9". Built sump around it. This should be an awesome skimmer for this tank. Super psyched about it. Here is the specs and info from BRS for more details if needed. https://www.bulkreefsupply.com/elite-200-int-8-super-cone-protein-skimmer-reef-octopus.html?msclkid=bb11f463a06118b02454a995289db3e2&utm_source=bing&utm_medium=cpc&utm_campaign=Shopping>Octopus>Brand (MAP)&utm_term=4577335627125042&utm_content=Octopus After posting some pics-- a fellow reefer asked- can you get the skimmer body out of the sump/stand? Found out today that NO-I CAN'T!!!! Even taking the skimmer apart-- it is 9.75 inch of casted plastic at its narrowest. IMG_8016 by Greg Lorenz, on Flickr IMG_8017 by Greg Lorenz, on Flickr So I just took tank off stand and removed skimmer from stand/sump. Any suggestions. I don't want to have a skimmer in the sump I can't replace if a part breaks or if I need to do full cleaning. I am not dismantling a tank because I oversized the skimmer. The only thought I have is to go smaller-- make sure it is 8 inch total diameter before installing? Any suggestions on skimmers that would fit the bill? Please help. Thank you. Greg
-
Greg's 120 Gallon Mixed Reef
VA Reefdog replied to VA Reefdog's topic in Dedicated Tank (Build) Forum
YHSublime- your tank is beautiful. I am hoping to get my tank to look so nice. Now this will make you feel better. Planned on equipment listed above-- got used skimmer-- Reef Octopus Elite 200-INT 8" Super Cone Skimmer. Footprint - 15" x 11.2"/Height - 23.2". Recommended Water Height: 7.5" - 9". Built sump around it. After posting some pics-- had some one ask- can you get the skimmer body out of the sump/stand? Found out today that NO-I CAN'T!!!! Even taking the skimmer apart-- it is 9.75 inch of casted plastic at its narrowest. IMG_8016 by Greg Lorenz, on Flickr IMG_8017 by Greg Lorenz, on Flickr So I just took tank off stand and removed skimmer from stand/sump. Any suggestions. I don't want to have a skimmer in the sump I can't replace if a part breaks or if I need to do full cleaning. I am not dismantling a tank because I oversized the skimmer. The only thought I have is to go smaller-- make sure it is 8 inch total diameter before installing? Any suggestions on skimmers that would fit the bill? Please help. 120 gallon tank/40 gallon breeder sump and limited opening to get skimmer in and out. Looking at mixed reef-- medium stocking. Thank you. Greg -
Greg's 120 Gallon Mixed Reef
VA Reefdog replied to VA Reefdog's topic in Dedicated Tank (Build) Forum
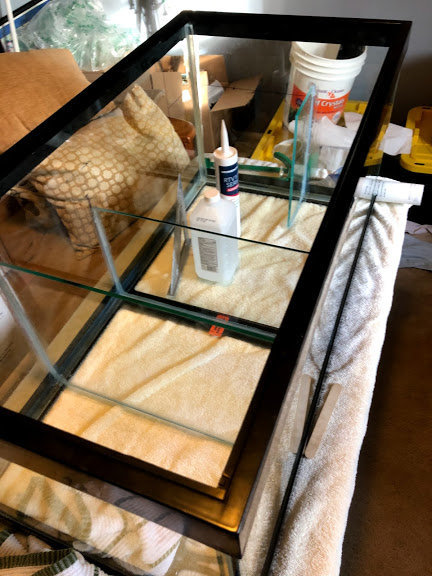
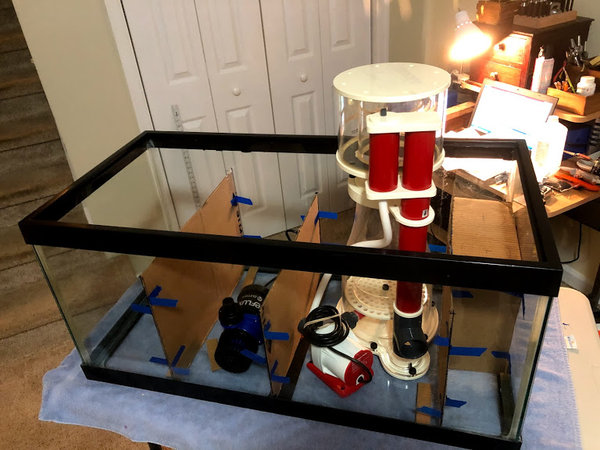
Sump construction finally done. First assembled with baffles and home-made bubble/chaeto trap at the top (egg-crate with plastic screen attached). Filter cups in place. IMG_7984 by Greg Lorenz, on Flickr IMG_7983 by Greg Lorenz, on Flickr Then leak test and check flow. IMG_7985 by Greg Lorenz, on Flickr Then remembered that I wanted to do something to prevent algae growth in rest of the sump. I got a piece of black acrylic sheet and adhered to baffle between the refugium and return chamber. IMG_7990 by Greg Lorenz, on Flickr And finally done with sump. So now to put it back under the tank and finalize the plumbing. -
Seth's Next Reefkeeping Chapter
VA Reefdog replied to sethsolomon's topic in Dedicated Tank (Build) Forum
That stocking list should be a very impressive tank. Can't wait to see how all those wrasses look together. Always wanted most of those wrasses- should be beautiful. -
Greg's 120 Gallon Mixed Reef
VA Reefdog replied to VA Reefdog's topic in Dedicated Tank (Build) Forum
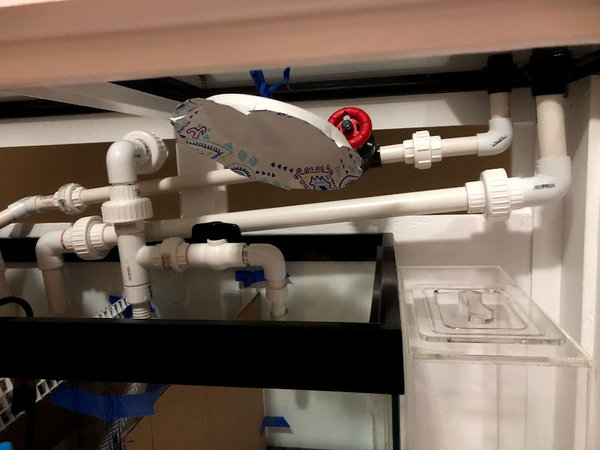
That is part of the plan-- the pics so far are just plumbing pushed into the bulkheads. I have PVC strap supports for both the long ones on the right and the return/overflow for once everything is in its final position and cemented in place. -
Greg's 120 Gallon Mixed Reef
VA Reefdog replied to VA Reefdog's topic in Dedicated Tank (Build) Forum
sethsolomon-- thanks alot. The hood was revised a few times mid-project but should work well. The fine details didn't come out as well as I planned but I am hoping people will focus on the tank and fish/corals and not the trim work. I need to hang the lights and make sure I have good coverage and ability to access/clean the tank without taking things apart/moving anything. Oh well-- more work to do. QT news- all fish are eating in QT. Now have copper level up to therapeutic level (brought it up slowly over 3 days). Still working on the sump. Pics will follow once it is further along. -
Greg's 120 Gallon Mixed Reef
VA Reefdog replied to VA Reefdog's topic in Dedicated Tank (Build) Forum
That is all I got for now. I am super excited to be making progress finally. I am happy as a little kid to just have fish in the house again. I still have lots to do but at least I can see progress. I can't wait until it is ready for some coral. At least the rock is completely cycled and just waiting on me to finish putting the sump and plumbing together/and then aquascaping. Thanks for looking. I look forward to meeting you all at a future meet. Hopefully more to come as I keep the build moving forward. Greg -
Greg's 120 Gallon Mixed Reef
VA Reefdog replied to VA Reefdog's topic in Dedicated Tank (Build) Forum
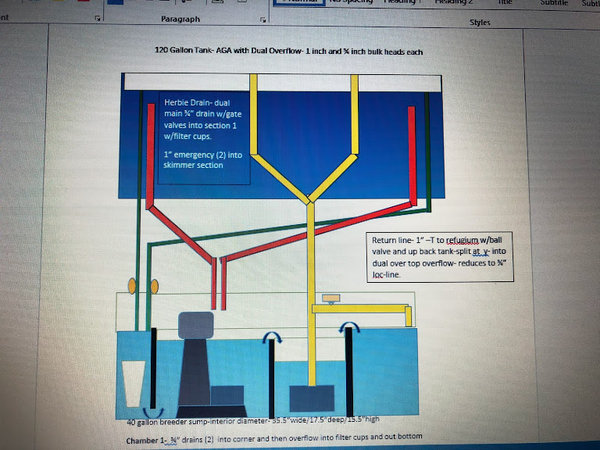
And currently DYI sump. Had glass cut at local shop. Putting it together now. IMG_7974 by Greg Lorenz, on Flickr IMG_7975 by Greg Lorenz, on Flickr Currently a work in progress. Here are the plans that I used for the plumbing/sump. 120 Gallon Tank- AGA with Dual Overflow- 1 inch and ¾ inch bulk heads each IMG_7978 by Greg Lorenz, on Flickr 40 gallon breeder sump-interior diameter- 35.5”wide/17.5”deep/15.5”high Chamber 1- ¾” drains (2) into corner and then overflow into filter cups and out bottom Chamber 1 size- baffle 12” high & 5”wide/17.5”deep- volume=4.5 gallon 2” gap under bottom of baffle for flow under Chamber 2- Skimmer- Reef Octopus Elite 200int- 9”high baffle & 12.5”w/17.5” Skimmer footprint- 15X12, Volume chamber= 8.5 gallon Chamber 3- Return pump- Current USA 6010 DC pump- 9 “ left baffle/12”right baffle Chamber- 8.75” wide and 17.5”deep- Chamber volume= 6 gallon Chamber 4- Refugium- T with ball valve on return-12”H/8.75”W/17.5”deep- Chamber volume= 8 gallon Sump additional Notes ATO – AutomaticTopoff.com- dual sensor in Chamber 3 above Excess for power failure—approx. 13-14 gallons. Cover 2 overflow boxes and return lines siphon hole just below water surface. -
Greg's 120 Gallon Mixed Reef
VA Reefdog replied to VA Reefdog's topic in Dedicated Tank (Build) Forum
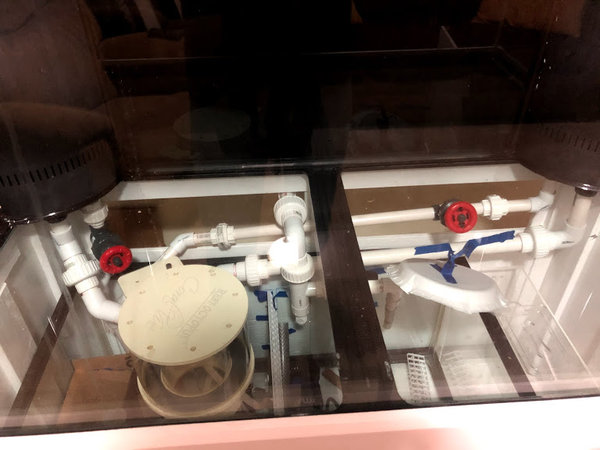
Plumbing is done except cementing PVC to bulkheads. Here is the view through bottom of the tank. The paper plate is the mockup for the fuge light. IMG_7969 by Greg Lorenz, on Flickr The right side of the stand- includes the right drains and the return line (runs over the top of back of tank). IMG_7970 by Greg Lorenz, on Flickr The left side of the stand. IMG_7972 by Greg Lorenz, on Flickr And return over back of tank. IMG_7973 by Greg Lorenz, on Flickr IMG_7968 by Greg Lorenz, on Flickr -
Greg's 120 Gallon Mixed Reef
VA Reefdog replied to VA Reefdog's topic in Dedicated Tank (Build) Forum
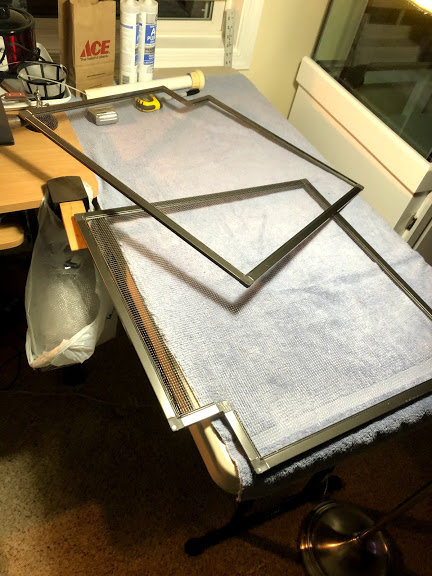
Screen tops are built. IMG_7938 by Greg Lorenz, on Flickr I can barely fit everything in the sump. IMG_7947 by Greg Lorenz, on Flickr In order to get sump into the stand-- I have to remove the center brace- and re-attach before putting the tank back up. IMG_7765 by Greg Lorenz, on Flickr IMG_7764 by Greg Lorenz, on Flickr -
Greg's 120 Gallon Mixed Reef
VA Reefdog replied to VA Reefdog's topic in Dedicated Tank (Build) Forum
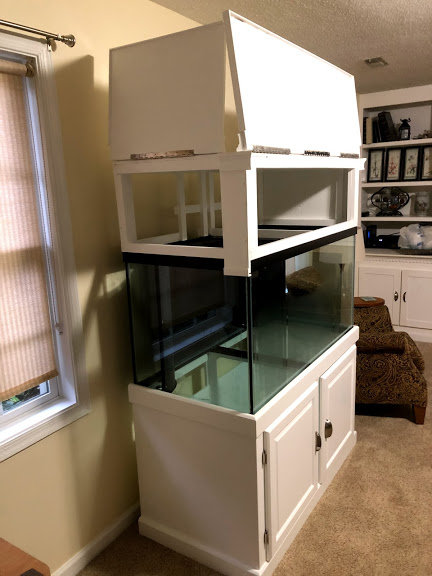
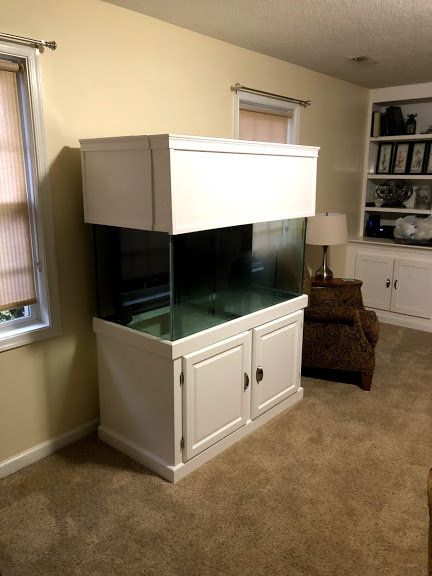
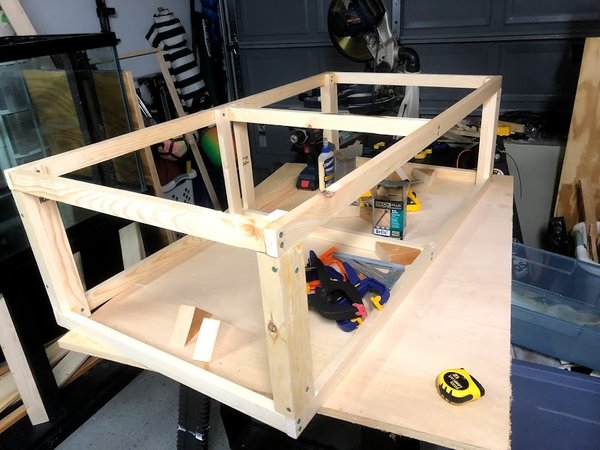
I built the canopy. It was the first time I tried anything like this. I made it so that i could get to the tank from all 3 sides. Came out functional and looks ok. IMG_7294 by Greg Lorenz, on Flickr IMG_7930 by Greg Lorenz, on Flickr -
Greg's 120 Gallon Mixed Reef
VA Reefdog replied to VA Reefdog's topic in Dedicated Tank (Build) Forum
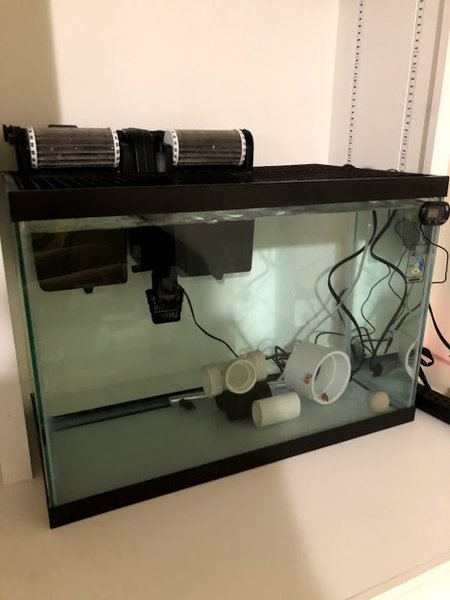
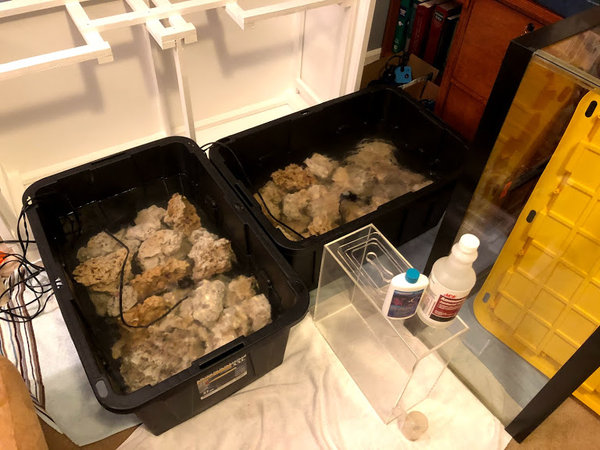
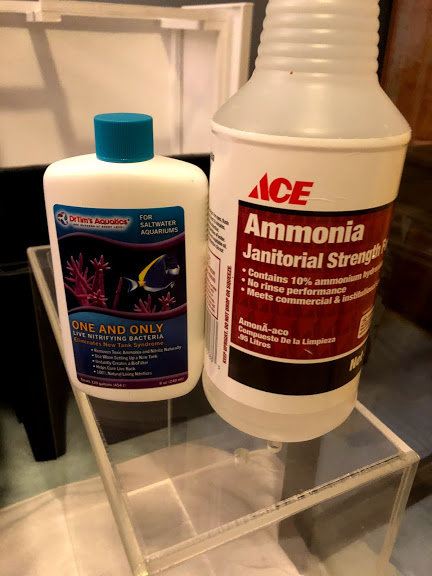
Given work/family and all sorts of other projects- this has been going slow over the last 7 months. I will get more details out (with more pictures). I have been away from this hobby for far too long. So I started my reef journey with 29 gallon biocube in 2013 and 75 gallon reef-ready tank in 2014. I took a break from the hobby for a couple of years and now am excited to be diving back in. To start- I am using all dry rock. Over last few months- I rinsed and soaked in bleach for several days then soaked in DI water and with seachem prime. I cycled the rock in rubbermaid tubs and Dr. Tim’s additives along with concentrate ammonia. I am finishing plumbing now. The sump is 40 gallon breeder that I had custom glass baffles cut. I still have to finish lights- but that can happen slowly over the next month while I wait out the first fish to get out of quarantine. For QT- just using a 20 gallon with hang-on back Marineland Emperor Bio-wheel filter, an air stone, heater, PVC fittings, and ammonia badge and egg-crate lid. The first fish are in QT- tiny pair of ocellaris clowns, and two small gobies (yellow-watchman and orange spotted). IMG_7961 by Greg Lorenz, on Flickr IMG_7977 by Greg Lorenz, on Flickr -
Greg's 120 Gallon Mixed Reef
VA Reefdog replied to VA Reefdog's topic in Dedicated Tank (Build) Forum
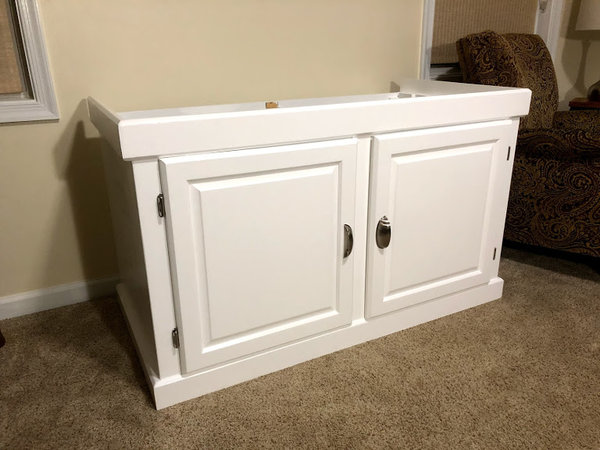
Lets see if I can post some pictures Here is the tank and stand after picked up. IMG_7017 by Greg Lorenz, on Flickr IMG_7021 by Greg Lorenz, on Flickr To how the tank and stand look currently in the family room. IMG_7926 by Greg Lorenz, on Flickr More to come. Greg -
TANK: 120 Gallon Reef-Ready AGA Tank (with dual corner overflow drilled with ¾ “ and 1” drains). Purchased tank and stand from Craigslist. Reinforced the stand, repainted and new hardware. Canopy—DYI-built with doors to front and sides for access of tank. Approx. 14” high for lighting. I am definitely not a carpenter so I am just happy it is functional. Sump—40 gallon breeder. Diagram will follow—DYI into 4 chamber with built-in dual filter cup chamber/skimmer chamber, return and refugium. EQUIPMENT: Lights— Reefbreeders Superlux LEDs X 2. Each is 165 watt full-spectrum programmable lights. These are left over from my prior 75 gallon tank. LET- T5- HO retrofit—2 bulb 36" Kit from BRS – adding 2 bulb in front and 2 bulb in back of LEDS Refugium light- Roledro LED UFO Grow Light, 300W Timer/controller--- Kasa Smart WiFi Power Strip - 6 Outlet Surge Protection for all lights Skimmer— Reef Octopus Elite 200-INT 8" Super Cone Skimmer. This thing is a beast and I can barely get the skimmer cup off and out the opposite door of the stand given how cramped everything is. Return pump- Current USA 6010 DC pump. Flow Rate- 380 – 1,900 gph. Max head Pressure- 14.75 ft. and 1” return line. ATO- Dual sensor from autotopoff.com- with Tom’s Aqualifter from 5 gallon Crystal ATO reservoir. Heater/controllers- Ranco Temperature controller- ETC for (2) 300 watt Finnexx heaters In-tank circulation- (2) Jebao OW-40 Wave Maker (317-3962 GPH) I am going to try to upload and more details in following posts with the build so far. Glad to be back into reef-keeping. I have been away for too long and glad to be part of WAMAS. Thanks for looking. Greg

.jpg.cec6c540fb2da6431942d5ff09ef7a2d.jpg)
