Jeff721
-
Posts
59 -
Joined
-
Last visited
Jeff721's Achievements
Hatchling (3/13)
-
It's almost the diameter of a dime right now. I don't have any sps, but do have lps and softies. Should I be concerned? Any benefits? Thanks!
-
I love the rock-work in this setup. Way to go. Tank is too beautiful for all of that ugly equipment though lol.
-
Wow, what a nice tank. I am always happy to see the big tanks that don't look barren. Yours is stuffed - I love it.
-
Looking good. I love the lighting in the tank.
-
Thanks Jenn, and thanks for the reassurance. Wish they noted these types of tips in the books.
-
Overdue for a few new shots. Picked up a few frags from Reef eScape at the open house/meet and greet. My Macroalgae has gone nuts, it was twice this size before I cut it in half to share: Love this shot, happy frogspawn: The zoas and mushroom on the left are from Reef eScape, also, my GSP is finally expanding and taking over as it should: Full tank shot from the chair: My typical point of view: What it looks like when I am feeding everyone: The tank really seems to be established now. I am getting spots of coraline algae. Everything else seems really happy too. All of the inverts are thriving. I don't know how, but I lose track of my turbo snail often, it pops back up every week or so, but the thing is the size of a golf ball, turbo is a contender for hide-and-seek champion of my tank – between turbo snail, bristleworms, and tiny starfish. I will add, my corals all seem to like it when I don't change the water every week. I get more extension from them and more growth if I go two weeks between water changes. I am scared to go any longer so won't be doing that. I do remember someone telling me that softies and lps actually like not-so-pristine water.
-
Hi Reefoholic, thanks! A lot of the rock on the bottom is very "branchy" my blenny and shrimp have a field day moving in and out under there. I don't know if you can see it in the pics, but in the middle of the structure there is an arch at the very bottom as well. I would like to make a arch at the top somehow to bring the height up a litte, but haven't thought it through enough, nor found the right pieces of rock. Here are some updated shots though. I picked up a few frags at Petland, man, htere coral selection and prices were better than I expected. New acan up front and muchroom in the back. New paly New mushroom Clownfish photobomb:
-
Sorted out my filtration a little. I am now running live rock rubble in one of the stages of the InTank media basket instead of bioballs (replaced about half). Also picked up poly filter and phosban which are also running in the media basket. I will eventually replace all of the bioballs but wanted to do it slowly to not disrupt the balance. Got a new blue bulb to replace my actinic. Then ended up keeping the actinic too and replacing a 50/50 with it. So now my lights are: 10k, Blue (not sure of kelvin rating), Actinic, all 24 watt PC bulbs. The blue really makes the corals pop. I also managed to get a shot of the blenny that I have, who is less shy now with the clowns in the tank. And last but not least got a miraculous shot of one of the clownfish:
-
Thanks folks. I would like to add some taller/branchier things to the top of the rocks, any suggestions? I also added an ATO and DJ powerstrip (as recommended) last week. Both were a big help. Here is my write-up of the auto top off.
-
So this was a definite need for me after my first week or so and watching my salinty make minor swings because of evaporation and heavy handed top-offs. ROUND 1: I went over to a website dealing specifically with the matter and ordered their nano topoff switch. via autotopoff.com all rights reserved When it arrived I wasn't really sure about the whole thing. The biocube 14's "built in water level" was a little low for the switch. I had to mount it on the last hole possible and ended up adding an extra zip-tie to secure it. I cut a small channel out of the hood (you can see it later in pics) and slid it down into the built in sump on the tank. After, I tried to cook up a delivery system using a powerhead that I had lieing around and a few plumbing parts from the hardware store. i spent about $7-$8 on plumbing parts. I was worried that the recommended Aqualifter pump might not be able to handle the head pressure to pump high enough (they say 40"). A couple of problems arose. 1. I didn't want to put that big of a hole in the hood of the 'cube. 2. There wasn't anywhere to put a hole that big. 3. This was going to deliver too much water, too quickly to the system; presumably. 4. I didn't want to pump to turn on a heartbeats-at-a-time because that might lead to early wear. The other thing was that I did a terrible job on the hole on the lid of bucket that I was using. VERDICT: This solution works, but it wasn't the best for my system. Better to do on a large system with a sump. The parts are available if anyone wants them, we can make a trade for frags or something. ROUND 2: As I was messing about with the kit-bashed system I went ahead and ordered the Aqualifter pump online. I also picked up some black airline tubing. Much cleaner install: I was concerned about the hose not staying at the bottom of the bucket so I added some weight via a sterilized rock and a zip-tie. I drilled a much smaller hole in the hood and slid the tubing in through the back, it tucks nicely into the filtration rack without contacting water. For those beginners ( I had to give it some thought) this is how you prevent back-siphoning, keep some air between the tube and the water. You can also see the channel that I cut for the sensor hanger in this photo. Of other concern, I added a smaller drilled hole to the bucket lid to prevent a vaccum from being created which would add stress to the pump. VERDICT: Man this thing is quiet. Never hear it run. Works great, aqualifter pump produced a steady stream of droplets. Glad that I underwent this project sooner rather than later. I know consistency is majorly contributing factor to success in aquariums. I added a "DJ powerstrip" at the same time which allows me to easily turn off the auto top off system when I am doing a water change or acclimating livestock. Otherwise the system would kick on and disrupt the salinty balance. I wanted to keep the project affordable I spent a little over $60 on this project as a whole. $39 - Auto Topoff sensor/switch $16 - Aqualifter pump $4 - Airline tubing $5 - Bucket and lid $? - misc. - zipties, etc. ______________________ $64 Total
-
All th coral frags are on the sand right now, but I am trying to see which if any need to be moved closer to the lights. I think my frogspawn might need a better spot in the 'sun'. I have been feeding the Acan occasionally. Any identification and advice on corals is appreciated. Especially advice on taking them off of the frag discs.
-
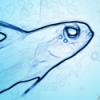
Updates: Right now for livestock I have: 2 Zoanthid frags 1 Acan frag 1 Frogspawn 1 GSP colony/frag 1 unidentified frag - if anyone can ID please do, it's the green one behind the zoas. 2 Occelaris Clowns - they were getting along in the shops tank and had been for a while. Seem to like each other right now. 1 Bicolor Blenny - hard to get picks of it, sorry, pretty and interesting fish though. Most of these shots were taken before I added the Clowns yesterday evening. Followed Hilary's advice on the macro
-
The colors really are just absolutely stunning.
-
I like it. Is it replacing the hex tank next to it in the first photo? If so, I totally approve of the decision, much more slick looking.
-
Happy to help. I'm not that far away in MD either.