


msl5078
-
Posts
61 -
Joined
-
Last visited
Content Type
Profiles
Forums
Gallery
Events
Store
Posts posted by msl5078
-
-
Update:
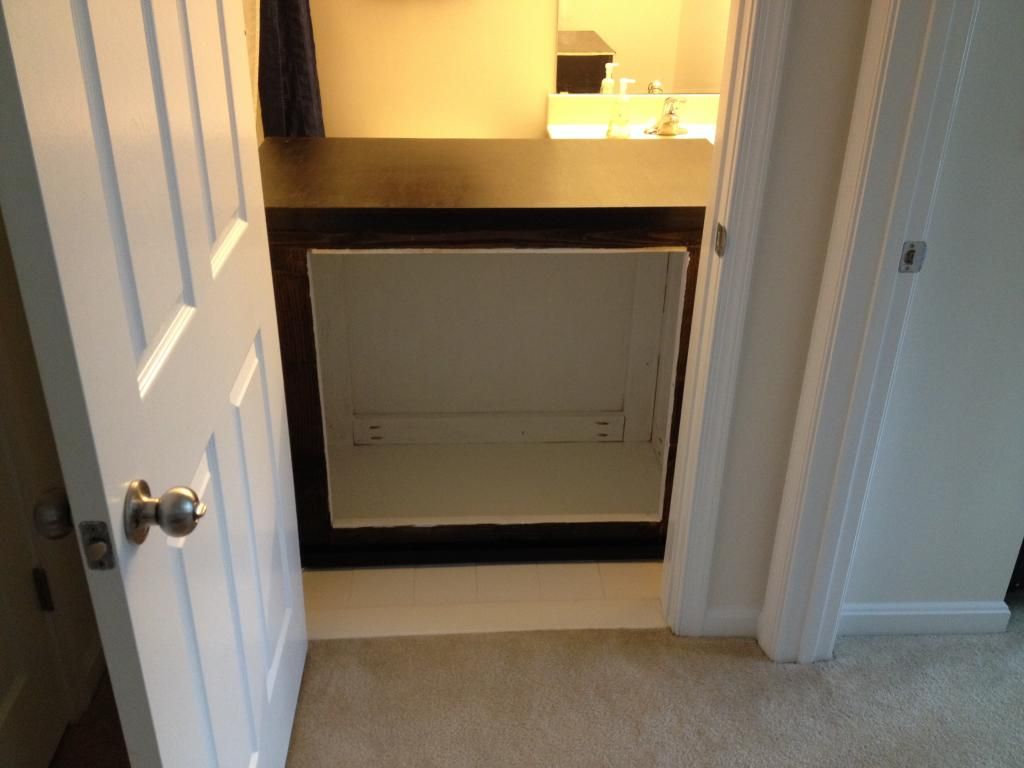
So I finally got around to starting to paint the inside of my stand. The inside of the stand is going to be painted with 2 coats of primer and 2 coat of flat black paint. Unfortunately, I only had some Rustoleum oil based enamel paint laying around from another project, and decided to use that instead of going out and buying new paint. I ended up having to put the stand into our second bathroom, and using the fan to help with the fumes. The girlfriend was ready to kill me when I had the door open while I was painting. Here is a picture of the stand with just the primer. The next step in the build is to order some PVC sheets, and build a dip tray inside the stand. I also may look into using acrylic for this, but I think it would be more expensive than some 1/16" PVC sheets.
-
I just finished up building the stand a week ago, I decided to take a break. That was until I got hit by the coral bug again, so I'm hoping the tank will be up and running by the end of January. I posted a thread under the build forum, check it out I'm always looking for advice I don't think its possible to learn enough in this hobby!
-Mike
-
I know I could get custom cut acrylic online, but I rather use a local supplier. I will have to stop by ArtFully Acrylic and see what they can do for me. I would have to keep to a 5 gallon footprint, but could make the ATO pretty high. Thanks for the idea/input!
-
So I think you are going to regret just a 5g ATO. you are going to be refilling that every couple days.
I think you may be right, When I was running my 120 gallon I would get about 3 days out of 5 gallons. I could go with a larger ATO container, but I would have to make an acrylic one to fit in the same space. I will have to look into that.
-
After not having a tank up and running since last May, I finally built the new stand for my 65 gallon tank. This will be my second attempt at a mixed reef tank. My first tank was an Aqueon 120 gallon RR tank that I had purchased used locally when I was living in Connecticut. The 120 gallon tank wasn't a failure, but it wasn't a huge success either. I learned quite a few hard lessons from that tank, all of which have been incorporated into my new build. The goal of this tank is to have it automated as much as possible (I travel quite frequently for work) and to have enough room under the stand to work and perform maintenance tasks easily.
For the stand I wanted to make an over-sized stand to fit all the equipment, ATO Tank, QT tank underneath the tank. I used a program to do a layout of the equipment and sump, and used that to determine the size of the stand I would need. Much of the equipment I have supported my 120 gallon tank, which is over-sized for my new 65 gallon build but I did not see any need to spend more money on getting new equipment. Major Equipment for this tank is:
- AquaMaxx CO-1 Cone Protein Skimmer
- Sump
- BRS Carbon / GFO Reactors
- BRS CO2 reactor for Protein Skimmer Intake
- Coralife 36-Watt Twist UV Sterilizer with dedicated Siccie feed pump
- Koralin Nitrate Reactor
- TLF Phosban 150 for ARM Media for Nitrate Reactor
- Calcium/Alkalinity/Magnesium Dosing pumps and Containers
- Dosing Pump for Nitrate Reactor Feed water
- 5 Gallon ATO Tank with Tunze Osmolator
- 5 Gallon QT Tank
- Apex Controller with PH, ORP (used for Nitrate Reactor), 2xEB8, and WXM module.
- DC Return Pump
- 2 x Ecotech Radion Gen 3 Pumps
- 2 x Ecotech MP40 Powerheads
- Tunze Nano-Wavebox (not sure if I want to use this yet)
- Koralin Powerheads (not sure if I will use these, used them to help with dead spots in my 120)
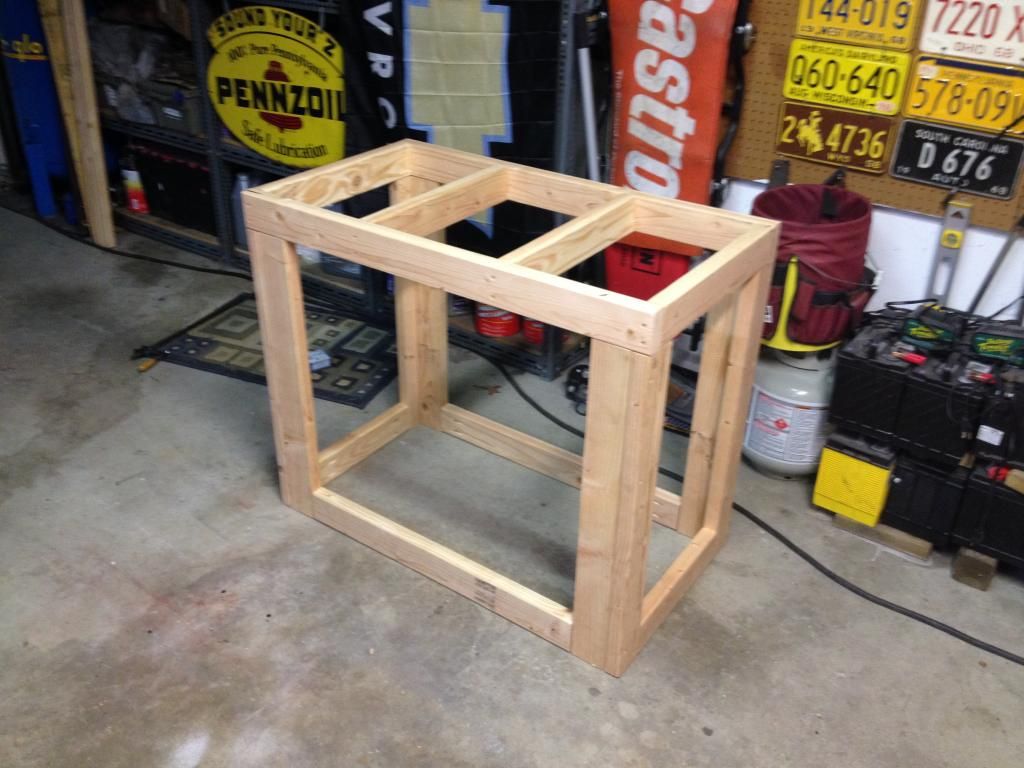
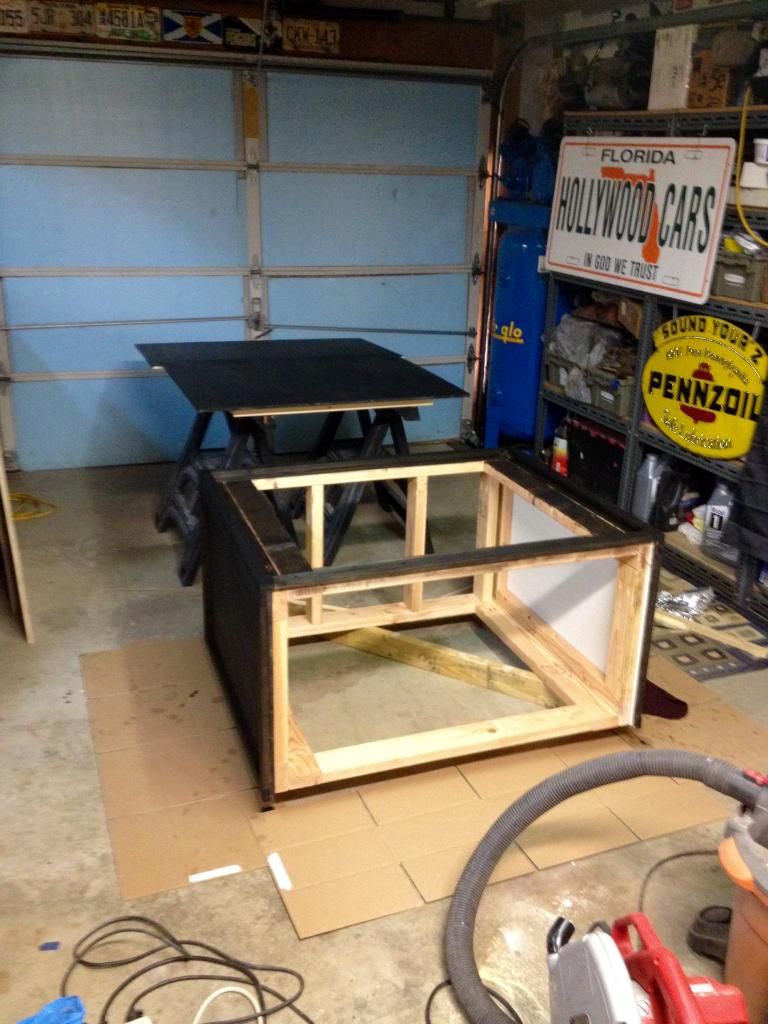
The stand was built while I was back visiting my parents in Pittsburgh. The stand itself is very easily broken down, and can easily fit in the back of my car. The stand dimensions came out to be roughly 44" (w) x 23" (D) x 36" (H). The stand construction was a 2"x4" frame skinned with 1/2" plywood and 1"x2" Trim. The stand was then stained with an ebony wood finish and flat black for the areas that will not be seen. Here are some pictures of the stand construction.
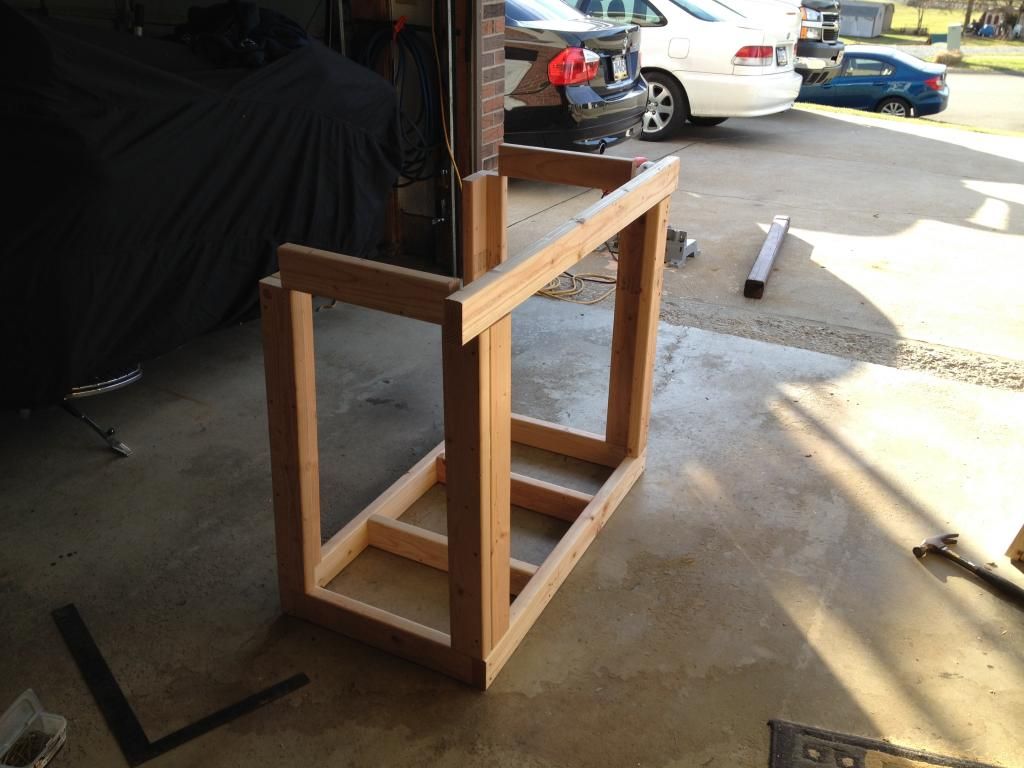
The bottom of the stand is held together using a mostly pocket screws, I purchased a pocket screw jig just for this build and I was very happy with the results.
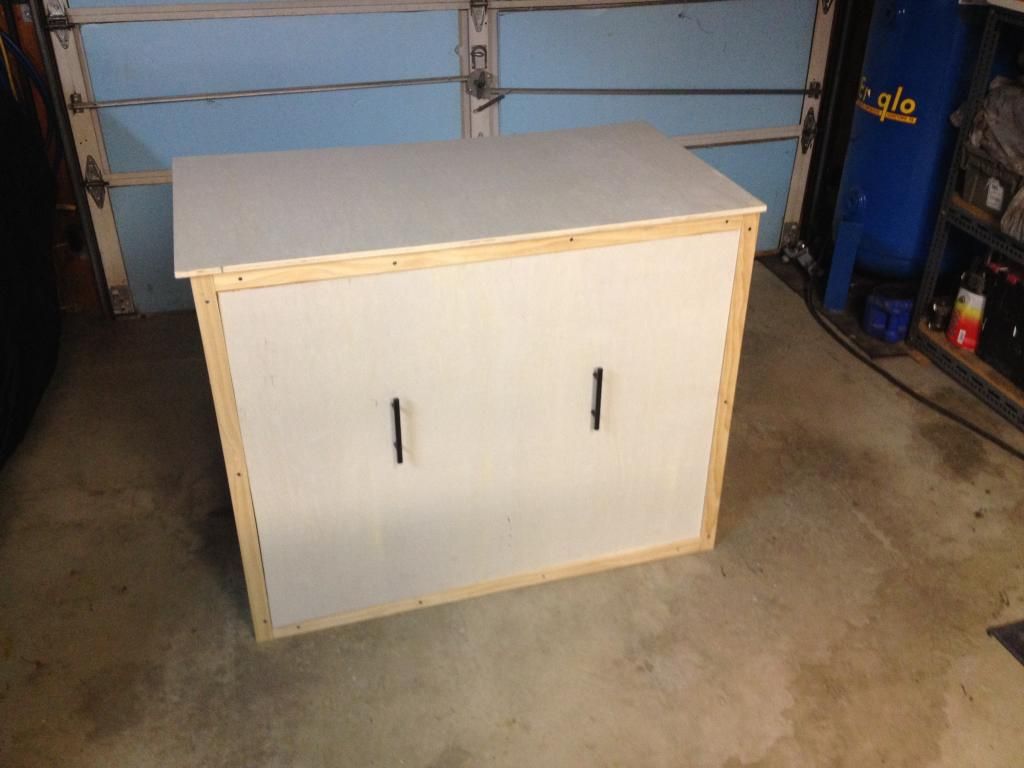
The stand was then wrapped in 1/2" plywood with 1"x2" Trim used around the edges. There is one large door on the front of the stand, with wood bracing behind it to help with any bow that may occur over time.
The stand was stained using an ebony stain. The stain was left on the wood for about 20 minutes to get a very dark color, I was trying to match our living room furniture.
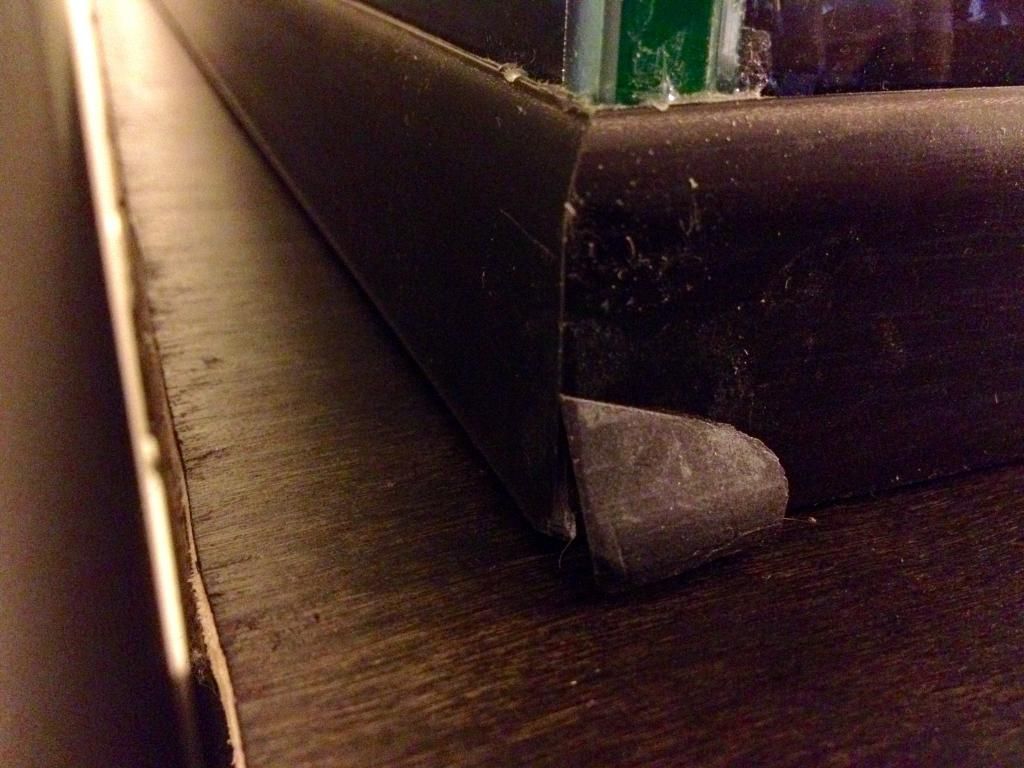
When I took the brand new tank out of the box, I found that the plastic frame was chipped. Needless to say I was a little irritated, the chip does not go all the way through the frame. I contacted DSA and was told the frame on this tank is only cosmetic and that I could just super glue the chip back into the frame.
Before:
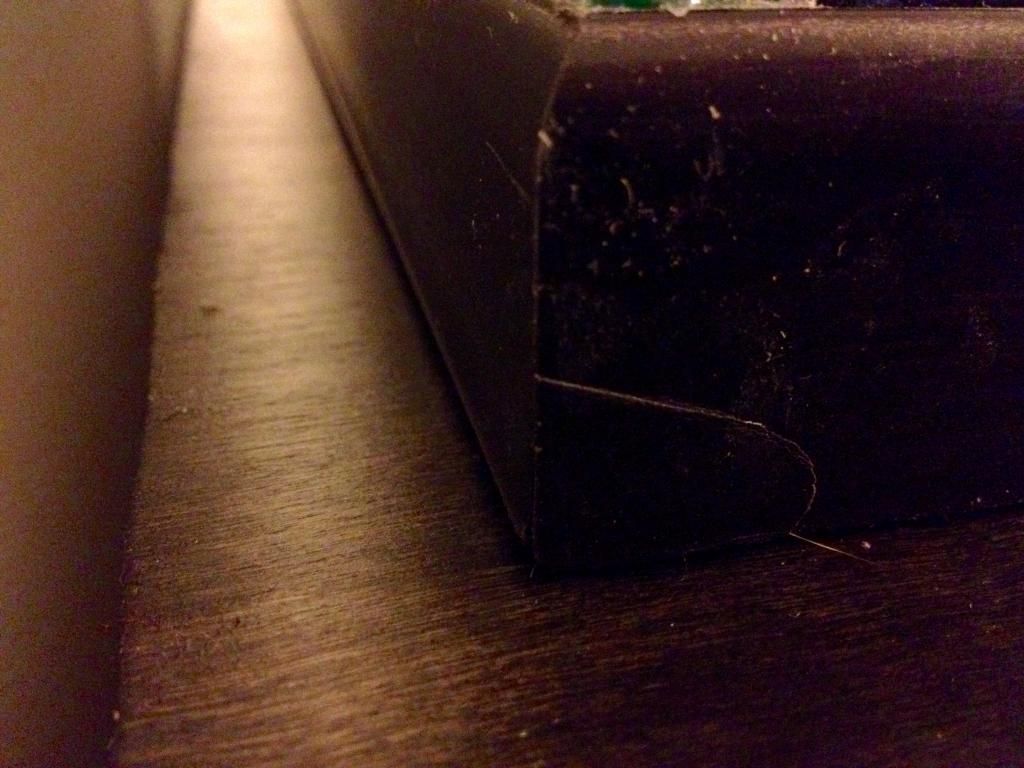
After (what looks like a larger crack was just a cat hair that got stuck to the glue, darn cats!):
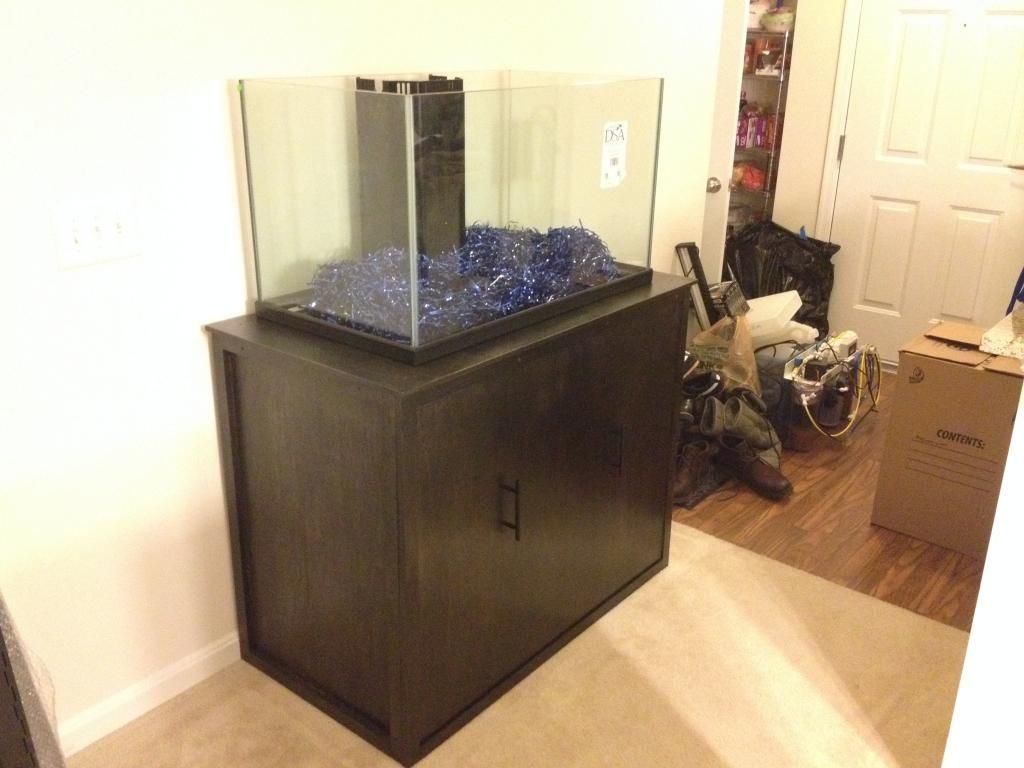
Here is the finished stand with the tank on top! My girlfriend added some Christmas wrapping leftovers inside the tank to make it more festive I guess.
-
I used API for years, but they are notorious inaccurate with what the kit provides. When I use the API kits with syringes, I get fairly consistent results. I heavily recommend using Prime or some other ammonia binding agent for a QT tank. When I had my 120 up and running I would run QT with a seeded cheap sponge I kept in my sump and prime to help with ammonia for when I couldn't keep up with the frequent water changes.
-
That Pet Place in Pa. Not that far to drive on a nice weekend. I own a DSA 105 Elite. You may want to consider getting one over the 57 gallon.
I would love to have a 105, I have a 120 right now actually, but my landlord will only let me have a 60 gallon in my apartment...... darn landlords!
-
Hi everyone,
After looking at every different reef tank manufacture, I think I have decided to go with a DSA 57 Rimless for my apartment. Does anyone know where I can find this tank at a LFS for a good price near Manassas? I don't know very many of the stores in the DC area, I've only been living here for 5 months!
Thanks,
Mike -
I was wondering if anyone knew of any places that would drill and install an overflow in a new 40g long tank. I watched some videos on youtube, but I just don't feel confident enought to drill two holes in a brand new tank to install a ghost like overflow (that one that is on ebay).
Thanks,
Mike -
I was looking for something with a suggested max capacity around 100 gallons.
-
Love avast stuff, but the CS-1 would be too big for the tank I was thinking about getting I think. I'm afraid with something that big I won't get the proper foam head development on the skimmer causing it to underperform compared to a small skimmer with a slightly smaller neck and body.
-
Hi everyone, I've been absent from here for awhile and I'm starting to get the coral itch again and want to get my tank up and running. So long story short I have a 120 gallon tank that I need to get rid of and downsize to a 40 gallon tank (most my landlord will allow). So I'm looking at getting a 40 gallon long (48"x12"x16") and then drilling it for overflows and making a mini version of my plans for my 120. I'm having trouble picking a skimmer... here is what I've come up with so far:
Seaside Aquatics CS5.5
Seaside Aquatics ES5
ESHOPPS S120
Aquamaxx CO-1
My budget for this is going to be about $300 probably, just need to sell that equipment that I cannot use on the 120... darn landlord. For this tank I plan to slightly overstock with small community fish and make my emphasis more on coral and the challenge of doing SPS... woohoo!
-Mike
-
So I just moved into my new apartment in Manassas and want to start my 120 upgrade build soon. I am looking for someone to build me doors for my metal stand. I am not looking for anything super fancy I was planning on doing something simple. I was planning on having the doors attached with magnets so they can just pull off the metal stand.
Does anyone know where I can find someone to make these for me? I don't have the space or tools anymore to build them myself unfortunatly.
-Mike
-
Here is the article were I found out about using lye. I hope I can post this...
http://www.reefscapes.net/articles/breefcase/aiptasia_control.html
In the article, the author talked about 1N, 2N, and 3N aqueous sodium hydroxide (lye) solutions. I figured that met 1M, 2M, and 3M concentrations in my rodi water. You are correct that it puts off heck of a exothermic reaction when you are mixing it. The lye is fully dissolved in solution, not until it comes into contact with tank water does it turn a opaque white glob kinda thing. I've had great luck with this stuff, because I can blow it into small crevices in the rock to get to those pesky asptasia.
-
I was using lye, I gave up on using kalk it wasn't working well enough for more. I would use a syringe and apply the solution near the mouth of the pest anemone. It makes almost like a slurry that you want to sit on what your trying to get rid of. Some of it dissolves into the water, but the slurry like stuff will sit on a horizontal rock until you remove it. Works great, took me about 4 weeks of treatments to get rid of all my asptasia.
-
I use a 1M mixture of sodium hydroxide (lye) and distilled water, just make sure you turn off all your flow and then let the stuff sit for about 20-30 minutes after you apply it. Search sodium hydroxide mojano and you will find a how to. Make sure to wear gloves!
Mike
-
I was wondering what the best option for RODI water storage is in an apartment. Where I currently live I have a big pantry that fits a 32 gallon brute container, but my new place that I am moving to in June doesn't have a pantry at all. I've already been told that a 32 gallon brute in the middle of the apartment is a no go lol, so I need to get creative.
-Mike
-
I've already given up on trying to drive lol, when we were apartment shopping we hit 95 during rush hour on a Friday and it was insane. So it's going to be VRE for me, our apartment is 2 blocks from the station.
-
-
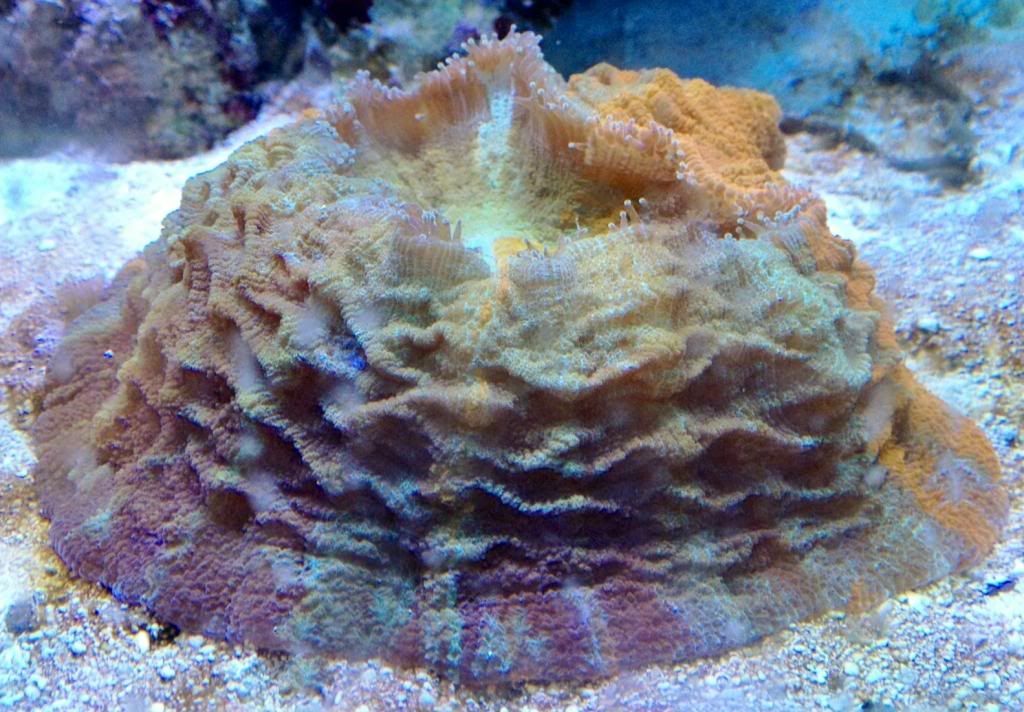
Good thing I took some pictures! I'll have to upload my pictures of the whole tank, but here is a picture of my favorite coral that I had to get rid of for the move.
My Acanthophyllia deshayesiana, or donut coral (about 5" diameter when I sold it), man I miss it already
How do I post pictures? haha
-
Well we just signed a lease in Manassas! Looks like this move is going to happen!
-
I just accepted a job in crystal city and my girlfriend and I are getting ready to move to the area in little over a month from Southeastern Connecticut (going to be the first time living in the DC area). I have a 120 gallon mixed reef that has been up and running for about a year that I am starting to shutdown for the move. But every ending has a new beginning right?...Time to rebuild!
-Mike
MSL5078 DSA NEO 65 Mixed Reef Build
in Dedicated Tank (Build) Forum
Yea I did a single coat of black already, and will be doing a second coat tonight. My old 120 gallon setup I had, I painted the stand white but I like the look of the black much more.